
Table of Contents
Figures.............................................................................................................................................................................................6
Tables...............................................................................................................................................................................................9
Disclaimers....................................................................................................................................................................................10
Additional Note about Screen Shots...........................................................................................................................................10
What’s New....................................................................................................................................................................................11
1. Introduction.........................................................................................................................................................................12
1.1. About FATCA...............................................................................................................................................12
1.2. Purpose of Guide.........................................................................................................................................12
1.3. Comments....................................................................................................................................................13
1.4. Technical Support .......................................................................................................................................13
2. International Data Exchange Service (IDES)....................................................................................................................13
2.1. About IDES...................................................................................................................................................13
2.2. Before You Begin ........................................................................................................................................14
2.3. Authorized Users.........................................................................................................................................14
2.4. System Availability......................................................................................................................................16
2.5. Data Security................................................................................................................................................17
2.6. File Retention...............................................................................................................................................17
2.7. Requirements...............................................................................................................................................18
2.8. HCTA Username and Password.................................................................................................................18
3. Obtain a Digital Certificate.................................................................................................................................................19
3.1. Purpose of a Digital Certificate ..................................................................................................................19
3.2. IRS Approved Certificate Authorities ........................................................................................................19
3.3. Digital Certificate Format............................................................................................................................19
3.4. Upload a Digital Certificate to IDES ...........................................................................................................20
3.5. Public Key Certificate..................................................................................................................................20
3.6. Certificate Maintenance ..............................................................................................................................20
4. IDES Enrollment .................................................................................................................................................................21
4.1. Overview.......................................................................................................................................................21
4.2. IDES Enrollment Home Page......................................................................................................................21
2
4.3. Enrollment....................................................................................................................................................22
4.4. Knowledge Base..........................................................................................................................................23
4.5. Support.........................................................................................................................................................24
4.6. IRS Public Key .............................................................................................................................................25
4.7. IDES Enrollment User Log In......................................................................................................................26
5. HCTA Administrators......................................................................................................................................................... 26
5.1. Overview.......................................................................................................................................................26
5.2. Begin Enrollment.........................................................................................................................................27
5.3. Create Challenge Questions.......................................................................................................................30
5.4. Create User Profile ......................................................................................................................................31
5.5. Select Alert Preferences .............................................................................................................................32
5.6. Upload Digital Certificate............................................................................................................................33
6. FI Administrators................................................................................................................................................................35
6.1. Overview.......................................................................................................................................................35
6.2. Begin Enrollment.........................................................................................................................................36
6.3. Create Challenge Questions.......................................................................................................................38
6.4. Create User Profile ......................................................................................................................................39
6.5. Select Alert Preferences .............................................................................................................................40
6.6. Upload Digital Certificate............................................................................................................................41
7. Existing Administrators (HCTA and FI)............................................................................................................................ 43
7.1. Add a User....................................................................................................................................................43
7.2. Disable a User..............................................................................................................................................46
7.3. Enable a User...............................................................................................................................................49
7.4. Update the Certificate..................................................................................................................................52
7.5. Update Alert Preferences............................................................................................................................54
7.6. Create a Metadata File.................................................................................................................................57
7.7. Reset Password...........................................................................................................................................60
7.8. Edit User Role ..............................................................................................................................................61
7.9. Download the IRS Public Key.....................................................................................................................63
8. End Users............................................................................................................................................................................ 64
8.1. Create an Account.......................................................................................................................................64
3
8.2. Create Challenge Questions.......................................................................................................................65
8.4. Select Alert Preferences
.............................................................................................................................67
8.5. IDES Enrollment User Log In......................................................................................................................69
8.6. Create a Metadata File.................................................................................................................................72
8.7. Update Alert Preferences............................................................................................................................72
8.8. Reset Password...........................................................................................................................................73
8.9. Forgot Username.........................................................................................................................................74
8.10. Forgot Password .........................................................................................................................................77
9. Data Preparation for FATCA XML Report.........................................................................................................................80
9.1. Overview.......................................................................................................................................................80
9.2. Prepare the FATCA XML File......................................................................................................................80
9.3. Receive an IRS Notification ........................................................................................................................89
10. Access the IDES Gateway .................................................................................................................................................90
10.1. Overview.......................................................................................................................................................90
10.2. Reset Password...........................................................................................................................................91
10.3. Session Timeout..........................................................................................................................................91
10.4. User Interface Overview..............................................................................................................................92
10.5. Preferences..................................................................................................................................................94
11. Transmit a FATCA Report..................................................................................................................................................95
11.1. IDES Transmission Archive........................................................................................................................95
11.2. IDES Transmission ID .................................................................................................................................96
11.3. Retransmissions..........................................................................................................................................96
11.4. Folder Structure...........................................................................................................................................96
11.5. Transmit a File Using Web UI .....................................................................................................................97
11.6. Model 1, Option 2 HCTA............................................................................................................................100
11.7. Transmit a File Using SFTP ......................................................................................................................103
11.8. Connect to IDES SFTP using Windows Secure Copy (WinSCP):..........................................................103
12. Alerts .................................................................................................................................................................................106
12.1. Overview.....................................................................................................................................................106
12.2. Receive Alerts............................................................................................................................................107
13. IDES Reports..................................................................................................................................................................... 108
4
13.1. IDES Sentinel Overview ............................................................................................................................108
13.2. System Timeout.........................................................................................................................................108
13.3 Connect to IDES Sentinel Web Dashboard using web browser............................................................109
13.4 Understanding Web Dashboard interface...............................................................................................110
13.5 Search Transmission and Alert History ..................................................................................................119
13.6 View Search Results..................................................................................................................................119
13.7 IDES Visibility- Transmission Overview..................................................................................................120
13.7.1 List of All Report Alerts ......................................................................................................................120
13.7.2 List of Failed Transmissions..............................................................................................................121
13.7.3 Examples of Transmission Alerts......................................................................................................124
13.7.4 Examples of Transmission Alerts
- Model 1 Option 2......................................................................126
Appendix A: Acronyms............................................................................................................................................................................................................ 130
Appendix B: File Naming Convention ..................................................................................................................................................................................... 131
Appendix C: Certificate Upload Error Messages .................................................................................................................................................................... 132
Appendix D: HCTA FATCA Entity ID Composition................................................................................................................................................................. 133
Appendix E: IDES Alert Codes................................................................................................................................................................................................ 134
Appendix F: Data Preparation User Tips ................................................................................................................................................................................ 139
Appendix G: IDES Gateway UI Accessibility .......................................................................................................................................................................... 144
Appendix H: IDES Communication Types.............................................................................................................................................................................. 151
5
1
2
3
4
5
6
7
8
9
10
11
12
13
14
15
16
17
18
19
20
21
22
23
24
25
26
27
28
29
30
31
32
33
34
35
36
37
38
39
40
41
42
43
44
45
46
47
48
49
50
25
30
35
40
45
50
55
Figures
FIGURE – IDES PROCESS OVERVIEW. .................................................................................................................................14
F
IGURE – FILE RETENTION FLOW. ......................................................................................................................................17
F
IGURE – ACCESS THE IRS PUBLIC KEY................................................................................................................................
F
IGURE – CREATE IDES CHALLENGE QUESTIONS.................................................................................................................
F
IGURE – ENROLLMENT CONFIRMED................................................................................................................................
F
IGURE – SELECT IDES ALERT PREFERENCES......................................................................................................................
F
IGURE – SEND AN ENROLLMENT INVITATION. ...................................................................................................................
F
IGURE – SELECT A USER TO ENABLE. ...............................................................................................................................
F
IGURE – SELECT NEW ALERT PREFERENCES.......................................................................................................................
F
IGURE – IDES ENROLLMENT HOME PAGE. .........................................................................................................................21
F
IGURE – IDES OVERVIEW AND ENROLLMENT TOOL PAGE......................................................................................................22
F
IGURE – IDES KNOWLEDGE BASE PAGE.............................................................................................................................23
F
IGURE – IDES SUPPORT PAGE.........................................................................................................................................24
F
IGURE – IRS PUBLIC KEY CERTIFICATE INFORMATION. ..........................................................................................................25
F
IGURE – IDES ENROLLMENT USER LOG IN..........................................................................................................................26
F
IGURE – ACCESS IDES ENROLLMENT..............................................................................................................................27
F
IGURE – BEGIN THE ENROLLMENT PROCESS. ....................................................................................................................28
F
IGURE – LOG IN AS AN HCTA ADMINISTRATOR. ...............................................................................................................29
F
IGURE – IDES GIIN FOUND PAGE..................................................................................................................................29
F
IGURE – SUBMIT USER PROFILE INFORMATION. ................................................................................................................31
F
IGURE – SELECT IDES ALERT PREFERENCES......................................................................................................................32
F
IGURE – UPLOAD A DIGITAL CERTIFICATE.........................................................................................................................34
F
IGURE – SELECT A DIGITAL CERTIFICATE...........................................................................................................................34
F
IGURE – ACCESS IDES ENROLLMENT..............................................................................................................................36
F
IGURE – BEGIN THE ENROLLMENT PROCESS. ....................................................................................................................36
F
IGURE – LOG IN AS AN FI ADMINISTRATOR. .....................................................................................................................37
F
IGURE – IDES GIIN VERIFICATION PAGE. ........................................................................................................................37
F
IGURE – CREATE IDES CHALLENGE QUESTIONS.................................................................................................................38
F
IGURE – SUBMIT USER PROFILE INFORMATION. ................................................................................................................39
F
IGURE – UPLOAD A DIGITAL CERTIFICATE.........................................................................................................................41
F
IGURE – SELECT A DIGITAL CERTIFICATE...........................................................................................................................42
F
IGURE – ENROLLMENT CONFIRMED................................................................................................................................42
F
IGURE – ADD AN END USER. .........................................................................................................................................44
F
IGURE – NEW USER ADDED. .........................................................................................................................................45
F
IGURE – IDES WELCOME EMAIL. ...................................................................................................................................46
F
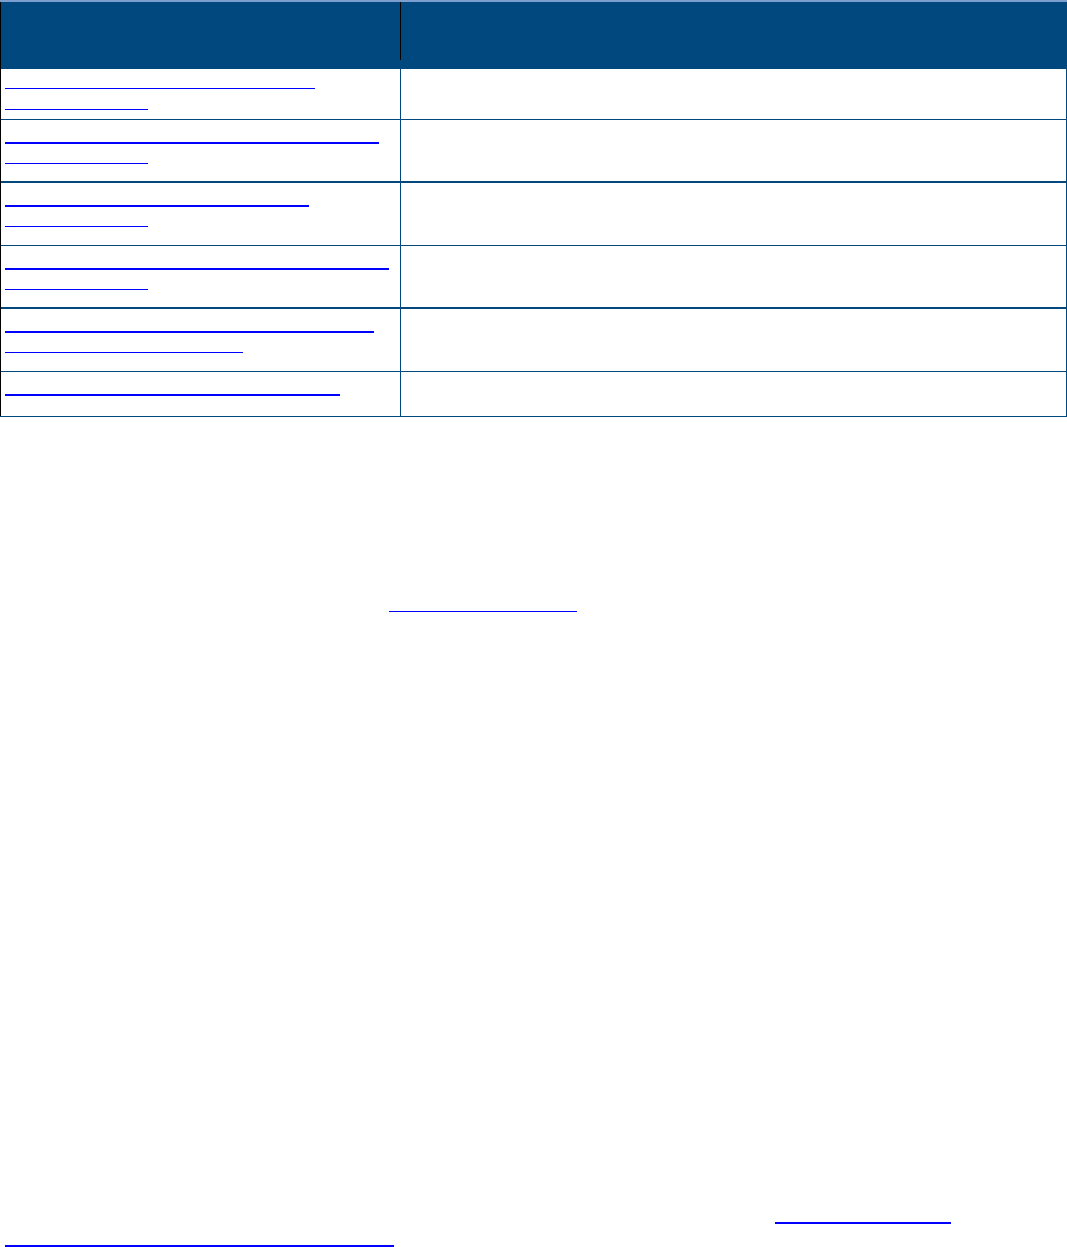
IGURE – DISABLE A USER..............................................................................................................................................47
F
IGURE – SELECT A USER TO DISABLE. ..............................................................................................................................47
F
IGURE – VERIFY USER TO DISABLE. .................................................................................................................................48
F
IGURE – USER DISABLED CONFIRMATION.........................................................................................................................48
F
IGURE – ENABLE A USER. .............................................................................................................................................49
F
IGURE – VERIFY THE USER TO ENABLE.............................................................................................................................51
F
IGURE – USER ENABLED CONFIRMATION. ........................................................................................................................51
F
IGURE – UPDATE A USER CERTIFICATE.............................................................................................................................52
F
IGURE – UPLOAD A DIGITAL CERTIFICATE.........................................................................................................................52
F
IGURE – SELECT A DIGITAL CERTIFICATE...........................................................................................................................53
F
IGURE –UPDATED DIGITAL CERTIFICATE CONFIRMATION.....................................................................................................53
F
IGURE – UPDATE ALERT PREFERENCES. ...........................................................................................................................54
F
IGURE – SELECT THE USER PROFILE TO UPDATE.................................................................................................................54
F
IGURE – USER ALERT PREFERENCES UPDATED...................................................................................................................55
F
IGURE – EMAIL CONFIRMATION FOR UPDATED USER ALERT PREFERENCE ................................................................................56
6
51
52
53
54
55
56
57
58
59
60
61
62
63
64
65
66
67
68
69
70
71
72
73
74
75
76
77
78
79
80
81
82
83
84
85
86
87
88
89
90
91
92
93
94
95
96
97
98
99
100
101
102
103
FIGURE – CREATE A METADATA FILE. ...............................................................................................................................57
F
IGURE – ENTER METADATA FILE INFORMATION.................................................................................................................58
F
IGURE – METADATA SAMPLE IMAGE ..............................................................................................................................59
F
IGURE – RESET A PASSWORD. .......................................................................................................................................60
F
IGURE – SELECT THE USER TO UPDATE. ...........................................................................................................................60
F
IGURE – CREATE A NEW PASSWORD FOR THE SELECTED USER. .............................................................................................61
F
IGURE – EDIT USER ROLE..............................................................................................................................................61
F
IGURE – SELECT USER TO UPDATE ..................................................................................................................................62
F
IGURE – SELECT NEW ROLE FOR USER .............................................................................................................................62
F
IGURE – DOWNLOAD THE IRS PUBLIC KEY .......................................................................................................................63
F
IGURE – GENERAL CERTIFICATE INFORMATION. ................................................................................................................63
F
IGURE – IDES NEW END USER WELCOME EMAIL. ..............................................................................................................64
F
IGURE – CREATE IDES CHALLENGE QUESTIONS.................................................................................................................65
F
IGURE – SUBMIT USER PROFILE INFORMATION. ................................................................................................................66
F
IGURE – SELECT IDES ALERT PREFERENCES......................................................................................................................67
F
IGURE – ENROLLMENT CONFIRMATION...........................................................................................................................69
F
IGURE – IDES ENROLLMENT USER LOG IN PAGE................................................................................................................69
F
IGURE – LOG IN TO THE IDES ENROLLMENT SITE...............................................................................................................70
F
IGURE – MANAGE AN IDES USER ACCOUNT. ...................................................................................................................70
F
IGURE – CREATE A METADATA FILE ................................................................................................................................72
F
IGURE – UPDATE IDES ALERT PREFERENCES. ...................................................................................................................72
F
IGURE – SELECTING NEW ALERT PREFERENCES..................................................................................................................73
F
IGURE – RESET A PASSWORD. .......................................................................................................................................73
F
IGURE – CREATE A NEW PASSWORD. ..............................................................................................................................74
F
IGURE – REQUEST A USERNAME REMINDER EMAIL. ...........................................................................................................75
F
IGURE – ENTER AN EMAIL ADDRESS FOR A USERNAME REMINDER MESSAGE. ..........................................................................75
F
IGURE – REMINDER EMAIL SENT CONFIRMATION. .............................................................................................................76
F
IGURE – IDES USERNAME REMINDER EMAIL. ...................................................................................................................76
F
IGURE –USER EMAIL ADDRESS NOT RECOGNIZED ERROR MESSAGE........................................................................................77
F
IGURE – FORGOT PASSWORD RESET PAGE. ......................................................................................................................77
F
IGURE – ENTER A USERNAME TO RESET A PASSWORD.........................................................................................................78
F
IGURE – EMAIL SENT TO USERS TO RESET A PASSWORD. .....................................................................................................78
F
IGURE – CREATE A NEW PASSWORD. ..............................................................................................................................79
F
IGURE – DATA PREPARATION OVERVIEW.........................................................................................................................81
F
IGURE - IDES GATEWAY ACCEPT SCREEN. .......................................................................................................................90
F
IGURE – IDES GATEWAY LOG IN SCREEN.........................................................................................................................91
F
IGURE – IDES ABOUT TO EXPIRE SESSION MESSAGE...........................................................................................................92
F
IGURE – IDES SESSION TIMEOUT MESSAGE......................................................................................................................92
F
IGURE - IDES GATEWAY HOME SCREEN. .........................................................................................................................92
F
IGURE – IDES GATEWAY ACCOUNT HOME. .....................................................................................................................93
F
IGURE – SELECT PREFERENCES.......................................................................................................................................94
F
IGURE – SELECT AND UPLOAD FILES................................................................................................................................97
F
IGURE – VIEW FILE TRANSFER STATUS IN UPLOADS MONITOR. .............................................................................................97
F
IGURE – FILE TRANSFER STATUS.....................................................................................................................................98
F
IGURE – IDES FILE DOWNLOAD SCREEN..........................................................................................................................98
F
IGURE – SAVE A FILE. ..................................................................................................................................................99
F
IGURE – MODEL 1 OPTION 2 FOLDER STRUCTURE. ..........................................................................................................100
F
IGURE – IDES PENDING STATUS FOLDER.......................................................................................................................101
F
IGURE – IDES FILE OPTIONS. ......................................................................................................................................101
F
IGURE – IDES MOVE FILE OPTIONS. ...........................................................................................................................102
F
IGURE – SAMPLE SFTP CONNECTION. ........................................................................................................................103
F
IGURE – SSH AUTHENTICATION DISCLAIMER................................................................................................................104
F
IGURE – SFTP WARNING DIALOG. .............................................................................................................................104
7
104
105
106
107
108
109
110
111
112
113
114
115
116
117
118
119
120
121
122
123
124
125
126
127
128
129
130
131
132
133
FIGURE – SFTP CONNECTION. ...................................................................................................................................105
F
IGURE – IDES ALERT FLOW CHART FOR TRANSMISSION UPLOADS. ....................................................................................106
F
IGURE – SAMPLE IDES ALERT E-MAIL MESSAGE............................................................................................................107
F
IGURE – SENTINEL DISCLAIMER BANNER......................................................................................................................109
F
IGURE - SENTINEL WEB DASHBOARD LOGIN PAGE.........................................................................................................109
F
IGURE - SENTINEL WEB DASHBOARD HOME PAGE.........................................................................................................110
F
IGURE – WEB DASHBOARD TITLE BAR.........................................................................................................................110
F
IGURE – WEB DASHBOARD FLOATING MENU ...............................................................................................................111
F
IGURE – ADJUSTING WEB DASHBOARD MENU .............................................................................................................111
F
IGURE - MAIN DASHBOARD MENU .............................................................................................................................112
F
IGURE – SELECT A DASHBOARD .................................................................................................................................112
F
IGURE - DASHBOARD RESULT ....................................................................................................................................112
F
IGURE - DASHBOARD TRANSMISSION DETAILS LINK ........................................................................................................113
F
IGURE – SELECTED TRANSMISSION DETAILS..................................................................................................................113
F
IGURE – TRANSMISSION DETAILS MINIMIZED VIEW........................................................................................................113
F
IGURE – TRANSMISSION DETAILS EXTENDED VIEW .........................................................................................................114
F
IGURE - DASHBOARD FILTER ICON ..............................................................................................................................114
F
IGURE – FILTER IN DASHBOARD VIEW .........................................................................................................................114
F
IGURE – DASHBOARD FILTER MENU ...........................................................................................................................115
F
IGURE – DASHBOARD DATE AND TIME FILTER ...............................................................................................................115
F
IGURE – DASHBOARD LIST FILTER...............................................................................................................................116
F
IGURE - DASHBOARD DROP DOWN FILTER LIST..............................................................................................................116
F
IGURE - DASHBOARD TEXT FILTER ..............................................................................................................................116
F
IGURE – DASHBOARD NAVIGATION FROM DETAILED VIEW ..............................................................................................117
F
IGURE – DASHBOARD MAIN RESULT VIEW ...................................................................................................................117
F
IGURE – DASHBOARD REFRESH ICON ..........................................................................................................................117
F
IGURE – REFRESH ICON IN DASHBOARD VIEW ...............................................................................................................118
F
IGURE – RESULT EXPORT FROM DASHBOARD VIEW ........................................................................................................118
F
IGURE – DASHBOARD PDF EXPORT............................................................................................................................119
F
IGURE – DASHBOARD EXCEL EXPORT..........................................................................................................................119
8
1
2
3
4
5
6
7
8
9
10
11
12
13
14
15
16
17
18
19
20
21
22
23
24
25
26
27
28
29
30
31
32
33
34
35
36
37
38
39
40
41
42
43
44
Tables
TABLE – FATCA RELATED DOCUMENTS.............................................................................................................................13
T
ABLE – VALID USER TYPES AND FEATURES. .......................................................................................................................15
T
ABLE – SYSTEM REQUIREMENTS......................................................................................................................................16
T
ABLE - IDES ENROLLMENT REQUIREMENTS.......................................................................................................................18
T
ABLE – IRS-APPROVED CERTIFICATE AUTHORITIES..............................................................................................................19
T
ABLE – HCTA IDES ALERT PREFERENCES. ........................................................................................................................33
T
ABLE – FI IDES ALERT PREFERENCES. ..............................................................................................................................41
T
ABLE – METADATA FILE TYPE AND BINARY ENCODING TYPE PAIRING. ....................................................................................59
T
ABLE – IDES ALERT PREFERENCES...................................................................................................................................68
T
ABLE – OVERVIEW PROCESS TO PREPARE AND SEND A FILE..................................................................................................80
T
ABLE – PROCESS TO DIGITALLY SIGN A FILE.......................................................................................................................82
T
ABLE – RECOMMENDED COMPRESSION TOOLS BASED ON COMPRESSION TESTING AND SUPPORTED ALGORITHMS. .........................83
T
ABLE – PROCESS TO COMPRESS A FILE. ...........................................................................................................................83
T
ABLE – PROCESS TO ENCRYPT AN XML FILE WITH AN AES KEY. ...........................................................................................84
T
ABLE – PROCESS TO ENCRYPT AN AES KEY WITH A PUBLIC KEY.............................................................................................85
T
ABLE – PROCESS FOR A MODEL 1 OPTION 2 FI TO ENCRYPT AN AES KEY. .............................................................................86
T
ABLE – SENDER METADATA SCHEMA SUMMARIZES EACH ELEMENT......................................................................................87
T
ABLE – FILES CONTAINED IN A TRANSMISSION ARCHIVE OR DATA PACKET ...............................................................................88
T
ABLE - PROCESS TO OPEN A NOTIFICATION MESSAGE ARCHIVE.............................................................................................89
T
ABLE – IDES USER INTERFACE OVERVIEW.......................................................................................................................93
T
ABLE – IDES GATEWAY FOLDERS AND SUBDIRECTORIES. ....................................................................................................96
T
ABLE – SUMMARY DESCRIPTION OF IDES REPORTING PROCESS FOR MODEL 1 OPTION 2 HCTAS. ...........................................102
T
ABLE - SUMMARY OF SENTINEL AVAILABLE REPORTS........................................................................................................108
T
ABLE - SENTINEL COLOR-CODED TRANSMISSION EVENTS. ................................................................................................119
T
ABLE - SENTINEL REPORT RETURN CODES. ....................................................................................................................120
T
ABLE – LIST OF ALERT CODES FOR FAILED TRANSMISSIONS...............................................................................................123
T
ABLE – SUCCESSFUL TRANSMISSION UPLOAD.................................................................................................................124
T
ABLE - CERTIFICATE FAILURE.......................................................................................................................................125
T
ABLE - EXPIRED TRANSMISSIONS NOT DOWNLOADED BY IRS............................................................................................125
T
ABLE – MODEL 1 OPTION 2 APPROVED UPLOAD. ..........................................................................................................126
T
ABLE – MODEL 1 OPTION 2 TRANSMISSION FILE REJECTED..............................................................................................127
T
ABLE – EXPIRED UPLOAD: NO ACTION FROM HCTA. ......................................................................................................128
T
ABLE – EXPIRED UPLOAD: NO ACTION FROM IRS...........................................................................................................129
T
ABLE – TABLE OF ACRONYMS USED IN THIS DOCUMENT....................................................................................................130
T
ABLE – IDES FILE NAMING CONVENTIONS. ....................................................................................................................131
T
ABLE – IDES CERTIFICATE UPLOAD ERROR MESSAGES. ...................................................................................................132
T
ABLE – IDES HCTA FATCA ENTITY ID COMPOSITION. ...................................................................................................133
T
ABLE – DATA PACKAGING TIPS. ..................................................................................................................................140
T
ABLE – APPLICATION KEYBOARD SHORTCUTS.................................................................................................................148
T
ABLE – GO TO KEYBOARD SHORTCUTS. ........................................................................................................................148
T
ABLE – SELECTION KEYBOARD SHORTCUTS....................................................................................................................148
T
ABLE – FILES AND FOLDERS KEYBOARD SHORTCUTS. .......................................................................................................149
T
ABLE – TRANSFER QUEUE KEYBOARD SHORTCUTS. .........................................................................................................149
T
ABLE – IDES COMMUNICATION TYPES.........................................................................................................................151
9
Disclaimers
This document is provided to the public for information purposes only. Information in this
document is indicative and is subject to change without notice. Unless otherwise noted, the
companies, organizations, products, domain names, e-mail addresses, logos, people, places,
and events depicted in examples herein are fictitious. No association with any real company,
organization, product, domain name, e-mail address, logo, person, place, or event is intended or
should be inferred. Complying with all applicable copyright laws is the responsibility of the user.
Without limiting the rights under copyright, no part of this document may be reproduced, for any
purpose, without the express written of permission the IRS. For more information, contact the
IRS SPEC Office of Products, Systems & Analysis.
Additional Note about Screen Shots
Screen shots are intended for illustrative purposes only and may not match the IDES
Enrollment and IDES Gateway sites exactly. The FATCA IDES team will continue to update
screen shots in future versions of the guide.
10

What’s New
This section summarizes updates since the last publication of the IDES User Guide (July 2020):
Section Description
System Availability (2.4) Updated supported browser section
IDES Reports (Sections 13.1 - 13.6) Updated items
Examples of Transmission Alerts (13.7.4)
Updated Model 1 Option 2, RC030 from rename to move
IDES Testing Window (Appendix F) One annual testing window per year
.
11
1. Introduction
1.1. About FATCA
The Foreign Account Tax Compliance Act (FATCA) was enacted as part of the Hiring Incentives to Restore
Employment (HIRE) Act in March 2010. FATCA was created to improve transparency and address tax non-reporting of
income related to foreign financial accounts held by U.S. taxpayers.
FATCA requires certain foreign financial institutions (FFIs) to report certain information about its U.S. accounts (including
U.S. owned foreign entities), accounts held by owner-documented FFIs (ODFFI), and certain aggregate
information concerning account holders that are recalcitrant account holders and, for a transitional period, accounts held
by nonparticipating FFIs. Generally, FFIs will commit to these reporting requirements by registering with the IRS and
signing an agreement with the IRS; however, the FFI agreement does not apply to FFIs under a Model 1
Intergovernmental Agreement (IGA). In most cases, FFIs that do not register with the IRS will be subject to 30%
withholding on certain U.S. source payments (unless an exception applies). Chapter 4 of the FATCA regulations also
generally requires a withholding agent to deduct and withhold tax equal to 30 percent of a withholdable payment made
to a passive non-financial foreign entity (NFFE), unless the passive NFFE certifies to the withholding agent that it does
not have any substantial U.S. owners, or provides certain identifying information with respect to its substantial U.S.
owners. Payments to NFFEs that report their substantial U.S. owners directly to the IRS (direct reporting NFFEs) are
accepted from withholding and reporting by the withholding agent.
An approved financial institution (FI) (other than a limited FFI or a limited branch), direct reporting NFFE, or sponsoring
entity that registers with the IRS under FATCA will receive a global intermediary identification number (GIIN) and appear
on the published FFI list. The FFI List Search and Download tool allows users to search entities by GIIN, financial
institution name, or country/jurisdiction of the FFI or branch.
There are certain entities, such as U.S. withholding agents (USWA), territory financial institutions (TFI), third party
preparers, and independent software vendors that do not need to have a GIIN (non-GIIN filers) but need to file FATCA
reports through the International Data Exchange Service (IDES). A non-GIIN filer has to get a FATCA identification
number (FIN) in order to enroll in and report through IDES. Publication of a FIN on the FFI list does not change the filer’s
status for FATCA purposes, as it does not subject the filer to the requirements applicable to an FFI and does not serve
any function related to withholding tax on payments under FATCA or reporting such tax. A FIN will be accompanied by a
generic name (e.g., “U.S. Withholding Agent 1”) on the FFI List. For more information on FINs, visit the
FATCA
Identification Number (FIN) Enrollment Process page.
An FFI could have two or more GIINs on the FFI list in a given month. This may occur when an FI obtains one GIIN for its
own reporting and another GIIN to report on behalf of another entity (such as a sponsoring entity reporting on behalf of a
sponsored entity or a trustee reporting on behalf of a trustee-documented trust). This may also occur when an FI is in the
process of transferring into an expanded affiliated group or changing its FI type; in such a case, please note the
following:
If the FI’s FATCA account is in approved status, a new GIIN will be issued. The old GIIN will remain on the
published FFI list for 90 days to allow the GIIN holder enough time to distribute its new GIIN
All approved branches will also be issued new GIINs. The old branch GIINs will also remain on the published FFI list
for 90 days
1.2. Purpose of Guide
This guide is intended to serve as a tool for FIs, direct reporting NFFEs, sponsoring entities, non-GIIN filers, and Host
Country Tax Authorities (HCTAs) who transmit data through the International Data Exchange Service (IDES). The
document assumes that the reader is familiar with the FATCA regulations and is experienced with extensible markup
language (XML) and schema technology. For the purpose of this document, direct reporting NFFEs, sponsoring entities,
non-GIIN filers and trustees of trustee-documented trusts should follow the instructions set forth for FIs. Additionally, the
term “U.S. withholding agent” includes
a territory FI treated as a U.S. person.
12
Document Description
FATCA Online Registration User Guide
(Publication 5118)
Provides instructions for the online system to complete an electronic
Form 8957, FATCA Registration
FFI List Search and Download Tool User Guide
(Publication 5147)
Provides instructions on how to use the FFI List Search and Download
Tool to search for an approved GIIN
FATCA XML Schema v1.1 User Guide
(Publication 5124)
Explains the information required to be included in each data element of
the schema
FATCA Metadata XML Schema v1.2 User Guide
(Publication 5188)
Explains the schema and elements of a FATCA metadata file
FATCA Reports Notification XML Schema v2.0
User Guide (Publication 5189)
Explains the schema and elements of FATCA notifications
Instructions for Form 8966, FATCA Report Provides instructions for the paper Form 8966, FATCA Report
Table 1 – FATCA Related Documents.
1.3. Comments
We appreciate your feedback on the quality and usefulness of this publication. Please send comments, with a reference
to chapter, section, and page number(s), to lbi.fatca.ide[email protected].
1.4. Technical Support
IDES technical assistance is available Monday through Friday, 24 hours a day, except for U.S. federal holidays, through
the IDES Customer Service Help Desk. IDES customer support will send a system alert from the help desk portal for
planned outages and scheduled maintenance.
2. International Data Exchange Service (IDES)
2.1. About IDES
IDES is a secure managed file transfer service that is available to FIs and HCTAs to facilitate FATCA reporting. This
reporting is provided for under U.S. Treasury Regulations, the FFI agreement, Tax Information Exchange Agreements
(TIEAs), Intergovernmental Agreements (IGAs), and other guidance issued by the Treasury Department and the IRS.
The data collected through IDES will be incorporated into IRS compliance operations.
IDES is accessible to enrolled users over the Internet via Hypertext Transfer Protocol Secure (HTTPS) or Secure File
Transfer Protocol (SFTP). IDES provides for an end-to-end controlled file transfer with enhanced monitoring and
security features. The system only accepts encrypted electronic submissions, and will allow for the transmission of
FATCA reporting in the approved FATCA XML Schema v1.1 (FATCA XML). For more information on FATCA
regulations, Form 8966 and instructions, FATCA XML, and other related topics, visit the FATCA Home Page
and
FATCA Frequently Asked Questions (FAQs).
The main function of IDES is to provide authorized users with secure exchange services for FATCA data transmissions,
with the additional protection of a Public Key Infrastructure (PKI). The primary features of IDES are:
13

Enrollment
Certificate Management
Account Management
Secure Data Transmission
Status of Data Transmission (Alerts and Notifications)
Figure 1 – IDES process overview.
2.2. Before You Begin
This material is intended to supplement the contents of IDES online help and is not intended to replace technical
documentation to establish and test SFTP connections. Examples shown in this document are based upon a Windows
environment and may differ if using other operating systems.
2.3. Authorized Users
Authorized IDES users are FIs, direct reporting NFFEs, sponsoring entities, trustees of trustee-documented trusts, U.S.
withholding agents, and HCTAs. Each authorized user has limited access to the system based on the data flow model
described in their agreement with the United States (for example, an IGA or an FFI agreement) or in Treasury
regulations. Note that for many IDES users, the IRS is the only valid recipient for files. The table below provides
additional information regarding user access based on agreement types.
Type of Agreement
User
Type
Access Description
Model 1B IGA (Non-Reciprocal)
FFI transmits data directly to its HCTA then
the HCTA transmits data to the IRS
FFI No Access
HCTA On behalf of FI under the HCTA jurisdiction:
Upload FATCA reporting for direct transfer to
IRS
Download alerts generated by IDES
Download notifications and Competent
Authority Requests (CARs) submitted by IRS
14

Type of Agreement User
Type
Access Description
Model 1A IGA (Reciprocal)
FFI transmits data directly to its HCTA then
the HCTA transmits data to the IRS. This is a
reciprocal model with two-way transmission
between the HCTA and the IRS
FFI No Access
HCTA On behalf of FI under the HCTA jurisdiction:
Upload FATCA reporting for direct transfer to
IRS
Download alerts generated by IDES
Download notifications and CARs submitted by
IRS
Reciprocal data will be exchanged with HCTA
Model 1 Option 2
FFI transmits data directly to its HCTA via
IDES. The HCTA approves or rejects the
FATCA reporting data. If approved, IDES
releases the data to the IRS.
FFI Upload FATCA reporting to IDES for review by
HCTA
Download alerts generated by IDES
Download notifications submitted by IRS (subject to
the terms of the country’s IGA)
HCTA Upload approved or rejected FATCA reporting for
direct transfer to IRS
Download alerts generated by IDES
Download notifications and CARs submitted by IRS
Model 2 IGA and FFI agreement
FFI transmits data regarding:
Consenting accountholders directly to the
IRS
Aggregate information on non-consenting
accountholders and non-consenting, non-
participating FFIs directly to IRS
Specific information on non-consenting
accountholders and non-consenting, non-
participating FFIs directly to HCTA.
HCTA may deliver data to IRS after a
treaty request
FFI Upload FATCA reporting for direct transfer to IRS
Download alerts generated by IDES
Download notifications submitted by IRS (subject to
the terms of the country’s IGA)
HCTA Upload FATCA reporting regarding non-consenting
accountholders and non-consenting, non-
participating FFIs for direct transfer to IRS (after
treaty request)
Download alerts generated by IDES
Download notifications and CARs submitted by IRS
Non-IGA (FFI agreement)
FFI transmits data directly to the IRS
FFI Upload FATCA reporting for direct transfer to IRS
Download alerts generated by IDES
Download notifications submitted by IRS
HCTA No Access
Non-IGA (no FFI agreement)
Direct Reporting
NFFE, U.S.
Withholding Agent
(USWA),
Sponsoring Entity,
or Trustee of
Trustee-
Documented Trust
Upload FATCA reporting for direct transfer to IRS
Download alerts generated by IDES
Download notifications submitted by IRS
Table 2 – Valid User Types and Features.
15

2.4. System Availability
IDES requires a username and password, which can be obtained through the IDES enrollment process. The system will
be available 24 hours a day, with the exception of U.S. holidays and regularly scheduled system maintenance periods.
All users will be notified of planned outages, as well as unplanned outages that are expected to last more than 8 hours.
IDES works with all major browsers and can be accessed using different SSH clients for Secure File Transfer Protocol
(SFTP).
Items Technical Specifications
Browsers for HTTPS
Apple Safari – only on macOS
Google Chrome
Microsoft Edge
Mozilla Firefox
SSH clients
Any client that complies with RFCs 4251-4254
File Size
File uploads and downloads are limited to a size of 200 MB compressed.
File Naming Conventions See Appendix B for file naming conventions.
Only file extension .zip are authorized for file uploads to IDES in the user Outbox folders
File names are case insensitive
Do not use illegal characters in the name of files, such as colon, backslash, question mark or
space
Table 3 – System Requirements.
16

2.5. Data Security
IDES provides secure file data transfers and uses encryption standards established by the United States National
Institute of Standards and Technology (NIST). When a supported web browser connects to IDES via HTTPS, the
Transport Layer Security (TLS) cryptographic protocol provides communication security over the Internet and the
session is encrypted for data confidentiality.
2.6. File Retention
IDES provides secured data transmissions and prohibits long term data storage. Data packets that contain errors, such
as files with an unencrypted payload or virus, will be automatically deleted. Generally, each file transmitted from the
U.S. to a receiver remains available for download for a limited number of days, based on the date the file was created.
After a user transmits a data packet, the user receives an IDES Alert or Notification that the transmission is available for
download. The file will remain available for download in the receiver’s account inbox for 7 days. An inbox folder may
contain several different transmitted files at the same time, each with a different payload. For the purpose of this
document, the term payload will be used to describe the body of the data packet (e.g. a FATCA XML document) that
serves as the fundamental purpose of the data transmission.
If the receiver does not download the file within a specified period, the files expires and will be automatically deleted.
After a file is deleted, it cannot be retrieved, downloaded or restored. If the receiver initiates the file download within 7
days, the file should be downloaded within 24 hours from the time the download is initiated. After 24 hours, the file
expires and will be automatically deleted.
The file retention times vary slightly based on model types. Also refer to 11.6 for more details on file retention times for
files sent under Model 1 Option 2.
IDES
File: <IDESTransmissionID>.zip download initiated
File deleted
File: <IDESTransmissionID>.zip available for download
in account Inbox (or Pending) folder
Start of the 7 day expiration clock
(based on file CreationTime)
End of the 7 day expiration clock
Start of the 24 hour expiration clock
End of the 24 hour expiration clock
File not
downloadable
End of the 7 day expiration clock
File deleted
File not
downloadable
Continue the 7 day expiration clock
Or until file moved into /Approved or /Rejected folder
Model 1 Option 2 ?
NO
(Inbox\xxx folder)
YES
(Pending folder)
Figure 2 – File retention flow.
17

2.7. Requirements
Certain requirements are needed to create a new account on the IDES Enrollment site. Requirements differ for HCTA and FI users.
Valid User Type
Requirements HCTA FI
Registered GIIN and non-GIIN filers
See IRS FFI List for more information
N/A X
HCTA FATCA Entity ID
See Appendix D: for more information
The IRS provided
usernames to your
Competent Authority.
Contact the IRS for more
information
N/A
Valid certificate issued by an IRS
approved certificate authority (CA)
See Obtaining a Certificate
for more
information
X X
Public and Private Key
X X
Email address of additional users
X X
Table 4 - IDES Enrollment Requirements.
Note: Users that do not have a requirement to obtain a GIIN but are required to report using the FATCA XML (non-GIIN
filers), must get a FIN in order to enroll in and report through IDES. For information on how to obtain a FIN, refer to the
FATCA Identification Number (FIN) Enrollment Process page.
2.8. HCTA Username and Password
All countries under Model 1 IGAs have a pre-assigned username and HCTA FATCA Entity ID. Each HCTA FATCA
Entity ID is in the format: 000000.00000.TA.<ISO>. ISO is the ISO 3166-1 numeric standard country code. Please refer
to Appendix D:
for more information.
The first time a user logs on to IDES, the user is required to change its assigned username and create a password. A
letter containing information on the username and enrollment instructions will be sent to an appropriate contact from
each country based on their agreement with the United States. For additional information, contact the IDES help desk
.
IDES Users can change their contact information through the Registration Portal. The Registration Portal is found at
https://www.irs.gov/businesses/corporations/fatca-foreign-financial-institution-registration-system.
18

3. Obtain a Digital Certificate
3.1. Purpose of a Digital Certificate
Certificates and their related private keys are used to sign and decrypt messages between the sending party and the
IRS. A digital certificate binds an identity to a public key. A certificate authority (CA) issues a certificate after an identity
proofing process to verify the certificate owner. The individual identified in the certificate has possession and control
over the private key associated with the public key found in the certificate.
3.2. IRS Approved Certificate Authorities
The IRS only accepts certificates issued by approved CAs. A published list of certificate authorities and acceptable
digital certificate products is available on IRS.gov.
Certificate Authority Type of Certificate External Website Links
Sectigo (formerly Comodo) EV SSL https://ssl.comodo.com/ev-ssl-
certificates.php?track=11003&af=11003&s_track=7639#_
ga=2.257816459.1630310083.1528894756-
1943831559.1528894756
Digicert
®
Standard SSL
EV SSL
https://www.digicert.com/welcome/ssl-plus.htm
Entrust
®
Standard SSL
EV Multi-Domain SSL
http://www.entrust.net/ssl-certificates/standard.htm
®
GlobalSign
Organization SSL
Extended SSL
https://www.globalsign.com/ssl/organization-ssl/
Go Daddy
EV SSL https://www.godaddy.com/web-security/ev-ssl-certificate
IdenTrust Standard Server SSL http://www.identrust.com/irs/fatca/index.html
FATCA Organization
Certificate
http://www.identrust.com/irs/fatca/index.html
Table 5 – IRS-approved Certificate Authorities.
3.3. Digital Certificate Format
Before you begin the IDES enrollment process, each entity should obtain one valid digital certificate issued by
an approved certificate authority (CA). Certificates in other formats, such as wildcards will be rejected. IDES will only
accept digital certificates issued by an approved CA.
Supported formats for the digital certificates are:
Distinguished Encoding Rules (DER) binary X.509
Privacy Enhanced eMail (PEM) ASCII (Base-64) encoded X.509
19

IDES will convert digital certificates received in DER format to Base64 for storage and retrieval.
If a digital certificate is not in DER or PEM format, use Windows to convert your digital certificate to DER or PEM as
follows:
Open the digital certificate with a .CRT filename extension
Select the Details tab
Select the “Copy to File…” button
In the Certificate Export Wizard, select the format you want to use as either “DER encoded binary X.509 (.CER)” or
“Base-64 encoded X.509 (.CER)”.
3.4. Upload a Digital Certificate to IDES
Only an IDES administrator can upload a digital certificate. After an FI or HCTA administrator obtains a digital certificate,
the administrator will provide the certificate to IDES during the enrollment process. After upload, the certificate is
validated with the Certificate Authority (CA) that issued the certificate.
It is the responsibility of IDES users to verify that the certificate is valid at the time they attempt to use it. Please refer
to 5.6
for more information on how to upload a digital certificate to an IDES account.
3.5. Public Key Certificate
A public key certificate, also known as a digital certificate, is an electronic document used to prove ownership of a public
key. The IRS public key certificate can be downloaded during IDES enrollment. The IDES administrator will upload the
digital certificate for its FI or HCTA during enrollment.
3.6. Certificate Maintenance
IDES uses a Public Key Infrastructure (PKI) to manage and revoke digital certificates. The CA sets the lifetime of each
digital certificate, typically up to one year. IDES requires one digital certificate per FI or HCTA.
A Certificate Revocation List (CRL) is a list of digital certificates that have been revoked, meaning that they are not
trustworthy, and should not be used. CRLs are always issued by the trusted CA and are publicly available. IDES
validates all digital certificates against the most current CRL published from each trusted CA to identify any revoked
digital certificates. A revoked digital certificate will be deleted from IDES, along with the associated public key contained
in the digital certificate. IDES will immediately deactivate the user account associated with a revoked digital certificate.
The Online Certificate Status Protocol (OCSP) is an Internet protocol designed for real-time verification of digital
certificates against a database of revoked digital certificates. IDES tests all digital certificates using the OCSP to verify
whether the digital certificates are valid. For example, when a transmission uses an expired digital certificate, IDES tests
the certificate using the OCSP, confirms the certificate is revoked, and deletes the transmitted file. Users are not able to
transmit the file until a valid digital certificate is resubmitted.
20

4. IDES Enrollment
4.1. Overview
IDES Enrollment is required for FIs and HCTAs to access the IDES environment. Users must enter a valid GIIN and
certificate to enroll. FIs or HCTAs with invalid or expired certificates cannot enroll. Users with a FIN must select the FI
button to enroll. The IDES Enrollment site can be accessed at https://www.ides-support.com/
IDES Enrollment Options:
Add and Update a User
Update Certificate
Disable/Enable a User
Select Alert Preferences
Create Metadata File
4.2. IDES Enrollment Home Page
The IDES Enrollment site can be accessed through:
IDES Enrollment Web User Interface
Secure File Transfer Protocol (SFTP)
The IDES Enrollment site contains links to various IDES resources and includes five main tabs in addition to the Home
tab:
Enrollment
Knowledge Base
Support
IRS Public Key
IDES Enrollment User Log In
Figure 3 – IDES enrollment home page.
21

4.3. Enrollment
The Enrollment tab describes the IDES enrollment process and provides users with access to create an IDES account.
The Enrollment tab also links to the IDES Gateway, a web application that allows enrolled HCTAs and FIs to securely
upload and download FATCA data over the Internet using both HTTPS and SFTP protocols.
Figure 4 – IDES overview and enrollment tool page.
22

4.4. Knowledge Base
The Knowledge Base tab directs users to important IDES documentation such as user guides and an interactive
knowledge base.
Users can access the following resources from the Knowledge Base tab:
Interactive IDES Knowledge Base
IDES User Guides
IDES Frequently Asked Questions (FAQs)
Figure 5 – IDES knowledge base page.
23

4.5. Support
The IDES help desk is available to assist users with log in problems, error messages, and other technical issues. The
Support tab provides contact information for the help desk and hours of operation. The help desk can be contacted by
phone or via an online form which allows users to submit technical system problems. The click to call feature allows
users to dial the help desk directly from the internet browser. Please note that the help desk is available in English only.
Users can access the following resources from the Support tab:
Email Support
Phone Support
Help Desk Hours of Operation
Submit Technical System Problems
Figure 6 – IDES support page.
24

4.6. IRS Public Key
The IRS Public Key is a certificate that can be downloaded from the IDES Enrollment site. This certificate should be
included in the FATCA transmission archive transmitted to the IRS.
Figure 7 – Access the IRS public key.
1. From the IDES Support home page, click the IRS Public Key tab.
Figure 8 – IRS public key certificate information.
25

2. Download and save the IRS Public Key Certificate to your computer.
3. The certificate should be included in the transmission archive .zip file transmitted to the IRS via the IDES Gateway.
4.7. IDES Enrollment User Log In
The IDES Enrollment User Log In tab allows returning users to access the IDES Enrollment site. HCTA administrators,
FI administrators, and end users are able to log in after they have created an IDES account.
Figure 9 – IDES enrollment user log in.
5. HCTA Administrators
5.1. Overview
HCTA administrators have the following roles under the IGAs:
Model 1 IGA HCTA: The partner jurisdiction agrees to report to the IRS specified information about the U.S.
accounts maintained by all relevant FIs located in the jurisdiction.
Model 2 IGA HCTA: The partner jurisdiction agrees to direct and enable all relevant FIs located in the
jurisdiction to report specified information about their U.S. accounts directly to the IRS.
HCTAs will need their IRS assigned username in order to create an IDES account. The first user that registers for an IDES
account, on behalf of their HCTA, is considered the administrator. HCTA administrators are able to add end users, disable
26

and enable end users, update the certificate, update alert notifications, create a metadata file, reset passwords, and
download the IRS Public Key.
When an administrator makes changes to an End User, the End User receives an email about the changes.
Authorized end users (users under the HCTA administrator) have limited capabilities and may update their alert
notifications, create a metadata file, and reset their password.
To create an account, the HCTA administrator will create challenge questions and a password. The HCTA administrator
will then upload their digital certificate received from an IRS-approved certificate authority.
Note: You may have more than one IDES administrator on your account. To replace an existing administrator, please
contact IDES help desk support.
5.2. Begin Enrollment
The IDES Enrollment site can be accessed at https://www.ides-support.com.
Figure 10 – Access IDES enrollment.
1. Click on Learn More under IDES Enrollment.
27

Figure 11 – Begin the enrollment process.
2. Click on Begin Enrollment to start the enrollment process as an HCTA administrator.
28

Figure 12 – Log in as an HCTA administrator.
3. Select HCTA.
4. In HCTA Username, enter your username assigned by the IRS. If you have not received an HCTA
username, contact your local Competent Authority or IDES help desk support.
5. Click Next to continue.
Figure 13 – IDES GIIN found page.
6. Confirm information and verify GIIN, Financial Institution/HCTA and Country are correct. Note that the
Financial Institution name and GIIN must exactly match the name and GIIN as shown on the IRS FFI List.
7. Click Next to continue and set up Challenge Questions.
29

5.3. Create Challenge Questions
Figure 14 – Create IDES challenge questions.
1. Challenge Question #1
a. Question: Select the drop-down arrow to view a list of questions. Select a challenge question.
b. Answer: Type a response to the challenge question.
2. Challenge Question #2
a. Question: Select the drop-down arrow to view a list of questions. Select a challenge question.
b. Answer: Type a response to the challenge question.
3. Click Next to continue and set up a Username
30

5.4. Create User Profile
Figure 15 – Submit user profile information.
1. Username – Enter your new username. We recommend first initial and last name. If the username is already taken,
you will receive an error message.
a. The username should contain letters and numbers only. Special characters and non-English letters will not
be accepted. There is no maximum character length.
b. The username cannot be in use by anyone else or previously used.
2. First Name – Enter your first name.
3. Last Name – Enter your last name.
4. Email – Enter your email address.
a. The email address may be a personal email address or a shared mailbox address.
5. Verify Email – Enter your email address again (must match the previous entry). If it does not match, you will receive
an error message.
6. Password – Create a valid password.
a. The password must be 8-20 characters and include at least one uppercase and lowercase letter, one
number, and one of the designated special characters (~ ! @# % ^ * () ? , .). The previous 24
passwords cannot be used.
b. If you enter a password that does not meet the guidelines, you will receive an error message.
7. Verify Password – Re-type your password (must match the previous entry). If it does not match, you will receive an
error message.
31

5.5. Select Alert Preferences
All IDES system alerts and notifications may be viewed using IDES Reports. This feature allows you to receive emails
regarding the status of your transmission.
Figure 16 – Select IDES alert preferences.
1. Select Alert Preferences – Click on the box next to the alerts you wish to receive by email.
You can click the Check All/None box to choose all alerts or to remove all alerts. You must select user preferences
to receive alerts. There are eight Alert Preferences.
32

Alert Preference Description
a.
System Availability Alert
IDES Enrollment and/or IDES Gateway are
unavailable.
b.
Transmission Failed Alert
Transmission uploaded via the IDES Gateway
failed for one of several reasons (e.g., virus,
encryption validation, naming convention, package
content). The email will have an alert code that you
will need to look up on the IDES Gateway to
determine the reason the transmission failed.
c.
File Available for Download Alert
The user has a file to download on the IDES
Gateway.
d.
File Rejected Alert
(Model 1 Option 2)
Transmission upload was rejected by the HCTA.
The email will have an alert code that you will need
to look up on the IDES Gateway to determine the
reason the transmission was rejected.
e.
Transmission Alert
Receive all IDES Alerts (See Alerts b,c,d,f,g,h).
f.
File Uploaded Alert
Received transmission is uploaded to the IRS for
review.
g.
File Posted for Review Alert
(Model 1 Option 2)
Sent to the HCTA when an FI uploads a report.
h.
File Approved Alert
(Model 1 Option 2)
Sent after HCTA has approved the FI file.
Table 6 – HCTA IDES Alert Preferences.
Note that Alert Preferences may be modified at a later date.
2. Click Next to continue to upload digital certificate.
5.6. Upload Digital Certificate
Each entity should obtain a digital certificate issued by an approved CA. The digital certificates should be in a DER or
PEM format. It is the responsibility of IDES users to verify that the certificate is valid. For more information, refer
to Chapter 3. Obtain a Digital Certificate
.
33

Figure 17 – Upload a digital certificate.
1. Click Browse to search for the certificate located on your computer.
Figure 18 – Select a digital certificate.
2. Select the Active/Valid certificate file from your computer.
3. Click Open.
4. Click Validate.
a. If you receive an error message, refer to Appendix C: Certificate Upload Error Messages
or contact IDES
customer support for assistance.
34

Figure 19 – Enrollment confirmed.
5. After you have validated your certificate, the enrollment process is complete. You will receive an email from the IDES
help support desk that verifies your access to the IDES Gateway.
6. Click IDES Enrollment User Log In to log in as the HCTA administrator.
6. FI Administrators
6.1. Overview
Only registered FIs and third parties that have a valid GIIN or FIN may create an IDES account. The first user that registers
for an IDES account, on behalf of their FI, is considered the administrator. The FI administrator is able to add, disable and
enable end users, update the certificate, update alert preferences, create a metadata file, reset passwords, and download
the IRS Public Key.
When an administrator makes changes to an End User, the End User receives an email about the changes.
Financial Institutions include, but are not limited to:
Depository institutions (for example, banks).
Custodial institutions (for example, mutual funds).
Investment entities (for example, hedge funds or private equity funds).
Certain types of insurance companies that have cash value products or annuities.
USWA, TFI, third party preparers, and independent software vendors.
End users (users under the FI administrator) will be able to update their alert preferences, create a metadata file, and
reset their password. To create an account, the FI administrator will create challenge questions and a password. The FI
administrator will also upload the digital certificate received from an IRS approved Certificate Authority.
Notes: You may have more than one IDES administrator on your account. To replace an existing administrator, please
contact IDES help desk support.
IDES Users can change their contact information and GIIN composition through the Registration Portal. The
Registration Portal is found at https://www.irs.gov/businesses/corporations/fatca-foreign-financial-institution-
registration-system.
35

6.2. Begin Enrollment
The IDES enrollment site can be accessed at https://www.ides-support.com.
Figure 20 – Access IDES enrollment.
1. Click Learn More under IDES Enrollment or select the Enrollment tab.
Figure 21 – Begin the enrollment process.
2. Click Begin Enrollment to start the enrollment process as an FI administrator.
36

Figure 22 – Log in as an FI administrator.
3. Select Institution Type, click FI.
4. GIIN – Enter the FI’s GIIN in the 19-character format XXXXXX.XXXXX.XX.XXX.
5. Click Next.
Figure 23 – IDES GIIN verification page.
6. Confirm information and verify the GIIN, Financial Institution and Country are correct.
7. Click Next to continue and set up Challenge Questions.
37

6.3. Create Challenge Questions
Figure 24 – Create IDES challenge questions.
1. Challenge Question #1
a. Question: Select the drop-down arrow to view a list of questions. Select a challenge question.
b. Answer: Type a response to the challenge question.
2. Challenge Question #2
a. Question: Select the drop-down arrow to view a list of questions. Select a challenge question.
b. Answer: Type a response to the challenge question.
3. Click Next to continue and set up a Username.
38

6.4. Create User Profile
Figure 25 – Submit user profile information.
1. Username – Enter your new username. We recommend first initial and last name. If the username is already taken
you will receive an error message.
2. First Name – Enter your first name.
3. Last Name – Enter your last name.
4. Email – Enter your email address.
a. The email address may be a personal email address or a shared mailbox address.
5. Verify Email – Enter your email address again (must match the previous entry). If it does not match, you will receive
an error message.
6. Password – Create a valid password.
a. The password must be 8-20 characters and include at least one uppercase and lowercase letter, one
number, and one of the designated special characters (~ ! @# % ^ * () ? , .).
b. If you enter a password that does not meet the guidelines, you will receive an error message.
7. Verify Password – Re-type your password (must match the previous entry). If it does not match, you will receive an
error message.
39

6.5. Select Alert Preferences
All IDES system alerts and notifications may be viewed using IDES Reports. This feature allows you to receive emails
regarding the status of your transmission.
Figure 26 – Select IDES alert preferences.
1. Select Alert Preferences – Click on the box next to the alerts you wish to receive by email. You can click
the Check All/None box to choose all alerts or to remove all alerts. There are eight Alert Preferences
40

Alert Preference Description
a.
System Availability Alert
IDES Enrollment and/or IDES Gateway are
unavailable.
b.
Transmission Failed Alert
Transmission uploaded via the IDES Gateway
failed for one of several reasons (e.g., virus,
encryption validation, naming convention,
package content). The email will have an alert
code that you will need to look up on the IDES
Gateway to determine the reason the
transmission failed.
c.
File Available for Download Alert
The user has a file to download on the IDES
Gateway.
d.
File Rejected Alert (for Model 1
Option 2 countries)
Transmission upload was rejected by the
HCTA. The email will have an alert code that
you will need to look up on the IDES Gateway
to determine the reason the transmission was
rejected.
e.
Transmission Alert
Receive all IDES Alerts (See Alerts
b,c,d,f,g,h).
f.
File Uploaded Alert
Received transmission is uploaded to the IRS
for review.
g.
File Posted for Review Alert (for
Model 1 Option 2 countries)
Sent to the HCTA when an FI uploads a report.
h.
File Approved Alert (for Model 1
Option 2 countries)
Sent after HCTA has approved the FI file.
Table 7 – FI IDES Alert Preferences.
2. Click Next to continue to upload digital certificate.
6.6. Upload Digital Certificate
Figure 27 – Upload a digital certificate.
1. Click Browse to search for the security certificate located on computer.
41

Figure 28 – Select a digital certificate.
2. Select the Active/Valid certificate file from your computer.
3. Click Open.
4. Click Validate.
a. It is the responsibility of IDES users to verify that the certificate is valid. If you receive an error message,
refer to Appendix C: Certificate Upload Error Messages
or contact IDES customer support for assistance.
Important: Each entity should obtain a digital certificate issued by an approved CA. The digital certificates should be in
a DER or PEM format.
Figure 29 – Enrollment confirmed.
5. After you have validated your certificate, the enrollment process is complete. You will receive an email from the IDES
help desk that verifies your authorization to access IDES Gateway.
6. Click IDES Enrollment User Log In to log in as the FI administrator.
42

7. Existing Administrators (HCTA and FI)
HCTA and FI administrators can add end users, disable and enable end users, update the certificate, update alert
preferences, create a metadata file, reset passwords, and download the IRS public key.
Note: You may have more than one IDES administrator on your account. To replace an existing administrator, either
the FATCA Registered Responsible Officer (RO) or Point of Contact (POC) must request the change by contacting the
help desk support by email. The requestor must be the same person that is listed in the registration "RO or POC
Name", otherwise the request will be rejected.
Note: Your entity's RO and POC was set-up during the registration of your entity on the IRS website. You can
determine who your entity's RO / POC is by logging into the FATCA Registration portal
on the IRS website.
In the email from your RO/POC we will need the following information:
RO or POC Name:
FI Name:
GIIN:
RO
or POC Email:
We will also need the following:
Name of the New Admin:
Email o
f the New Admin:
Once we receive this information, an invitation to enroll in IDES will be sent to the email address provided to begin the
process (the emailed invitation does expire after 48 hours). After the end-user completes the enrollment process, the
account will be elevated to the role of IDES administrator for the organization.
The change request email should be sent to the Help Desk at questions@ides-support.com
.
7.1. Add a User
End users added under FI and HCTA administrator accounts are able to perform the following functions:
Create a Metadata File.
Update Alert Notifications.
Reset Password.
Download the IRS Public Key.
43

Figure 30 – Add an end user.
1. Click Add User.
44

Figure 31 – Send an enrollment invitation.
2. Email - Type in email address of new end user.
3. Click Send Enrollment Invitation.
Figure 32 – New user added.
4. The new end user will receive an email to register. The link in the email is valid for 48 hours.
5. Confirmation of End User Enrollment Invitation email has been sent.
45

Figure 33 – IDES welcome email.
6. The new end user will receive a copy of the above email. If the end user does not receive this email, contact
IDES customer support for assistance.
7.2. Disable a User
Administrators can disable an end user at any time. Administrators are not authorized to delete accounts, but disabling
an end user account will prevent the end user from accessing their IDES account. Administrators may enable this end
user at a later date.
46

Figure 34 – Disable a user.
1. Click Disable User.
Figure 35 – Select a user to disable.
2. Selected User – Select the end user that you want to disable from the drop down box by clicking the arrow.
3. Click Next.
47
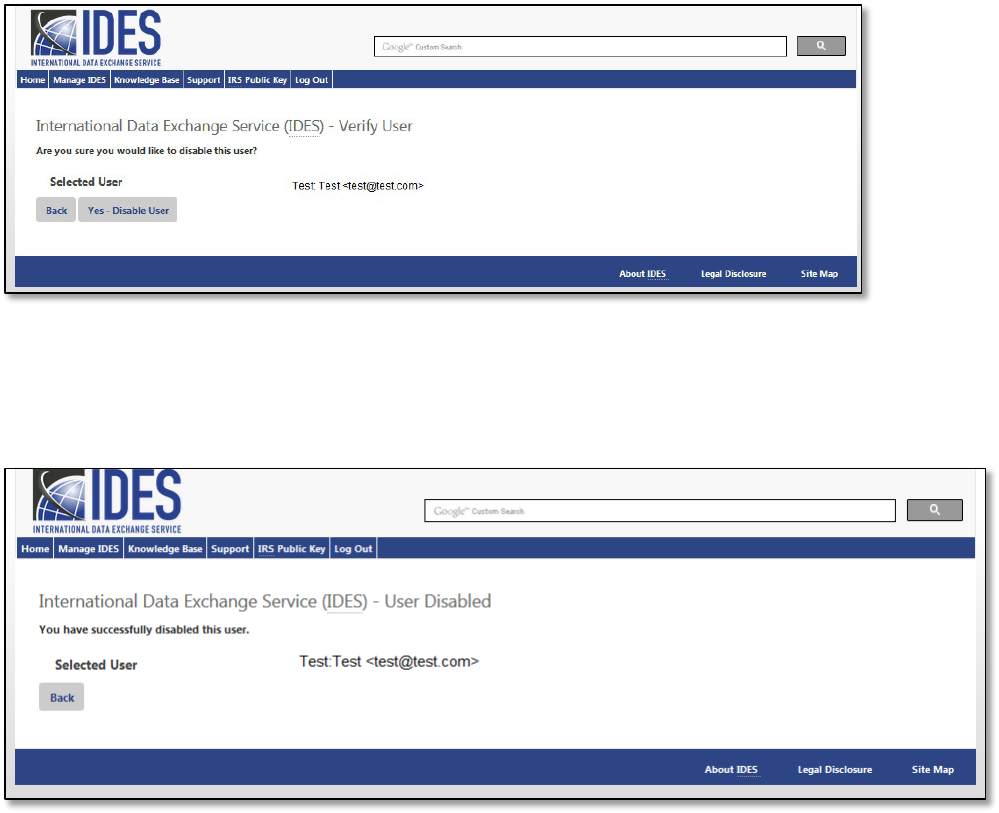
Figure 36 – Verify user to disable.
4. User – Verify that you have selected the correct username.
5. Click Yes – Disable User.
Figure 37 – User disabled confirmation.
6. Receive confirmation that the end user has been disabled.
48

7.3. Enable a User
Administrators can only use the Enable User option to enable end users that were previously disabled. To add a new end
user, administrators must follow the process for Add a User.
After the administrator has enabled the end user, the account and previous password will be active again. If the end user
does not remember his or her password, the administrator can reset the password or the end user can follow the Forgot
Password process.
The Responsible Officer or a Point of Contact must contact the FATCA Help Desk and speak with a representative to
have the access code reset if you are unable to utilize the Forgot FATCA ID or Access Code link on the IDES Login
webpage at https://www.idesgateway.com/
to regain access. Input the User ID and select the Forgot Your Password
link. A temporary password will be emailed to the email address we have on file.
If you selected the Forgot FATCA ID and are still unable to login, the password reset process may have been
successful, but the old failed login webpage is being displayed. We advise users to please clear their internet browsing
application’s cache before selecting the Forgot Password link on the IDES login webpage. The “cache” is a tool used by
your internet browser to speed up the webpage loading process. However, sometimes the cache can cause a problem
when websites are updated, completing forms, logging into an account, etc.
Figure 38 – Enable a user.
1. Click Enable User.
49

Figure 39 – Select a user to enable.
2. Selected User – Select the end user that you want to enable from the drop down box by clicking the arrow.
3. Click Next to confirm.
50

Figure 40 – Verify the user to enable.
4. User – Verify the user to enable.
5. Click Yes – Enable User.
Figure 41 – User enabled confirmation.
6. Receive confirmation that the end user has been enabled.
51

7.4. Update the Certificate
It is the responsibility of IDES users to verify that the certificate is valid. Administrators will need to update invalid or
expired certificates.
Figure 42 – Update a user certificate.
1. Click Update Certificate.
Figure 43 – Upload a digital certificate
2. Click Browse to upload the new certificate from your computer.
52

Figure 44 – Select a digital certificate
3. Click on the certificate file then click Open to load the file.
Figure 45 –Updated digital certificate confirmation.
4. Click Validate to complete the upload of the new certificate. If you receive a certificate error message, refer
to Appendix C: Certificate Upload Error Messages for a complete list or contact IDES customer support.
5. Review confirmation screen of successful certificate update.
53

7.5. Update Alert Preferences
Figure 46 – Update alert preferences.
1. Click Update Alert Preferences.
Figure 47 – Select the user profile to update.
2. Select User – Select the User to update their email alert preferences.
3. Click Next.
54

Figure 48 – Select new alert preferences.
4. User – Verify the username to update the alert preferences.
5. Select Check All/None to choose all alerts or to remove all alerts. Click the checkbox next to the Alert(s) to
receive via email.
6. Select the checkbox next to the item description to lock the setting for each alert. The user cannot make
changes to their alert preferences. There are eight Alert Preferences. Refer to Select Alert Preferences
for
full instructions.
Figure 49 – User alert preferences updated
7. Click Save. Alert preferences have been saved.
55
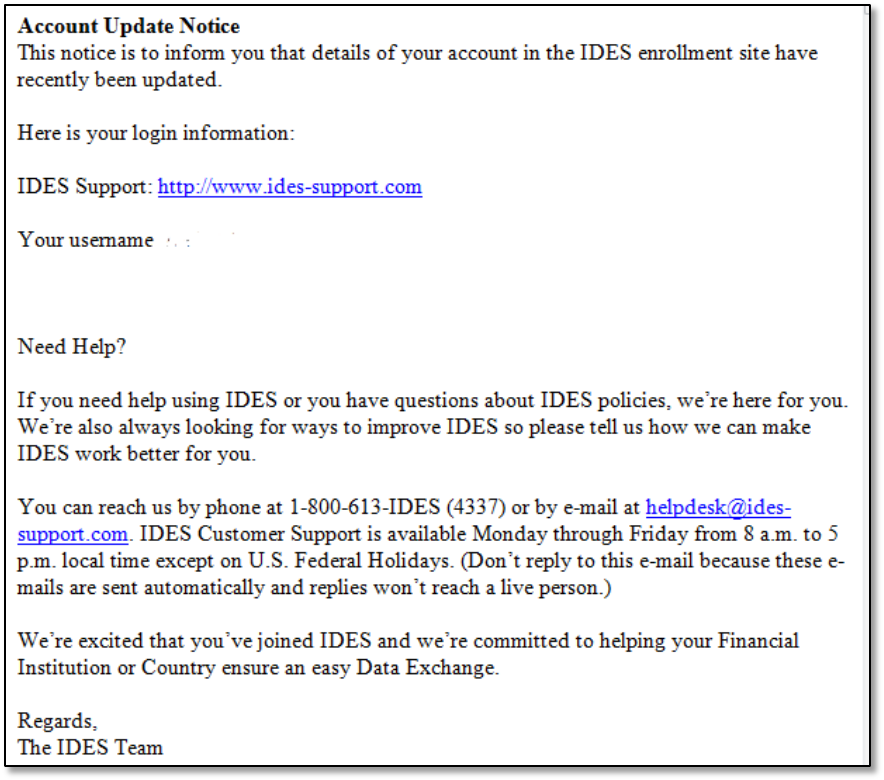
Figure 50 – Email confirmation for updated user alert preference
8. The User will receive an email stating that their preferences have been updated.
56

7.6. Create a Metadata File
Metadata is a collection of data about the content and characteristics of the FATCA reporting files. It is used to ensure
the transmission archives are correctly processed. The metadata file will be included in the transmission archive and may
also be created during the data preparation phase. HCTAs and FIs should create and validate metadata files using
the FATCA IDES Metadata XML Schema v1.2.
Figure 51 – Create a metadata file.
1. Click Create Metadata File.
57

Figure 52 – Enter metadata file information.
2. FI/HCTA Sender GIIN – Enter the FATCAEntitySenderId, such as a GIIN, FIN or HCTA FATCA Entity ID.
3. Receiver (IRS) GIIN – Enter the FATCAEntityReceiverId or recipient receiving the data.
a. For example, the U.S. HCTA FATCA Entity ID: 000000.00000.TA.840
4. Transmission Type – Select the transmission type:
a. RPT = FATCA Report (Default)
b. NTF = FATCA Notification
c. CAR = Competent Authority Request (Reserved. Do not use)
d. REG = FATCA Registration Data (Reserved. Do not use)
e. TEI = Traditional Exchange of Information
5. File Format (Optional) – Select the file format of the message transmitted:
a. XML – Extensible markup language (Default)
b. PDF – Portable document format (IRS use only)
c. TXT – Plain text (Reserved. Do not use)
d. RTF– Rich text format (Reserved. Do not use)
e. JPG – Joint photographic group format (Reserved. Do not use)
6. Binary Encoding (Optional) – Enter the binary encoding scheme code type:
a. NONE – No special encoding (Default)
b. BASE64 – Base64 encoding (IRS use only)
58

Note: User must comply with the below file format and binary encoding pairing:
File Type
Binary Encoding Type
XML
NONE
PDF
Base64
TXT
NONE or Base64
RTF
Base64
JPG
Base64
Table 8 – Metadata File Type and Binary Encoding Type Pairing.
7. Transmission Filename – Enter the transmission file name of the file being uploaded.
8. Transmission Timestamp – Reference the timestamp created by the sender transmission.
9. Tax Year – Enter the FATCA reporting data tax year.
10. Is This a Revised – Select checkbox if the report is a revision to a previously uploaded file.
11. Original File Transmission ID (Optional) – Enter the file name of the original file.
12. Sender Email (Optional) – Enter your email address.
13. Download File As: The default is to download as XML; you can also choose to download as TEXT format.
14. Click Download.
Figure 53 – Metadata sample image
15. Save the Metadata File. The file name for the FATCA XML metadata file is
FATCAEntitySenderId_Metadata.xml.
59

7.7. Reset Password
FI and HCTA administrators can reset the passwords of all end users under the administrator account.
Figure 54 – Reset a password.
1. Click Reset Password.
.
Figure 55 – Select the user to update.
2. Select User – Click on the drop down box to select the end user.
3. Click Next.
60

Figure 56 – Create a new password for the selected user.
4. User – Verify the correct user.
5. Password – Enter the new password.
a. Password Guidelines: The password must be 8-20 characters and include at least one uppercase and
lowercase letter, one number, and one of the designated special characters (~! @# % ^ * () ? , .). If you
enter a password that does not meet the guidelines, you will receive an error message.
b. Once a password has been reset, it cannot be reset again for 24 hours.
c. You cannot reuse any of your last 24 passwords
6. Verify Password – Re-type your password (must match previous entry). If it does not match, you will
receive an error message.
7. Click Next to complete password update.
7.8. Edit User Role
Figure 57 – Edit user role
61

1. Click Edit User Role.
Figure 58 – Select user to update
2. Select the User to be updated from the drop down box.
3. Click Next.
Figure 59 – Select new role for user
4. Select the applicable User role from the drop down box.
5. Admin: User: Allows user changes to the account with no restrictions.
6. End User: Allows user to reset password, update Alert Preferences (if not locked by the administrator),
download the metadata ile and download the IRS public key.
7. Click Save.
62
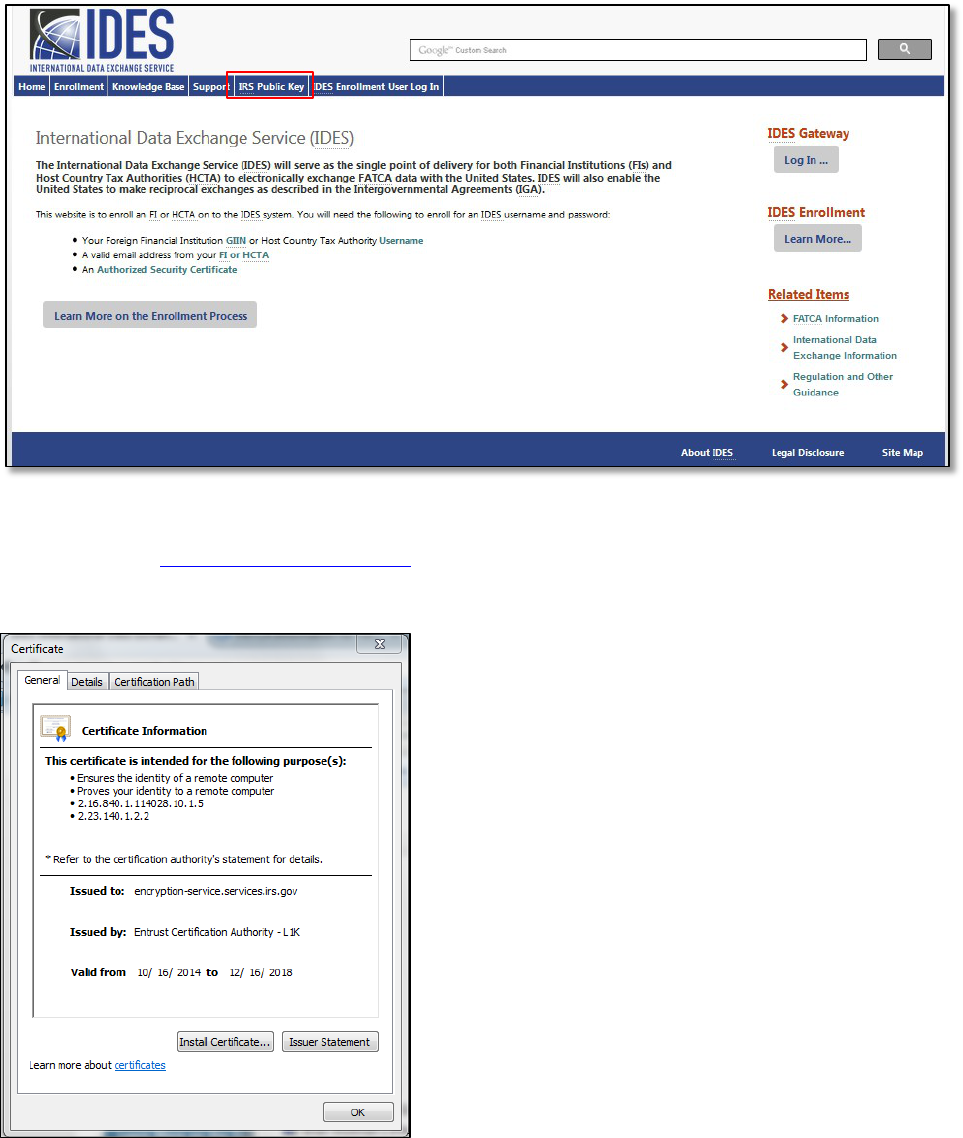
7.9. Download the IRS Public Key
The IRS Public Key should be included in the transmission archive .zip file that is uploaded through the IDES Gateway.
Figure 60 – Download the IRS public key
1. From the IDES Enrollment home page, click the IRS Public Key tab to begin download of the IRS Public Key
Certificate to your computer.
Figure 61 – General certificate information.
2. This certificate should be included in the FATCA reporting transmission archive you upload and transmit to the
IRS via the IDES Gateway.
63

8. End Users
End users are added by the HCTA or FI administrator. End users will receive an Email Registration Invitation from the
IDES help desk in order to complete the IDES enrollment process. The link within the email is valid for 48 hours.
8.1. Create an Account
Figure 62 – IDES new end user welcome email.
1. The new end user will receive a copy of the above email.
2. Users will click on this link within in the email to complete the IDES enrollment process
64

8.2. Create Challenge Questions
Figure 63 – Create IDES challenge questions.
1. Challenge Question #1
c. Question: Select the drop-down arrow to view a list of questions. Select a challenge question.
d. Answer: Type a response to the challenge question.
2. Challenge Question #2
c. Question: Select the drop-down arrow to view a list of questions. Select a challenge question.
d. Answer: Type a response to the challenge question.
3. Click Next to continue and set up a Username.
IMPORTANT: Remember to document your answers to your challenge questions. Users will need these to reset
password or to contact the IDES Help Desk. Note that challenge question responses must exactly match the
responses as originally submitted.
65

Figure 64 – Submit user profile information.
1. Username – Enter your new username. We recommend first initial and last name. If the username is already
taken you will receive an error message.
2. First Name – Enter your first name.
3. Last Name – Enter your last name.
4. Email – Enter your email address.
a. The email address may be a personal email address or a shared mailbox address.
5. Verify Email – Enter your email address again (must match the previous entry). If it does not match, you will
receive an error message.
6. Password – Create a valid password.
66

a.The password must be 8-20 characters and include at least one uppercase and
lowercase letter, one number, and one of the designated special characters (~ ! @ # % ^
* () ? , .).
b.If you enter a password that does not meet the guidelines, you will receive an error
message.
7. Verify Password – Re-type your password (must match the previous entry). If it does not match, you will
receive an error message.
8.4. Select Alert Preferences
Figure 65 – Select IDES alert preferences.
1. Select Alert Preferences – Click on the box next to the alerts you wish to receive by email. You can click the
67

Check All/None box to choose all alerts or to remove all alerts. You must select user preferences to receive
alerts. There are eight Alert Preferences.
Alert Preference Description
a. System Availability Alert
IDES Enrollment and/or IDES Gateway are
unavailable.
b. Transmission Failed Alert
Transmission uploaded via the IDES Gateway
failed for one of several reasons (e.g., virus,
encryption validation, naming convention,
package content). The email will have an alert
code that you will need to look up on the IDES
Gateway to determine the reason the
transmission failed.
c. File Available for Download Alert
The user has a file to download on the IDES
Gateway.
d.
File Rejected Alert (Model 1 Option 2)
Transmission upload was rejected by the
HCTA. The email will have an alert code that
you will need to look up on the IDES Gateway
to determine the reason the transmission was
rejected.
e. Transmission Alert
Receive all IDES Alerts (See Alerts
b,c,d,f,g,h).
f. File Uploaded Alert
Received transmission is uploaded to the IRS
for review.
g. File Posted for Review Alert
(Model 1 Option 2)
Sent to the HCTA when an FI uploads a report.
h. File Approved Alert
(Model 1 Option 2)
Sent after the HCTA has approved the FI file.
Table 9 – IDES Alert Preferences.
2. Click Next to continue to complete enrollment process.
68

Figure 66 – Enrollment confirmation.
3. You have completed the enrollment process as an end user. You will also receive an email from the IDES help
desk that verifies your authorization to access the IDES Gateway.
4. Click IDES Enrollment User Log In to log in as an end user.
8.5. IDES Enrollment User Log In
1. Access the IDES Enrollment site at www.IDES-Support.com.
Figure 67 – IDES enrollment user log in page.
2. Click on the IDES Enrollment User Log In tab.
69
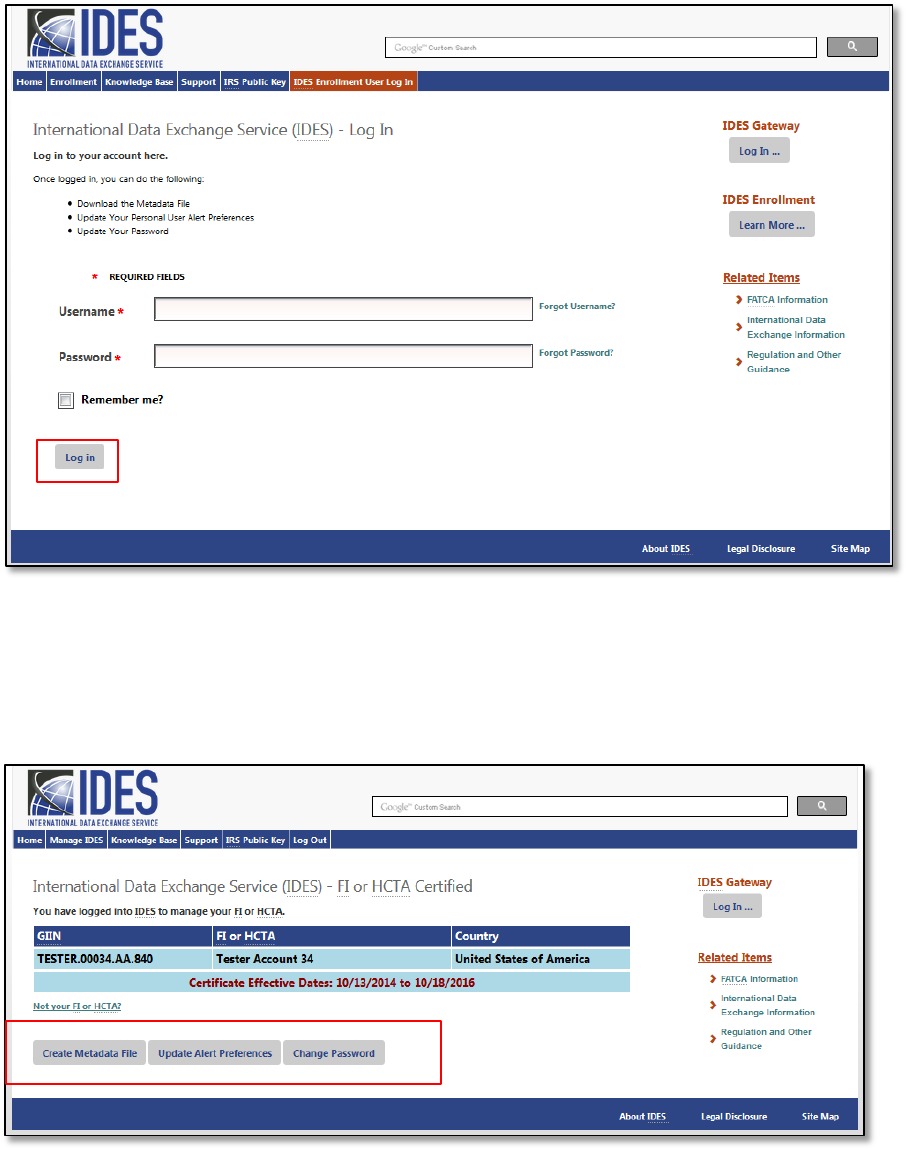
Figure 68 – Log in to the IDES enrollment site.
3. Username – Enter Username
4. Password – Enter Password
5. Click Log in.
Figure 69 – Manage an IDES user account.
6. You are now signed in. You can perform three functions from this screen:
a. Create a Metadata File.
b. Update Alert Preferences.
c. Reset Password.
70
IMPORTANT: Only an IDES administrator can upload a digital certificate.
71

8.6. Create a Metadata File
Metadata is a collection of data about the content and characteristics of the FATCA reporting files. It is used to ensure
the transmission archives are correctly processed. The metadata file will be included in the transmission archive and may
also be created during the data preparation phase. HCTAs and FIs should create and validate metadata files using
the FATCA IDES Metadata XML Schema v1.2.
Figure 70 – Create a metadata file
1. From the Manage FI tab, click Create Metadata File.
2. Refer to Create a Metadata File (Section 7.6) for full instructions.
8.7. Update Alert Preferences
Figure 71 – Update IDES alert preferences.
72

1. From the Manage FI tab, click Update Alert Preferences.
Figure 72 – Selecting new alert preferences.
2. Username will appear in the User field
3. Select the Alert(s) that you want to receive by email. If you want to receive all alerts click the Check All/None box.
Clicking it again will remove all alerts. See Select Alert Preferences for full instructions.
8.8. Reset Password
Figure 73 – Reset a password.
73

Figure 74 – Create a new password.
2. User - Verify your username.
3. Password – Enter a new password.
a. The password must be 8-20 characters and include at least one uppercase and lowercase letter, one
number, and one of the designated special characters (~ ! @# % ^ * () ? , .). If you enter a password that
does not meet the guidelines, you will receive an error message.
b. Once a password has been reset, it cannot be reset again for 24 hours.
c. You cannot reuse any of your last 24 passwords.
4. Verify Password - Re-type your password (must match previous entry). If it does not match, you will receive an
error message.
5. Click Update to complete password update.
8.9. Forgot Username
If an end user forgets their username, they can request a Username reminder email.
74
Figure 75 – Request a username reminder email.
1. Select IDES Enrollment User Log In tab, click Forgot Username?
Figure 76 – Enter an email address for a username reminder message.
2. Email – Enter the email address used to register on the IDES enrollment site.
3. Click Send Username.
75

Figure 77 – Reminder email sent confirmation.
4. Confirmation page showing that username reminder email was sent.
Figure 78 – IDES username reminder email.
5. Check your email for a copy of Username Reminder email. Return to the IDES enrollment home page and
select the IDES Enrollment User Log In tab.
76

Figure 79 –User email address not recognized error message.
Note: If there is not an IDES account associated with the email address entered, you will receive an error message.
Enter the same email that was used for enrollment. If you still receive the error after entering the correct email, contact
the Help Desk.
8.10. Forgot Password
Passwords can be reset on the IDES Enrollment User Log In tab.
Figure 80 – Forgot password reset page.
1. Select IDES Enrollment User Log In tab, click on Forgot Password?
77

Figure 81 – Enter a username to reset a password.
2. Username – Enter your username.
3. Click Next to continue.
Figure 82 – Email sent to users to reset a password.
4. An email will be sent to the email address provided during enrollment. The email will contain a reset code
needed to reset the user’s password
.
78

Figure 83 – Create a new password.
5. Password Reset Code – Enter the reset code you received in your email.
6. Password – Enter your new password.
a. The Password must be 8-20 characters and include at least one uppercase and lowercase letter, one
number, and one of the designated special characters (~ ! @# % ^ * () ? , .). If you enter a password that
does not meet the guidelines, you will receive an error message.
b. You cannot reuse any of your last 24 passwords
7. Verify Password – Re-type your password (must match previous entry). If it does not match, you will receive an
error message.
8. Click Save and return to the IDES Enrollment User Log In tab to log in with your new password.
79
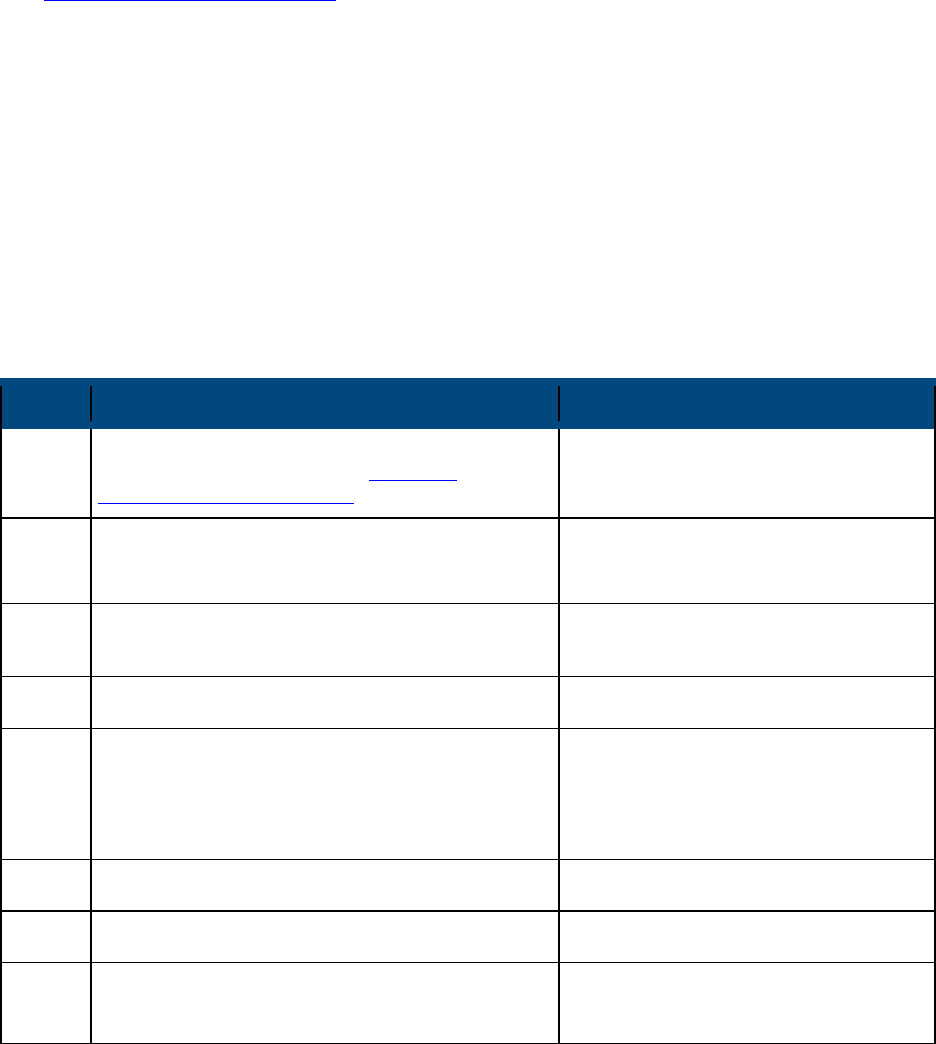
9. Data Preparation for FATCA XML Report
9.1. Overview
This section describes how to prepare a FATCA data file. Before you begin, you must have a valid certificate from
an IRS approved certificate authority.
9.2. Prepare the FATCA XML File
These instructions may change with maintenance updates to the system. IDES will only accept files in .zip format. Each
archive will contain either three or four files depending on the IGA Model and the type of user. These archives will
consist of the following files:
FATCAEntitySenderId_Payload
FATCAEntityReceiverId_Key
HCTAFATCAEntityId_Key (Model 1, Option 2 only)
FATCAEntitySenderId_Metadata.xml
Steps
Process
File Naming Convention
---
Obtain a digital certificate from an approved
Certificate Authority (CA). See Section 3,
Obtaining a Digital Certificate
Not applicable
1
Prepare and validate the FATCA XML file
Digitally sign the file
FATCAEntitySenderId_Payload.xml
2
Compress the FATCA XML file with compatible
zip utility
FATCAEntitySenderId_Payload.zip
3
Encrypt the FATCA XML file with AES-256 key FATCAEntitySenderId_Payload
4
Encrypt AES key and IV with the public key of
each recipient
For Model 1, Option 2 (only). Encrypt AES key
with public key of HCTA
FATCAEntityReceiverId_Key
HCTAFATCAEntityId_Key
5
Create sender metadata FATCAEntitySenderId_Metadata.xml
6
Create the transmission file UTC_FATCAEntitySenderId.zip
7
Transmit the data packet to IDES and receive
delivery confirmation
N/A
Table 10 – Overview process to prepare and send a file.
Note: The file name should be the same size and pattern as the standard data elements FATCAEntitySenderId,
FATCAEntityReceiverId and HCTAFATCAEntityId and stated in a 19-character GIIN format, such as
000000.00000.TA.840_Payload.xml.
80

Process to Prepare and Transmit XML File:
Figure 84 – Data preparation overview.
1. Validate IRS
Digital Certificate
2. Create valid
FATCA XML data
file
FFI Account
Data
3-4. Digitally sign
and compress
XML file
5. Encrypt with
(one time)
AES-256 key
6. Encrypt AES-
256 key + IV with
IRS public key
7. Create
unencrypted XML
header
8. Create
Transmission for
IDES
9. Upload
Transmission to
IDES
Sender
Private Key
AES-256 key
IRS or HCTA
public key
10. Receive IDES
acknowledgement
alert
Step 1 - Prepare and Validate the FATCA XML File
Step 1 explains how to create a sender payload file. Each FATCA XML file contains information about the accounts
required to be reported under FATCA. Ensure that all XML elements have prefixes, do not use default namespaces. For
information on the FATCA XML and related Form 8966 (FATCA Report), see FATCA XML Schemas and Business
Rules for Form 8966.
Step 1a - Sign the XML File
Digital signatures are used to assure data integrity, which means that the messages are not altered in transmission. The
receiver can verify that the received message is identical to the sent message. A sender uses its private key to digitally
sign the message. Senders and recipients of FATCA files will ensure that the file was not corrupted during compression,
encryption, and decryption, or altered during transmission to or from IDES.
81

Process Description File Naming Convention
Sign XML File
Prepare the FATCA reporting data using XML
element prefixes. Do not use the default
namespaces.
To generate the digital signature
1
, the XML file is
processed by a “one-way hashing” algorithm to
generate a fixed length message digest.
Depending on the tool used to perform the digital
signature, a different type of canonicalization
method may be required. The following methods
are acceptable:
o <Canonicalization Method
Algorithm="http://www.w3.org/2001/10/xml-
exc-c14n#"/>
o <Canonicalization Method
Algorithm="http://www.w3.org/TR/2001/REC-
xml-c14n-20010315"/>
IRS requires that the payload file be signed by
first creating a SHA2-256
2
hash. The Sender will
then create an RSA digital signature using the
2048-bit private key that corresponds to the public
key found in the Sender’s digital certificate on
IDES.
After validating the schema, digitally sign the
FATCA XML file using W3C Recommendation
XML Signature Syntax and Processing (Second
Edition)
3
“enveloping” signature.
Use the digital signature “enveloping” type. The
“enveloped and detached” types will cause the
transmission to fail.
The file name is
“FATCAEntitySenderId_Payload.xml”. The file is
case sensitive and any variation in file name or
format will cause the transmission to fail.
FATCAEntitySenderId_Payload.xml
Table 11 – Process to digitally sign a file.
1
Digital Signature Standard (DSS) (FIPS 186-4), July 2013, nvlpubs.nist.gov/nistpubs/FIPS/NIST.FIPS.186-4.pdf
2
Secure Hash Standard (SHS) (FIPS 180-4), March 2012, csrc.nist.gov/publications/fips/fips180-4/fips-180-4.pdf
3
XML Signature Syntax and Processing (Second Edition), June 2008, http://www.w3.org/TR/xmldsig-core/
82

Step 2 - Compress the XML File
The XML file “FATCAEntitySenderId_Payload.xml” should be compressed using a compatible compression utility and
the standard Deflate compression method.
Tools Version Host System
WinZip 17.5 Windows
7-Zip 9.2 Windows or Linux
Windows built-in zip utility N/A Windows
Linux/Unix standard zip utility N/A Linux/Unix
Apple built-in archive utility
MAC OS X 10.3
and later
MAC
Table 12 – Recommended compression tools based on compression testing and supported algorithms.
Compress XML File:
Process Descriptions File Naming Convention
Compress XML
File
The compressed file “zip” is the file extension used
by the compression tool or library.
Other tools may be used but the compression
method must be recognized by one of the five tools
or libraries for the file to be successfully processed.
FATCAEntitySenderId_Payload.zip
Summary
If the file is not recognized or processing fails, the file
will be rejected. The sending partner will receive a
notification that explains the reason for the
transmission failure and how to modify and resubmit
the file.
The file name is
“FATCAEntitySenderId_Payload.zip”. The file is case
sensitive and any variation in file name or format will
cause the transmission to fail.
Note: The current supported compression is ZIP
compression using the standard Deflate compression
method.
N/A
Table 13 – Process to compress a file.
83

Step 3 - Encrypt the XML File with AES 256 Key - Updated
AES is one of the most secure encryption algorithms and the preferred encryption standard for IDES. The file is
encrypted to protect sensitive information.
Encrypt XML File with AES Key:
Process Descriptions File Naming Convention
Encrypt XML
File
After compression, encrypt the file “FATCAEntitySenderId_
Payload.zip” using the AES-256 cipher with a randomly
generated “one-time use” AES key.
There are several steps necessary to perform AES
encryption. IRS recommended settings should be used to
maintain compatibility:
o Cipher Mode: CBC (Chain Block Chaining)
o Salt: No salt value
o Initialization Vector (IV): 16 byte IV. The IV must be
random and unique.
o Key Size: 256 bits / 32 bytes – the key size should be
verified. Moving the key across operating systems can
affect the key size.
o Encoding: None. There can be no special encoding. The
file will contain only the raw encrypted bytes.
o Padding: PKCS#7 or PKCS#5
The AES encrypted file name is
“FATCAEntitySenderId_Payload”. The file is case sensitive
and any variation in file name or format will cause the
transmission to fail.
FATCAEntitySenderId_Payload
Table 14 – Process to encrypt an XML file with an AES key.
Additional information regarding the AES-256 encryption algorithm and keys can be found in:
1. NIST Special Publication 800-57: Recommendation for Key Management – Part 1: General (Revision 3)
2. Advanced Encryption Standard (FIPS 197), November 2001
84

Step 4 - Encrypt the AES Key and IV with Public Key of Recipient – Updated
The next step is to encrypt the AES key with the public key of each recipient. The file is encrypted to protect the AES
key. All FATCA partners must validate the recipient’s X.509 Digital Certificate to an approved CA. An X.509 Digital
Certificate contains the public key for each FATCA partner, including the IRS, and is retrieved from the IDES Enrollment
site.
Encrypt AES Key and IV with Public Key:
Process Description File Naming Convention
Validate
Certificate
To validate the certificate:
1. Verify the certificate chain;
2. Check the revocation status of the certificate chain. There
are two methods:
Retrieve a Certificate Revocation List (CRL) or
Send an Online Certificate Status Protocol (OCSP)
query to a CA designated responder
N/A
Encrypt the After validating the certificate, use the public key from the
recipient’s certificate to encrypt the 32 byte AES 256 key
concatenated with the 16 byte IV. The encrypted value must
be 48 bytes in length.
FATCAEntityReceiverId_Key
AES Key
The public key encryption uses the standard RSA algorithm.
There are several steps necessary to perform AES
encryption. IRS recommended settings should be used to
maintain compatibility:
o Padding: PKCS#1 v1.5
o Key Size: 2048 bits
The encrypted file name is “FATCAEntityReceiverId_Key”.
“FATCAEntityReceiverId” is the 19-character of the recipient
of this AES key
Summary
FATCA reporting with one recipient will have two encrypted
files. The files are case sensitive and any variation in file
name or format will cause the transmission to fail:
1. Symmetric encryption - the AES 256 encrypted FATCA
XML file name is “FATCAEntitySenderId_Payload”
2. Asymmetric encryption - the public key encrypted AES 256
key file name is “FATCAEntityReceiverId_Key”
N/A
Table 15 – Process to encrypt an AES key with a public key.
Note: For most FIs and HCTAs, (e.g., Model 1 (Non-Reciprocal), Model 2 and non-IGA) the IRS is the only recipient.
85

Step 5 - Encrypt the AES Key – Model 1, Option 2
Under IGA, Model 1, Option 2, an FI submits a FATCA XML file to IDES. The HCTA reviews and releases or denies the
file to the IRS. The HCTA and the IRS will decrypt the same FATCA XML file. The FI creates a duplicate of the original
AES 256 key. The duplicate AES 256 key is encrypted with the HCTA Public Key.
Encrypt AES Key – Model 1, Option 2:
Process Description File Naming Convention
Validate
Certificate
See Step 4 – Validate Certificate
Encrypt the
AES Key
After validating the certificate, use the public key from the
recipient’s certificate to encrypt the 48 byte AES 256 key.
The encrypted file name should be
“FATCAEntityReceiverId_Key”. “FATCAEntityReceiverId”
is the 19-character GIIN of the recipient of this AES key
FATCAEntityReceiverId_Key
Encrypt the
AES Key
Encrypt the 48 byte AES key with the public key of the
approving HCTA
The encrypted file name is “HCTAFATCAEntityId_Key”,
where “HCTAFATCAEntityId” is the GIIN of the HCTA
recipient of this AES key
HCTAFATCAEntityId_Key
Summary
FATCA reporting with two recipients should have three
encrypted files. The files are case sensitive and any
variation in file name or format will cause the transmission
to fail:
1. Symmetric encryption - the AES 256 encrypted FATCA
XML file name is “FATCAEntitySenderId_Payload”
2. Asymmetric encryption - the public key encrypted AES 256
key file name is “FATCAEntityReceiverId_Key”
3. Asymmetric encryption - the public key encrypted AES 256
key file name is “HCTAFATCAEntityId_Key”
N/A
Table 16 – Process for a Model 1 Option 2 FI to encrypt an AES key.
Step 6 - Create Sender Metadata File
Users can create a sender metadata file to ensure that recipients accurately process FATCA XML files and notifications.
Notifications are responses sent by the IRS to an FI or HCTA and state whether the file was processed correctly or
contained errors.
A template metadata file is available in XML format as part of the enrollment process. FIs and HCTAs can use the
template to create a metadata file to attach to the payload before uploading to IDES.
The FATCA Sender Metadata XML file is created using the FATCA Metadata XML Schema v1.2 and the file name is
“FATCAEntitySenderId_Metadata.xml.” All FATCA partners must provide the values for the elements in the sender
metadata file. For more information, review the FATCA Metadata XML Schema v1.2 User Guide.
86

Elements Pattern/Size Description
FATCAEntitySenderId 19-character GIIN
format
FATCA partner that submits data
FATCAEntityReceiverId
19-character GIIN
format
FATCA partner receives data
FATCAEntCommunicationTypeCd RPT, NTF, CAR,
REG, ICAP, JA,
EOIR
Indicates the transmission type
RPT - FATCA Report communication
NTF - FATCA Notification communication
CAR - FATCA Competent Authority Request
(IRS use only)
REG - FATCA Registration Data (Reserved. Do
not use)
ICAP – International Compliance Assurance
Program
JA – Joint Audit
EOIR – Exchange of Information Request
SenderFileId 200 References the user provided transmission
filename
FileFormatCd XML, PDF, TXT, RTF,
JPG
XML – Extensible Markup Language
PDF – Portable Document Format
TXT – Plain text
RTF – Rich text format
JPG – Joint photographic group
BinaryEncodingSchemeCd NONE, Base64
FileCreateTs YYYY-MM-
DDTHH:MM:SS.msTZD
References timestamp created by the sender
transmission
TaxYear 4 Indicates the tax year (YYYY format)
FileRevisionInd true, false Indicates if this is a revised transmission
OriginalIDESTransmissionId 32-character unique ID
IDES Transmission ID referencing an update to
an earlier transmission
Optional – Use only after IRS request
SenderContactEmailAddressTxt N/A Sender email address
Table 17 – Sender Metadata Schema summarizes each element.
Note: The sender metadata file is never encrypted because it is used to verify and route transmissions to the correct
recipient.
Note: All other enumerations for FATCAEntCommunicationTypeCd element included in FATCA Metadata XML schema
should not be used unless pre-coordinated/ instructed by the recipient country’s tax authority.
87

Step 7 - Create a FATCA Data Packet
A file that is transmitted through IDES is known as a FATCA data packet or data packet. The data packet is an archive in
.ZIP file format, and it should be created using one of the compatible data compression tools described in Table 3. IDES
only supports data packets in a .ZIP file format with a .zip file extension. The files are case sensitive and any variation in
the file name or format will cause the transmission to fail.
Data Packet File Archive:
Model 1, Option 2 (Only)
Attach 4 Files
All Others Models (1 and 2)
Attach 3 Files
FATCAEntitySenderId_Metadata.xml FATCAEntitySenderId_Metadata.xml
FATCAEntityReceiverId_Key FATCAEntityReceiverId_Key
HCTAFATCAEntityId_Key FATCAEntitySenderId_Payload
FATCAEntitySenderId_Payload
Table 18 – Files contained in a transmission archive or data packet
The file naming convention of data packet is composed of a Coordinated Universal Time (UTC) timestamp and the GIIN
of the sender (FATCAEntitySenderId) as:
UTC_FATCAEntitySenderId.zip
The timestamp format of the UTC is YYYYMMDDTHHMMSSmsZ where:
YYYY = 4-digit year
MM = 2-digit month
DD = 2-digit day
T = letter for separating date and time separating
HH = 24-hour
MM = 2-digit minutes
SS = 2-digit seconds
ms = 3-digit milliseconds
Z= letter Z – the UTC designator
For example, a sender with a FATCAEntitySenderId of “000000.00000.TA.<ISO>” that transmits a data packet on
January 15, 2015 at 16:30:45.230Z can create a data packet named as:
20150115T1630451230Z_000000.00000.TA.840.zip
Step 8 - Transmit Data Packet using IDES
After the archive is uploaded and transmitted, IDES sends an alert to the authorized user via email. The message
provides status information about the file upload. If the upload and IDES file checks are successful, IDES assigns a
unique “TransmissionID” in the email. If there is an error, the IDES alert provides an appropriate error code in the email
message.
88
9.3. Receive an IRS Notification
A notification is a transmission archive or data packet that contains encrypted documents sent from the IRS to an FI or
HCTA. When the IRS sends a notification, IDES sends an email to the authorized user stating that a file is ready for
download. Generally, a file will be available for 7 days. See Section 2.6 File Retention Policy
for more information. The
email correspondence includes the file name of the “TransmissionID” in the original file. Notifications are prepared using
the same process and file components used to prepare the FATCA XML.
Users will need to download and unzip the notification message archive. IDES assigns each notification message a file
name similar to the FATCA data report, such as UTC_FATCAEntitySenderId.zip. Users can also process the elements
contained in the IRS notification. In a notification message, the FATCAEntitySenderId is the IRS and
FATCAEntityReceiverId is either the HCTA or FI.
Steps Process File Naming Convention
1.
Validate the sender metadata file using the IRS Sender
Metadata schema.
FATCAEntitySenderId_Metadata.xml
2.
Use your private key to decrypt the
FATCAEntityReceiverId_Key file
FATCAEntityReceiverId_Key
HCTAFATCAEntityId_Key
3.
The revealed 48 byte AES key will contain the 32 byte AES key
and 16 byte IV. Use these values to decrypt the
FATCAEntitySenderId_Payload.
FATCAEntitySenderId_Payload
4.
Decompress the FATCAEntitySenderId_Payload.zip FATCAEntitySenderId_Payload.zip
FATCAEntitySenderId_Payload.xml
5.
Validate “Enveloping” Digital Signature of the Notification XML
file (the Payload).
N/A
6.
Validate the Notification XML file using the IRS notification
schema.
N/A
Table 19 - Process to open a notification message archive.
89

10.Access the IDES Gateway
10.1. Overview
The IDES Gateway is a web application that allows enrolled HCTAs and FIs to securely upload and download FATCA
data over the Internet using three methods:
• A manual process through a secure web browser at https://www.idesgateway.com.
• An automated process through SFTP for scheduled bulk file transmissions. See Section 11.7, Transmit a File
Using SFTP.
• A link on the IDES Enrollment home page.
For IDES Gateway UI Accessibility information, see Appendix G
1. Connect to IDES using https://www.idesgateway.com
Figure 85 - IDES Gateway accept screen.
2. The URL directs you to the IDES Accept screen. An authorized session begins.
Note: Only users that completed the enrollment process are authorized to access the system. For information on
enrollment, see IDES Enrollment section.
3. Select the I accept box.
4. You are redirected to
IDES Log In screen.
90

Figure 86 – IDES Gateway log in screen.
5. In User ID, enter the username selected during the enrollment process.
a. If you are an HCTA, type the user name provided by the IRS or contact your local Competent Authority for
more information.
6. In Password field, enter the password and click Log In to continue.
Note: The system automatically locks the IDES account after three unsuccessful login attempts.
10.2. Reset Password
1. If the login is unsuccessful after three attempts or you have forgotten your password, you may be required to
reset your password.
2. On the Log in screen, click Forgot Your Password? to go to IDES help desk support.
If you fail to change your
password within 90 days, your account password with expire, and you will no longer be able to authenticate
your IDES credentials. Please use the Forgot Your Password? function to update your password. This will
allow you to sign into the IDES system with your username.
The Responsible Officer or a Point of Contact must contact the FATCA Help Desk and speak with a
representative to have the access code reset if you are unable to utilize the Forgot FATCA ID or Access Code
link on the IDES Login webpage at https://www.idesgateway.com/ to regain access. Input the User ID and
select the Forgot Your Password link. A temporary password will be emailed to the email address we have on
file.
If you selected the Forgot FATCA ID and are still unable to login, the password reset process may have been
successful, but the old failed login webpage is being displayed. We advise users to please clear their internet
browsing application’s cache before selecting the Forgot Password link on the IDES login webpage. The
“cache” is a tool used by your internet browser to speed up the webpage loading process. However, sometimes
the cache can cause a problem when websites are updated, completing forms, logging into an account, etc.
10.3. Session Timeout
An IDES Gateway session will time out after 15 minutes of inactivity.
A warning is displayed on the screen before the timeout occurs in order to maintain the session active.
91

Figure 87 – IDES about to expire session message.
Once it has expired, users will need to return to the Login Page to begin a new session.
Figure 88 – IDES session timeout message.
Select Login Page to enter a username and password.
10.4. User Interface Overview
The following links and features make it easy to navigate the IDES Gateway. User access levels and allowable
transaction types will depend on IGA Model and the type of user. IDES automatically associates a user type and IGA
Model.
Figure 89 - IDES Gateway home screen.
92

Figure 90 – IDES Gateway account home.
User Interface Description
Upload Files/Remote:
Inbox
Download files and notifications from IDES. Data packets can be downloaded
and saved to your computer hard drive.
Outbox
Upload a transmission archive or data packet to IDES. IDES only accepts
transmission archives with .zip extension.
Pending
Applies to countries under IGA Model 1, Option 2 HCTA only.
Upload Button
Transmits files from the Outbox to the receiver.
For example, select Upload to move files from the Outbox to the receiver (U.S.).
Note: For Model 1, Option 2, Upload is disabled.
Uploads Monitor View files and transmission status.
Actions Menu Access to Refresh, Download, Move or View Details.
View Change the display format: grid or list.
Preferences
Select the file transfer mode (Binary or ASCII).
Binary is the default.
Password
Redirect to IDES Support web site (Forgot Password page).
Accessibility
Accessibility menu (keyboard shortcuts).
IDES Support
Open a new tab towards IDES Support web site (Support page).
Logout End the IDES Gateway session.
Table 20 – IDES User Interface Overview.
93

10.5. Preferences
Figure 91 – Select preferences.
1. On IDES Gateway home screen, select Preferences under the account icon.
2. Under Transfer Mode, select Binary or ASCII Text.
Note: Binary mode is the recommend default.
94
11.Transmit a FATCA Report
11.1. IDES Transmission Archive
IDES only accepts transmission archives or data packets with the .zip extension. Most archives will contain a minimum of
3 or 4 files. Data packets that are not in .zip format will be automatically deleted. The sender will receive an alert that the
file has been deleted. Note that this alert, as well as other transmission-related alerts will be sent directly to the user that
transmitted the data, and will not be sent to all users enrolled under the FI or HCTA. Alert details will be stored and may
be viewed by all authorized users via IDES Sentinel Reporting.
An FI under a Model 1, Option 2 IGA does not transmit FATCA reporting data directly to IRS. The FI uploads and
transmits files to their HCTA. The HCTA will download the files and approve or reject the transmission to the IRS. An
HCTA can only approve or reject files from the Pending folder, and cannot make any changes to the files. An HCTA
must move files into ‘Approved’ or ‘Rejected’ folder. Any data packets that do not adhere to the file format will be
automatically deleted.
95

11.2. IDES Transmission ID
An IDES Transmission ID is created when a data packet is transmitted to the IRS. The transmission ID is a unique
32-character length number that identifies the transmission. This transmission ID will be included in both IDES system
alerts and notifications generated by the IRS. File transmission IDs for all transmissions can also be viewed through the
IDES Sentinel Web Monitoring (Sentinel) platform. The original transmission ID is an element in the metadata schema
and can help to monitor and track a specific message.
For example: <ISO>F-weXu2uKAh-UjuL8V6QPEN2IlJgX, represents the ID for a file sent by an HCTA.
11.3. Retransmissions
Retransmissions are FATCA reports that have been revised and re-sent. The FATCA metadata file identifies the revision
with the <FileRevisionInd> element and recognizes the original transmission using the <OriginalIDESTransmissionId>
element. The <OriginalIDESTransmissionId> element helps IDES link the new transmission to the original transmission.
11.4. Folder Structure
The IDES folder directory structure is based on the ISO-3166 standard three-digit country code. Sub-directories are
automatically created based on the entity GIIN and/or ISO country code. FI and HCTA administrators and end users
have the same access to the home directory and other folders. Each HCTA will have sub-folders under its country code
folder. For Model 1 Option 2, each FI under the HCTA will be listed as a sub-folder under the country code folder.
Example: After HCTA login, the IDES Gateway home page shows access to two folders and subdirectories:
Inbox/840 (US) Files from the U.S./recipient available for download
Outbox/840 (US) Files to the U.S. or recipient available for upload
Pending
Model 1, Option 2
Files from FI are pending approval or rejection
Pending/Approved
Model 1, Option 2
If approved, then files are routed to the U.S.
Pending/Rejected
Model 1, Option 2
If rejected, then files are automatically deleted
Table 21 – IDES Gateway folders and subdirectories.
Note: All users of the same entity (FI or HCTA) will have the same access rights, and can see transmissions made by
other users of the same FI or HCTA. There are no shared folders between all IDES users, and no controls to stop users
from uploading files from the same entity.
96

11.5. Transmit a File Using Web UI
Upload a File
Figure 92 – Select and upload files.
On the IDES Gateway home page, select the Outbox and click on folder 840.
1. Click Upload and a dialog box appears that allows you to select files.
2. Select the file(s) and click Open. The file transfer process begins.
3. View the Uploads monitor at the bottom of the screen. The files are then moved from the sender Outbox to the
receiver.
Figure 93 – View file transfer status in uploads monitor.
97

4. After the uploaded files are transmitted from the Outbox, the status appears at the bottom of the screen in the
Uploads monitor.
Figure 94 – File transfer status
5. Uploads are transmitted to the receiver.
6. The files are routed based on the sender and recipient elements defined in the unencrypted FATCA Metadata
XML file or file name FATCAEntitySender_Metdata.xml. The elements
in the metadata schema
<FATCAEntitySenderId> and <FATCAReceiverId> identify the sender and receiver. See Create Sender
Metadata File for more information.
Download a File
Recipients will receive an email alert when files are available to download (to select Alert Preferences settings) .
Under a Model 1A IGA, recipients will receive reciprocal reports that contain specified account information that is
transmitted strictly to the Model 1A HCTA. Both reciprocal reports and IRS
notifications are prepared and encrypted using the same process and file components used to prepare the FATCA XML.
Authorized users will need to download the reciprocal report or notification message archive using the following steps:
Figure 95 – IDES file download screen.
1. On the IDES Gateway main page, navigate to Inbox and click on 840 (United States) to view files available
for download.
98

Figure 96 – Save a file.
2. Click the file to download or select Actions/Download.
3. The file is automatically saved per the browser settings.
4. The file has been downloaded from the Inbox to the hard drive.
99

11.6. Model 1, Option 2 HCTA
FIs under Model 1, Option 2 may only transmit files to their HCTA. After logging in, the FI should follow normal
procedures to upload and transmit files to their HCTA. Once a file is transmitted, the HCTA will receive an IDES alert
indicating that files are available in the HCTA’s Pending folder for download and review. Once reviewed, HCTAs should
move the files in either “Accepted” or “Rejected” folder.
FI upload a file:
1. On the IDES Gateway home page, select the Outbox and click on folder 840.
2. Click Upload and a dialog box appears that allows you to select one or many files.
3. Select the file(s) and click Open. The file transfer process begins.
4. View the Uploads Monitor at the bottom of the screen. The files are then moved from the sender Outbox to the
Pending folder for retrieval by the HCTA.
HCTA download and verify a file:
1. The HCTA file transfer screen displays three folders and subdirectories:
a. Inbox: Files from the US are available for download
b. Outbox: Files to the US (840) may be uploaded
c. Pending: Files from an FI are available for download. An HCTA cannot upload files to the Pending folder.
Files from the Pending folder are moved to the sub-folders “Approved” or “Rejected”.
Figure 97 – Model 1 option 2 folder structure.
1. Select the Pending folder. The folder displays a list of files available for download.
100

Figure 98 – IDES Pending status folder.
2. Select a file to download by clicking on it or using the Actions menu / Download button. The HCTA will
review the files to determine whether to approve or reject.
Figure 99 – IDES file options.
3. After the files are reviewed, select the file and Actions, then select Move. An HCTA may only move and
transmit an archive or data packet. An HCTA cannot upload files to the Pending / Approved / Rejected
folders.
101

Figure 100 – IDES move file options.
4. After a file is moved:
If the file is moved to the Approved sub-folder, the file is routed to the US (840) and alerts/notifications are distributed
If the file is moved to the Rejected sub-folder, the file is automatically deleted and alerts/notification are distributed
5. Approved files should be sent to the IRS and rejected files are automatically deleted.
Note: Files in pending status after seven (7) days are automatically rejected and/or deleted.
Step
Description
1.
User connects to IDES and uploads a .zip transmission archive or data packet into the Outbox 840.
2.
The transmission is routed to a «Pending» folder in the HCTA account based on the HCTA IGA
Model and data elements in the unencrypted FATCA metadata. The transmission is renamed using
the IDES unique Transmission ID as the file name.
3.
An approver (HCTA user account) downloads the file from the «Pending» folder and reviews the file.
The HCTA has 7 days to review the files. All files in the Pending folder exceeding 7 days will be
deleted.
4.
The approver (HCTA user account) moves the file to either Approved or Rejected sub-folder.
5.
The files moved to the Rejected folder are deleted from the system.
6.
The files moved to the Approved folder are routed according to their destination to the US. (3
first characters of the file name).
7.
If a file remains in the «Pending» folder and is not moved to either Approved or
Rejected folder for 7 days, it will be automatically deleted and marked as expired.
Table 22 – Summary description of IDES reporting process for Model 1 Option 2 HCTAs.
102

11.7. Transmit a File Using SFTP
The IDES SFTP Server provides users with secure access to manage and transfer files between hosts over a network.
IDES SFTP authenticates using your username and password. The DNS name must be used for the connection.
The SFTP connection methods shown provide a general overview of the process. You may have a different SFTP
configuration and operating system. Please use one of the recommended SSH Client tools.
Depending on the
configuration, your organization may need to adjust network confirmation (firewall) settings to provide connectivity.
Contact your information technology specialist for assistance with accessing IDES using SFTP.
Figure 101 – Sample SFTP connection.
11.8. Connect to IDES SFTP using Windows Secure Copy (WinSCP):
1. Open your SFTP client. Your SFTP client may have different settings than the one shown as an example.
2. In SFTP Host name, enter https://www.idesgateway.com. The following IP addresses should be exposed (no
firewall restrictions) to send and receive files.
a. Port: 4022
b. External FQDN address:
• www.idesgateway.com
3. When you connect using SSH, you may see an authentication screen. Click Continue.
103

Figure 102 – SSH authentication disclaimer.
4. In User name, enter the user name selected during the enrollment process.
a. If HCTA, type the user name provided by the IRS or contact your local Competent Authority for more
information.
5. In Password, enter your password and click Login.
Figure 103 – SFTP warning dialog.
6. You may be prompted with a Warning message about the server’s secure key.
7. Click Yes to accept the key and continue.
104

Figure 104 – SFTP Connection.
8. You will see your local computer directories on the left pane and the IDES home folders and subfolders in the
right pane. See Folder Structure, for more information.
Go to Inbox/840 to download files from the US.
Go to Outbox/840 to upload files to the US.
9. SSH transfers: Do not attempt to upload a file using a temporary file name and then rename the file. Some tools
attempt to rename files automatically.
a. If using WinSCP: Uploads will fail if WinSCP is configured to upload files such as <filename>.filepart.
This configuration option should be disabled via the following steps:
Navigate to WinSCP > Preferences > Endurance -> "Enable transfer resume / transfer to
temporary filename for"
Disable the above option
Note: IDES SFTP supports password authentication ONLY. The IDES account will expire if you fail to change the
password every 90 days. To update an expired password, go to the IDES Enrollment site or contact IDES help desk
support.
105

12.Alerts
12.1. Overview
IDES issues email alerts via unsecured, plain-text email to all users based on user preference settings. The IDES Alert
contains information about the transmission processing and does not contain any personally identifiable information.
IDES Alerts are sent to both the sender and receiver immediately after the transmission is processed in IDES. All
transmissions are scanned for virus, encryption, and mandatory elements in the metadata XML file. If a transmission fails
the validation checks, the transmission will be deleted. The sender receives an IDES Alert email and is required to
resubmit the transmission for processing. The history of all alerts is available online in Sentinel and can be viewed
through a secure web browser.
HCTA or FFI User
IDES
AlertReasonCd=RC002
AlertReasonCd=RC003
AlertReasonCd=RC004
AlertReasonCd=RC001
Figure 105 – IDES alert flow chart for transmission uploads.
106

12.2. Receive Alerts
See Alert Preferences, for more information on configuring IDES Alerts.
The IDES Alert email message will come from a unique address: [email protected]. The message contains the
following:
IDES unique transmission ID
User-specified file name/ID
User-specified sending application timestamp
From (Sender)
To (Receiver)
Message Type (payload type)
Sending Date/Time Timestamp
Alert Date/Time Timestamp
Alert Code (transmission status)
From: [email protected]
To: Receiver email address
Subject: IDES – Alert for a Transmission
Figure 106 – Sample IDES alert e-mail message.
Note: If a transmission fails processing, it will be automatically deleted. When a transmission fails to upload, only partial
elements are available in the alert message because the metadata file could not be processed. The transmission
archive must be corrected and resubmitted.
107

13.IDES Reports
13.1. IDES Sentinel Overview
IDES Sentinel provides monitoring and reporting for all transmissions on a record-by-record basis. Sentinel will
correlate the events and store multiple data records that describe the end-to-end flow of every file transferred using
IDES. Users can query the system for all events and search, filter and view the transmission history. Sentinel’s
monitoring features allow the user to:
Execute and filter predefined queries to analyze the data in the repository based on specific parameters.
Retrieve historical information about alerts and notifications.
Note: All users enrolled with IDES can access Sentinel through IDES Sentinel Web Monitoring and/or Sentinel Web
Dashboard. All FI and HCTA users can view the alert and transfer history of all uploaded files and notifications that
pertain to their entity only.
It includes a set of predefined reports that will be available to all authorized users of a given FI or HCTA.
Report/Query
Description
List of All Report Alerts To display a list of all transmissions.
List of Failed Transmissions To display a list of all failed transmissions (uploads or downloads).
List of Transmission Downloads
To display a list of all successful transmissions downloaded by the FFI
or HCTA
List of Transmission Uploads
To display a list of all successful transmissions uploaded by the FFI or
HCTA.
List of Transmission Not Downloaded
within Last 7 days
To display a list of all transmissions not downloaded by a user within last
7 days. Expired transmissions.
List of Transmission Downloads (Model
1 Option 2 ONLY)
To display a list of all transmissions downloaded by a Model 1 Option 2
HCTA.
List of Transmissions to Be Reviewed
(Model 1 Option 2)
To display a list of all transmissions to be reviewed by a Model 1 Option
2 HCTA.
Table 23 - Summary of Sentinel available reports.
13.2. System Timeout
A session expires after 15 minutes of inactivity. When a session expires, the login window will appear.
108

13.3 Connect to IDES Sentinel Web Dashboard using web browser
1. Enter directly the IRL:
https://visibility.idesgateway.com/SentinelWebDashboard
2. Accept the disclaimer
Figure 107 – Sentinel disclaimer banner.
If you select Cancel, you are redirected to the IDES Enrollment site. Note: Only users that have completed the
enrollment process are authorized to access the system.
3. Sentinel Web Dashboard login page is displayed
Figure 108 - Sentinel Web Dashboard login page
4. Enter Username / Password to access IDES Web Dashboard.
5. Successful Login will result into IDES Web Dashboard home page:
109

Figure 109 - Sentinel Web Dashboard home page
13.4 Understanding Web Dashboard interface
13.4.1
Web Dashboard home page
Web Dashboard interface home page is displayed with the following sections:
Title Bar – It displays the logged in Username on the top right side.
Figure 110 – Web Dashboard title bar
110

Floating Menu – A floating menu in the center of the home page. This menu can be adjusted on either
side of the Home page. Once done, the browser caches its position and it doesn’t need to be adjusted
every time the dashboards page is launched.
Figure 111 – Web Dashboard floating menu
Adjusting the floating menu on the Left side. This can be done by dragging and dropping it on the Left side.
Figure 112 – Adjusting Web Dashboard menu
111

13.4.2 Working with Web Dashboards – Executing a dashboard
1. By default, the dashboard list is displayed in the “Web Dashboards” section under the Main dashboard menu.
Figure 113 - Main dashboard menu
2. Click on the dashboard – “List of All Report Alerts Dashboard” to display the results.
Figure 114 – Select a dashboard
Figure 115 - Dashboard result
112

3. Executing the IDES Life Cycle Report from the dashboard.
i) Browse to the end of the table displaying the records on the dashboards.
ii) A column with label “Details” contains the link to the IDES Life Cycle Report.
Figure 116 - Dashboard transmission details link
iii) Click on the link “Details” from any row. It will display the Life Cycle of that particular file transmission.
Figure 117 – Selected transmission details
Figure 118 – Transmission details minimized view
113

iv) Click on the detail window, a Life Cycle view of a particular file transmission is displayed as shown
below.
Figure 119 – Transmission details extended view
13.4.3 Understanding Dashboard Filters
1. After executing any dashboard with the default values for filters, the filter list can be accessed for
modifying default values as shown below:
Click on the “Filter” icon as shown below above the dashboard header:
Figure 120 - Dashboard filter icon
Figure 121 – Filter in dashboard view
114

2. A small floating window is displayed showing all the filters for the dashboard.
Figure 122 – Dashboard filter menu
Date and Time filters
i) Date and Time filters are used to filter file transmissions using a combination of date and time values.
ii) By default, these filters are set to display data for the last 24 hours.
iii) User can specify any value for the date and time as per the calender object display below:
Figure 123 – Dashboard date and time filter
iv) These filters are only applicable on following fields wherever used in dashboards:
Alert Date
Alert Time
115

Selection list filters
i) These filters provides a list of values to users for filtering the data.
ii) Users can select a single value from the drop-down list.
Figure 124 – Dashboard list filter
Figure 125 - Dashboard drop down filter list
NOTE:
Users can only select a single value from the selection list.
Text Type Filters
i) These filters are provided to users to explicitly type values for filtering data using a combination with
alphabets.
ii) For example – entering ‘NTF’ will return records that contain ‘NTF’ anywhere within the text string.
Figure 126 - Dashboard text filter
116

13.4.4 Navigating between dashboards.
From the IDES Life Cycle Report, a user can move back to the dashboard as shown below.
The highlighed Flow shows the navigation control from one dashboard to another.
Figure 127 – Dashboard navigation from detailed view
Selecting the dashboard with label “List of All Report Alerts” will display the parent dashboard back on the
Interface.
Figure 128 – Dashboard main result view
13.4.5 Manual Refresh on Dashboards.
On the Top Left side, A small icon as mentioned below is provided to do a manual refresh on the dashboard.
Figure 129 – Dashboard refresh icon
117

Figure 130 – Refresh icon in dashboard view
Clicking the icon will result in refreshing the dashboard.
13.4.6 Generating Reports from Dashboards
After executing any dashboard from the “Web Dashboards” menu. Click on the icons marked for a PDF or an
These icons export the data as mentioned below:
i)
- PDF Export
ii)
- Excel export
iii)
- CSV export
iv) - html export
Click on icon for “PDF Export” to generate a PDF report.
Excel export of the data.
Figure 131 – Result export from dashboard view
118

Figure 132 – Dashboard PDF export
Similarly, use the icon for “Excel export” to generate an report in Excel format.
Figure 133 – Dashboard Excel export
Similarly, use the icon for “CSV or html export” to generate an report in CSV or html format
13.5 Search Transmission and Alert History
On a monthly basis, alerts, notifications, and reports will be stored in an electronic file format such as CSV or PDF. Alerts
will be available online for 90 days and then archived. An FFI or HCTA with various end users can only view the alert
history of files and notifications that pertain to their entity. If you need assistance retrieving historical account information,
contact IDES help desk support.
13.6 View Search Results
In Sentinel, all transmission events are color-coded based on transmission status. See Appendix E: IDES Alert Codes.
Event
Description
Black
Transmission event still processing
Green
Transmission event completed successfully
Brown
Transmission event completed but with exception
(expiration without expected action)
Red
Failed Transmission (transmission deleted)
Table 24 - Sentinel Color-Coded Transmission Events.
119

13.7 IDES Visibility- Transmission Overview
13.7.1 List of All Report Alerts
The report corresponds to the current status of all transmissions where the IDES user is either the sender (file upload)
or receiver (file download). It is a combination of all report alert types and also includes the file available for download.
The most current status related to the transmission upload will be reported.
Based on current configurations, the following return codes will be displayed in the reports:
Return
Code
Description
RC001
File Uploaded
RC002
Anti-Virus Check Error
RC003
Encryption Check Error
RC004
Metadata Check Error
RC005
File Rejected
RC006
HCTA File Expired After 7 Days (Model 1 Option 2 only)
RC007
File Expired After 7 Days
RC008
Invalid Sender GIIN
RC012
GIIN Not Match Payload
RC013
GIIN Not Match Key
RC014
Payload Missing
RC015
Key Missing
RC016
HCTA Key Missing (Model 1 Option 2 only)
RC018
Package Name Error
RC019
Metadata Missing
RC020
Certificate Failure
RC021
File Available for Download
RC022
File Available for Review (Model 1 Option 2 only)
RC023
Upload-Approved by Tax Authority (Model 1 Option 2 only)
RC024
Receiver Downloaded
RC025
Invalid Zip Package
RC026
Too Many Files in Package
RC027
Package Contain Folder
RC028
Invalid HCTA Key Name
RC029
Upload-Waiting Tax Authority (Model 1 Option 2 only)
RC030
Downloaded by the HCTA Reviewer (Model 1 Option 2 only)
RC999
Unexpected error
Table 25 - Sentinel Report Return Codes.
120

13.7.2 List of Failed Transmissions
The report corresponds to all possible transmission errors. The transmission is deleted with the error type DL.
All the failed transmissions should be red colored in the report.
Code Reason Description / Action
Transmission Deleted – Type: DL
RC002 Anti-Virus Check Error
The data packet failed IDES validation. One or more files in the data
packet are infected with malware. The metadata file may be infected if
the other files are correctly encrypted.
The sender must perform an anti-virus check to clean the data packet
and retransmit.
RC003
Encryption Check
Error
The data packet failed IDES validation. One or more files in the data
packet are not encrypted as required.
The sender must encrypt the FATCA XML document and the AES
key as required in the data packet and retransmit.
RC004
Metadata Check
Error
The data packet failed IDES validation. The metadata XML
document is not valid against the metadata XML schema.
The sender must include a valid metadata XML document in the
data packet as required and retransmit.
RC005 File Rejected
The data packet passed IDES validation but it was rejected by the
Model 1 Option 2 HCTA.
The sender must contact the corresponding HCTA directly to
address any concerns and retransmit.
RC008 Invalid Sender GIIN
The data packet failed IDES validation. The file name of the data
packet does not contain a FATCAEntitySenderID in the correct
format.
The sender must include a FATCAEntitySenderID as part of the data
packet file name in the correct format and retransmit.
UTC_FATCAEntitySenderId.zip
RC012
GIIN Not Match
Payload
The data packet failed IDES validation. The FATCAEntitySenderID
in the data packet file name does not match the
FATCAEntitySenderID in the payload or metadata file names.
The sender must include the same FATCAEntitySenderID across
the data packet as required and retransmit.
RC013 GIIN Not Match Key The data packet failed IDES validation. The receiver key filename does
not match the receiver key.
When a file is uploaded in Outbox\840, the package should contain
a key file named 000000.00000.TA.840_Key
Action: Review/Fix the Key filename and resubmit
121

Code Reason Description / Action
RC014 Payload Missing
The data packet failed IDES validation. The data packet does not
contain a payload file.
The sender must include a payload file in the data packet as
required and retransmit.
The data packet should contain 3 files:
1. FATCAEntitySenderId_Payload
2. FATCAEntityReceiverId_Key
3. FATCAEntitySenderId_Metadata.xml
RC015 Key Missing
The data packet failed IDES validation. The data packet does not
contain an AES key.
The sender must include an AES key in the data packet as required
and retransmit.
The data packet should contain 3 files:
1. FATCAEntitySenderId_Payload
2. FATCAEntityReceiverId_Key
3. FATCAEntitySenderId_Metadata.xml
RC016
HCTA Key Missing
(Model 1 Option 2)
The data packet failed IDES validation. The data packet does not
contain the Model 1 Option 2 HCTA key.
The sender must include the Model 1 Option 2 HCTA key in the data
packet as required and retransmit.
The data packet should contain 4 files:
1. FATCAEntitySenderId_Payload
2. FATCAEntityReceiverId_Key
3. HCTAFATCAEntityId_Key
4. FATCAEntitySenderId_Metadata.xml
RC018 Package Name Error
The data packet failed IDES validation. The file name of the data
packet does not contain an underscore.
The sender must set an underscore as the data packet file name
separator and retransmit.
UTC_FATCAEntitySenderId.zip
RC019 Metadata Missing
The data packet failed IDES validation. The data packet does not
contain a metadata file.
The sender must include a valid metadata XML document as
required and retransmit.
The data packet should contain 3 files:
1. FATCAEntitySenderId_Payload
2. FATCAEntityReceiverId_Key
3. FATCAEntitySenderId_Metadata.xml
RC020 Certificate Failure
The data packet failed IDES validation. The digital certificate in the
data packet is expired, revoked, or invalid.
The sender must include a valid certificate from an approved
certificate authority as required in the data packet and retransmit.
122

Code
Reason
Description / Action
RC025
Invalid Zip Package
The data packet failed IDES validation. The data packet was not
archived as required.
The sender needs to archive the data packet using a compatible Zip
compression tool or algorithm as required and retransmit.
RC026
Too Many Files in
Package
The data packet failed IDES validation. One or more extra files are
included in the data packet. The data packet should contain ONLY 3
files or 4 files (for Model 1 Option 2).
The sender must include only the required files in the data packet
and retransmit.
RC027
Package Contain
Folder
The data packet failed IDES validation. A folder is included in the
data packet.
The sender must delete the folder and all its contents from the data
packet and retransmit.
RC028
Invalid HCTA Key
Name
The data packet failed IDES validation. The data packet contains an
invalid Model 1 Option 2 HCTA key.
The sender must include a valid Model 1 Option 2 HCTA key in the
data packet as required and retransmit.
The filename used for the reviewer key is incorrect. The reviewer
key name must match the Sender country code.
If the user belonging to the country XXX submitted a package, the
second key should be named:
000000.00000.TA.XXX_Key
RC999
Unexpected Error
The data packet failed IDES validation. The data packet contains an
unexpected error.
The sender should first retry the transmission, and if the same error
(RC999) persists, the sender should contact the IDES Help Desk
and open a ticket to have the IDES team troubleshoot the issue
Table 26 – List of Alert Codes for Failed Transmissions.
123

13.7.3 Examples of Transmission Alerts
The report corresponds to all transmissions uploaded to IDES by FATCA users with their different statuses. As a result,
this report is a combination of different colored coded events.
The last status should be a green colored event for each IDES Transmission ID; otherwise, this indicates that the file is
still processing or failed after the submitter received an RC001.
Successful Upload
The report will show 3 events for a given file upload or IDES Transmission ID with the last status being a successful
download by the IRS
.
Code
Reason
Description / Action
RC001 File Uploaded
Transmission uploaded – Type: SA
The data packet passed IDES validation and is now available for
download by the receiver.
No action is required from the sender.
RC021 File Available for Download Transmission downloaded – Type: RD
File available for download by the receiver (IRS).
No action is required from the sender.
RC024 Receiver Downloaded
Transmission downloaded – Type: SA
The data packet passed IDES validation and was downloaded by
the receiver (IRS).
Action: The sender should get a notification regarding their
submission. The folder Inbox\840 has to be watched for
download.
Table 27 – Successful Transmission Upload.
Successful Upload- Certificate Failure
The report will show 4 events for a given file upload or IDES Transmission ID with the last status being a failure.
Code
Reason
Description / Action
RC001 File Uploaded Transmission uploaded – Type: SA
The data packet passed IDES validation and is now available for
download by the receiver.
No action is required from the sender.
RC021 File Available for Download Transmission downloaded – Type: RD
File available for download by the receiver (IRS).
No action is required from the sender.
124

Code Reason Description / Action
RC024 Receiver Downloaded
Transmission downloaded – Type: SA
The data packet passed IDES validation and was downloaded by
the receiver (IRS).
Action: The sender should get a notification regarding their
submission. The folder Inbox\840 has to be watched for
download.
RC020 Certificate Failure
Transmission Deleted – Type: DL
The data packet failed IDES validation. The digital certificate in the
data packet is expired, revoked, or invalid.
The sender must include a valid certificate from an approved
certificate authority as required in the data packet and retransmit.
Table 28 - Certificate Failure.
Successful Upload – File Expired and Not Downloaded by IRS
The report will show 3 events for a given file upload or IDES Transmission ID with the exception of the last status (file
expiration). The file expired without any download action by FATCA users. These transmissions are deleted with the
error type DL.
Code
Reason
Description / Action
RC001 File Uploaded
Transmission uploaded – Type: SA
The data packet passed IDES validation and is now available for
download by the receiver.
No action is required from the sender.
RC021 File Available for Download Transmission downloaded – Type: RD
File available for download by the receiver (IRS).
No action is required from the sender.
RC007 File Expired After 7 Days Transmission deleted – Type: DL
The data packet passed IDES validation but it was not
downloaded by the IRS during the 7 day window and it has
expired.
The receiver should contact the IDES helpdesk for additional
support.
Table 29 - Expired Transmissions Not Downloaded by IRS.
125

13.7.4 Examples of Transmission Alerts - Model 1 Option 2
Successful Upload (HCTA Approved)
The report will show a minimum of 5 events for a given file upload or IDES Transmission ID. The sender country’s HCTA
may not download the FFI file, or download the file several times. If the HCTA downloads the FFI more than once, each
download will appear separately.
Code
Reason
Description / Action
RC029 File Uploaded
Transmission uploaded – Type: SA
The data packet passed IDES validation and is now available for
download and approval by the Model 1 Option 2 HCTA.
No action is required from the sender.
RC022 File Available for Review
Transmission downloaded – Type: RD
File available for download by the reviewer in the pending folder
Action: No action from the sender
Reviewer (sender country’s HCTA) must download the file made
available in the pending folder
RC030 Downloaded by the HCTA
Reviewer
Transmission downloaded – Type: SA
The data packet passed IDES validation and was downloaded by
the receiver (sender country’s HCTA).
Action: No action from the sender
Reviewer (sender country’s HCTA) must move the file made
available in the pending folder based on expected action:
.approved or .rejected
RC023 Upload-Approved by Tax
Authority
The data packet passed IDES validation and has been approved
by the Model 1 Option 2 HCTA. It is now available for download by
the receiver.
No action is required from the sender
RC021 File Available for Download
Transmission downloaded – Type: RD
File available for download by the receiver (IRS).
No action is required from the sender.
RC024 Receiver Downloaded Transmission downloaded – Type: SA
The data packet passed IDES validation and was downloaded by
the receiver (IRS).
Action: The sender should get a notification regarding their
submission. The folder Inbox\840 has to be watched for
download.
Table 30 – Model 1 Option 2 Approved Upload.
126

Successful Upload (HCTA Rejected)
The report will show a minimum of 3 events for a given file upload or IDES Transmission ID. The sender country’s HCTA
may not download the FFI file, or download the file several times. If the HCTA downloads the FFI file more than once,
each download will appear separately.
The last status will show as a failure (file rejected).
Code
Reason
Description / Action
RC029 File Uploaded
Transmission uploaded – Type: SA
The data packet passed IDES validation and is now available for
download and approval by the Model 1 Option 2 HCTA.
No action is required from the sender.
RC022 File Available for Review Transmission downloaded – Type: RD
File available for download by the reviewer in the pending folder
Action: No action from the sender
Reviewer (sender country’s HCTA) must download the file made
available in the pending folder
RC030 Downloaded by the HCTA
Reviewer
Transmission downloaded – Type: SA
The data packet passed IDES validation and was downloaded by
the receiver (sender country’s HCTA).
Action: No action from the sender
Reviewer (sender country’s HCTA) must move the file made
available in the pending folder based on expected action:
.approved or .rejected
RC005 File Rejected
Transmission deleted – Type: DL
The data packet passed IDES validation but it was not
downloaded by the receiver during the 7 day window and it has
expired.
The sender must contact the receiver to address any concerns
and retransmit.
The receiver is either an FFI/HCTA or the IRS. The same code is
used for both directions and the alert is sent to both the sender
and receiver.
It means that if IRS did not download a file when IRS is a receiver,
until the notification process is fixed, they should know why it has
not been downloaded via the FAQ.
The receiver should contact the IDES helpdesk for additional
support.
Table 31 – Model 1 Option 2 Transmission File Rejected.
127

each download will appear separately. The last status will be an exception (file expired).
Code
Reason
Description / Action
RC029 File Uploaded Transmission uploaded – Type: SA
The data packet passed IDES validation and is now available for
download and approval by the Model 1 Option 2 HCTA.
No action is required from the sender.
RC022 File Available for Review
Transmission downloaded – Type: RD
File available for download by the reviewer in the pending folder
Action: No action from the sender
Reviewer (sender country’s HCTA) must download the file made
available in the pending folder
RC030 Downloaded by the HCTA
Reviewer
Transmission downloaded – Type: SA
The data packet passed IDES validation and was downloaded by
the receiver (sender country’s HCTA).
Action: No action from the sender
Reviewer (sender country’s HCTA) must move the file made
available in the pending folder based on expected action:
.approved or .rejected
RC006 HCTA File Expired After 7
Days
Transmission deleted – Type: DL
The data packet passed IDES validation but it was not
downloaded by the receiver during the 7 day window and it has
expired.
The sender must contact the receiver to address any concerns
and retransmit.
The receiver is either an FFI/HCTA or the IRS. The same code is
used for both directions and the alert is sent to both the sender
and receiver.
It means that if IRS did not download a file when IRS is a receiver,
until the notification process is fixed, they should know why it has
not been downloaded via the FAQ.
The receiver should contact the IDES helpdesk for additional
support.
Table 32 – Expired Upload: No Action from HCTA.
128

each download will appear separately
The last status will be an exception (file expired).
Code Reason Description / Action
RC029 File Uploaded Transmission uploaded – Type: SA
The data packet passed IDES validation and is now available for
download and approval by the Model 1 Option 2 HCTA.
No action is required from the sender.
RC022 File Available for Review
Transmission downloaded – Type: RD
File available for download by the reviewer in the pending folder
Action: No action from the sender
Reviewer (sender country’s HCTA) must download the file made
available in the pending folder
RC030 Downloaded by the HCTA
Reviewer
Transmission downloaded – Type: SA
The data packet passed IDES validation and was downloaded by
the receiver (sender country’s HCTA).
Action: No action from the sender
Reviewer (sender country’s HCTA) must move the file made
available in the pending folder based on expected action:
.approved or .rejected
RC023 Upload-Approved by Tax
Authority
The data packet passed IDES validation and has been approved
by the Model 1 Option 2 HCTA. It is now available for download by
the receiver.
No action is required from the sender
RC021 File Available for Download
Transmission downloaded – Type: RD
File available for download by the receiver (IRS).
No action is required from the sender.
RC007 File Expired After 7 Days Transmission deleted – Type: DL
The data packet passed IDES validation but it was not
downloaded by the IRS during the 7 day window and it has
expired.
The receiver should contact the IDES helpdesk for additional
support.
Table 33 – Expired Upload: No Action from IRS.
129

Appendix A: Acronyms
Acronym Definition
AES
Advanced Encryption Standard
CA Certificate Authority
CRL Certificate Revocation List
DER
Distinguished Encoding Rules
FATCA
Foreign Account Tax Compliance Act
FCPA
Federal Common Policy Root CA
FFI
Foreign Financial Institution
FI
Financial Institution
FTP
File Transfer Protocol
GIIN
Global Intermediary Identification Number
HCTA Host Country Tax Authority
HTTPS Hypertext Transfer Protocol Secure
IDES International Data Exchange Service
IGA Intergovernmental Agreement
IRS Internal Revenue Service
NFFE Non-Financial Foreign Entity
NTF Notification Communication
OCSP Online Certificate Status Protocol
PEM Privacy Enhanced eMail
PKI Public Key Infrastructure
PMO Project Management Office
RPT
FATCA Report Communication
RSA Rivest, Shamir and Adleman
SFTP Secure File Transfer Protocol
SSH Secure Shell
TFI Territory Financial Institution
TIEA Tax Information Exchange Agreement
TLS
Transport Layer Security
USWA
United States Withholding Agents
UTC
Coordinated Universal Time
XML Extensible Markup Language
Table 34 – Table of acronyms used in this document.
130

Appendix B: File Naming Convention
File Name
Description
Associated IGA
Group
FATCAEntitySenderId_Payload Encrypted payload using a randomly generated
one-time use key (preference: AES-256)
All
FATCAEntityReceiverId_Key Key encrypted using the receiver public key All
HCTAFATCAEntityId_Key Key encrypted using HCTA public key Model1 Option 2
FATCAEntitySenderId_Metadata.xml FATCA Metadata to ensure that recipients
properly process FATCA XML reports. FATCA
Metadata XSD will be published on the IRS
website
Note: A text version of the FATCA metadata
SenderGIIN_Metadata.txt will be accepted for
partners not familiar with xml.
N/A
UTC_FATCAEntitySenderId.zip N/A N/A
Table 35 – IDES file naming conventions.
131

Appendix C: Certificate Upload Error Messages
Status
Description
CtlNotSignatureValid
Specifies that the certificate trust list (CTL) contains an invalid signature.
CtlNotTimeValid
Specifies that the certificate trust list (CTL) is not valid because of an invalid
time value, such as one that indicates that the CTL has expired.
CtlNotValidForUsage
Specifies that the certificate trust list (CTL) is not valid for this use.
Cyclic
Specifies that the X509 chain could not be built.
HasExcludedNameConstraint
Specifies that the X509 chain is invalid because a certificate has excluded a
name constraint.
HasNotDefinedNameConstraint
Specifies that the certificate has an undefined name constraint.
HasNotPermittedNameConstraint
Specifies that the certificate has an impermissible name constraint.
HasNotSupportedNameConstraint
Specifies that the certificate does not have a supported name constraint or has
a name constraint that is unsupported.
InvalidBasicConstraints
Specifies that the X509 chain is invalid due to invalid basic constraints.
InvalidExtension
Specifies that the X509 chain is invalid due to an invalid extension.
InvalidNameConstraints
Specifies that the X509 chain is invalid due to invalid name constraints.
InvalidPolicyConstraints
Specifies that the X509 chain is invalid due to invalid policy constraints.
NoError
Specifies that the X509 chain has no errors.
NoIssuanceChainPolicy
Specifies that there is no certificate policy extension in the certificate. This error
would occur if a group policy has specified that all certificates must have a
certificate policy.
NotSignatureValid
Specifies that the X509 chain is invalid due to an invalid certificate signature.
NotTimeNested
Deprecated. Specifies that the CA (certificate authority) certificate and the
issued certificate have validity periods that are not nested. For example, the CA
cert can be valid from January 1 to December 1 and the issued certificate from
January 2 to December 2, which would mean the validity periods are not
nested.
NotTimeValid
Specifies that the X509 chain is not valid due to an invalid time value, such as a
value that indicates an expired certificate.
NotValidForUsage
Specifies that the key usage is not valid.
OfflineRevocation
Specifies that the online certificate revocation list (CRL) the X509 chain relies
on is currently offline.
PartialChain
Specifies that the X509 chain could not be built up to the root certificate.
RevocationStatusUnknown
Specifies that it is not possible to determine whether the certificate has been
revoked. This can be due to the certificate revocation list (CRL) being offline or
unavailable.
Revoked
Specifies that the X509 chain is invalid due to a revoked certificate.
UntrustedRoot
Specifies that the X509 chain is invalid due to an untrusted root certificate.
Table 36 – IDES Certificate Upload Error Messages.
132

Appendix D: HCTA FATCA Entity ID Composition
A Global Intermediary Identification Number or GIIN is issued to FIs and direct reporting NFFEs to identify themselves to
withholding agents and tax administrations for FATCA reporting.
The GIIN is a 19-character identification number that is a composite of several other identifiers.
In lieu of a GIIN, HCTAs will be issued an HCTA FATCA Entity ID. The HCTA FATCA Entity ID represents each country
under an IGA and contains the following identifiers:
Format: 000000.00000.TA.<ISO>
Characters
Position
Description
000000 1-6 N/a
Separator 1 7 Period =.
00000 8-12 N/A
Separator 2 13 Period =.
TA
Category Code
14-15 HCTA = Tax Authority
Separator 3 16 Period =.
XXX
Country Identifier
17-19 Numeric ISO 3166-1 numeric standard country code of
the Tax Authority
Table 37 – IDES HCTA FATCA Entity ID composition.
133

Appendix E: IDES Alert Codes
Note: The list provides an overview of the IDES alert codes you may receive after submitting a transmission archive
using IDES. If a transmission is deleted, then the data packet was not transmitted. Review the alert code, correct the
transmission archive, and retransmit. If you need assistance, refer to the IDES User Guide, IDES web pages
or contact
IDES Customer Support.
Code
Reason
Description / Action
To
Sender
To
Receiver
(IRS)
To
Reviewer
(HCTA)
Type: SA: - Transmission uploaded successfully
RC001 Successful upload
(including all IDES
validation checks)
The data packet passed IDES validation
and is now available for download by the
receiver.
No action is required from the sender.
X
RC029 Successful upload
(including all IDES
validation checks),
waiting for HCTA
approval
(Model 1 Option 2)
The data packet passed IDES validation
checks and is now available for
download and approval by the Model 1
Option 2 HCTA.
No action is required from the sender.
X
RC023 Successful upload and
approval by the HCTA
(Model 1 Option 2)
The data packet passed IDES validation
checks and has been approved by the
Model 1 Option 2 HCTA. It is now
available for download by the receiver.
No action is required from the sender.
X
Type: DL - Transmission deleted
RC002 Failed virus check in
IDES
The data packet failed IDES validation.
One or more files in the data packet are
infected with malware.
If the files are properly encrypted, this
likely indicates that the metadata file is
the infected file. The sender must
perform a complete anti-virus check to
clean the data packet and retransmit.
X
RC003 Failed encryption check
in IDES
The data packet failed IDES validation.
One or more files in the data packet are
not encrypted as required.
The sender must encrypt the FATCA
XML document and the AES key as
required in the data packet and
retransmit.
X
134

Code Reason Description / Action To
Sender
To
Receiver
(IRS)
To
Reviewer
(HCTA)
RC004 Failed FATCA Metadata
schema check in IDES
The data packet failed IDES validation.
The metadata XML document did not
validate against the metadata XML
schema.
The sender must include a valid
metadata XML document in the data
packet and retransmit.
X
RC005 Transmission was
rejected by the sender’s
HCTA (Model 1 Option 2)
The data packet passed IDES validation
but it was rejected by the Model 1 Option
2 HCTA.
The sender must contact the
corresponding HCTA directly to address
any concerns and retransmit.
X X X
RC006 No actions taken by the
sender’s HCTA (Model 1
Option 2); transmission
expired after 7 days
The data packet passed IDES validation
but it was not approved by the Model 1
Option 2 HCTA during the 7 day
approval window and it has expired.
The sender must contact the
corresponding HCTA directly to address
any concerns and retransmit.
X X X
RC007 Transmission ready for
receiver to download, but
expired after seven (7)
days
The data packet passed IDES validation
but it was not downloaded by the
receiver during the 7 day window and it
has expired.
The sender should review the FAQs on
IRS website or contact the IDES help
desk for additional support to address
any concerns and retransmit.
X X
RC008 Invalid
FATCAEntitySenderID or
GIIN
The data packet failed IDES validation.
The file name of the data packet does not
contain a valid FATCAEntitySenderID that
is in the correct format.
The sender must include a valid
FATCAEntitySenderID in the correct
format as part of the data packet file
name and retransmit.
X
RC009 Invalid Receiver GIIN Not used X
RC010 Sender not authorized for
the Receiver
Not used X
RC011 Receiver not authorized
for the Sender
Not used X
135

Code Reason Description / Action To
Sender
To
Receiver
(IRS)
To
Reviewer
(HCTA)
RC012 FATCAEntitySenderID or
GIIN does not match the
payload or metadata
The data packet failed IDES validation.
The FATCAEntitySenderID in the data
packet file name does not match the
FATCAEntitySenderID in the payload file
name and/or metadata file name.
The sender must include the same
FATCAEntitySenderID across the data
packet as required and retransmit.
X
RC013 Receiver GIIN does not
match the key
The data packet failed IDES validation.
The data packet contains an invalid
receiver key file.
The sender must include a valid receiver
key file in the data packet as required
and retransmit.
X
RC014 Payload missing The data packet failed IDES validation.
The data packet does not contain a
payload file.
The sender must include a payload file in
the data packet as required and
retransmit.
X
RC015 Key missing The data packet failed IDES validation.
The data packet does not contain an
AES key.
The sender must include an AES key in
the data packet as required and
retransmit.
X
RC016 Approving HCTA key
missing
(Model 1 Option 2)
The data packet failed IDES validation.
The data packet does not contain the
Model 1 Option 2 HCTA key.
The sender must include the Model 1
Option 2 HCTA key in the data packet as
required and retransmit.
X
RC018 Package filename error The data packet failed IDES validation.
The file name of the data packet does
not contain an underscore.
The sender must set an underscore as
the data packet file name separator and
retransmit.
X
136

Code Reason Description /Action To
Sender
To
Receiver
(IRS)
To
Reviewer
(HCTA)
RC019 Metadata missing The data packet failed IDES validation.
The data packet does not contain a
metadata file.
The sender must include a valid
metadata XML document as required
and retransmit.
X
RC020 Invalid certificate The data packet failed IDES validation.
The digital certificate in the data packet
is expired, revoked, or invalid.
The sender must include a valid
certificate from an approved certificate
authority as required in the data packet
and retransmit.
X
RC025 Invalid zip package file The data packet failed IDES validation.
The data packet was not archived as
required.
The sender needs to archive the data
packet using a compatible Zip
compression tool as required and
retransmit.
X
RC026 Too many files in
package
The data packet failed IDES validation.
One or more extra files are included in
the data packet. The data packet should
contain only 3 files (or 4 files in the case
of a sender in a Model 1 Option 2
jurisdiction).
The sender must include only the
required files in the data packet and
retransmit.
X
RC027 Zip package contains a
folder
The data packet failed IDES validation. A
folder is included in the data packet.
The sender must delete the folder and all
its contents from the data packet and
retransmit.
X
RC028 Invalid approving HCTA
key name
(Model 1 Option 2)
The data packet failed IDES validation.
The data packet contains an invalid
Model 1 Option 2 HCTA key.
The sender must include a valid Model 1
Option 2 HCTA key in the data packet as
required and retransmit.
X
137

Code Reason Description /Action To
Sender
To
Receiver
(IRS)
To
Reviewer
(HCTA)
RC999 Unexpected error The data packet failed IDES validation.
The data packet contains an unexpected
error.
The sender should first retry the
transmission, and if the same error
(RC999) persists, the sender should
contact the IDES Help Desk and open a
ticket to have the IDES team
troubleshoot the issue
X
Type: RD - Transmission available for download
RC021 Available for receiver to
download
(Model 1 Option 2)
The data packet passed IDES validation
and is now available for download by the
receiver.
No action is required from the sender.
X
RC022 Available for HCTA
review (Model 1 Option
2)
The data packet passed IDES validation
and is now available for download by the
Model 1 Option 2 HCTA for review.
No action is required from the sender.
The Model 1 Option 2 may download and
review the data packet from the Pending
folder.
X
X
Type: SA - Transmission downloaded
RC024 Downloaded by the
receiver
The data packet passed IDES validation
and was downloaded by the receiver.
No action is required from the sender.
X
RC030 Downloaded by the
HCTA reviewer (Model 1
Option 2)
The data packet passed IDES validation
and was downloaded by the Tax
Authority approver.
No action is required from the sender.
X
X
Table 38 – Types of Alerts.
138

Appendix F: Data Preparation User Tips
Due to the implementation of highly secured data transmissions, sometimes it can be challenging to trace the source of a
data transmission problem. In response to user questions and common user errors, the IRS has compiled a list of tips to
assist users with the data preparation and transmission processes.
If you identify any issues that are not covered here, please forward comments to [email protected]v. Due to the
volume of questions received, responses to these issues will be addressed through future updates to this document or in
IDES FAQs rather than via personalized responses
The suggestions below represent the most common solutions. The solutions are grouped into four categories:
Data Package
Payload file
Key file
Metadata file
All validation checks apply to the production and test environments. Certain critical errors will cause the immediate
rejection of a transmission, and additional error checks will not be performed. Be aware that even if you correct the initial
error, your transmission package may be rejected again if additional errors are found.
Overall Package
1. The transmission packet is in an incorrect format (not ZIP). The file extension must be .ZIP.
2. The file was compressed with an incorrect compression algorithm.
All files must be compressed using the standard Deflate algorithm and common ZIP tools such as WinZip, 7Zip, etc.
More information can be found at http://www.irs.gov/Businesses/Corporations/Compression-tools.
3. The data packet has an incorrect file name.
The data packet filename must be in the format UTC_FATCAEntitySenderId.zip, where UTC represents a timestamp
including milliseconds.
For example, the filename 20150115T163045320Z_000000.00000.TA.124.zip represents a file submitted by the
Host Country Tax Authority (HCTA) for Canada created at 2015 January 15 16:30:45.320 Z.
4. The transmission packet contains subfolders.
The transmitted ZIP file may not contain subfolders and data packets should only contain archived files at the root
level.
5. The transmission packet contains additional files.
There are too many files archived in a folder. The ZIP file should only contain one payload file, one metadata file, and
either one or two keys. No other files can be included. Ensure you have the proper naming
UTC_FATCAEntitySenderId.zip.
139

- -
Type of File Model 1, Option 2 (Only) Attach 4 Files Models 1 & 2 Attach 3 Files
Metadata FATCAEntitySenderId_Metadata.xml FATCAEntitySenderId_Metadata.xml
Key File(s): FATCAEntityReceiverId_Key FATCAEntityReceiverId_Key
HCTAFATCAEntityId_Key N/A
Payload FATCAEntitySenderId_Payload FATCAEntitySenderId_Payload
Table 38 – Data Packaging Tips.
6. The transmission packet failed virus scan.
The transmission packets are scanned for viruses during the upload process and will be rejected and/or deleted if a
virus or other threats are detected.
Payload file
7. The payload was not attached to the file.
A valid XML payload is required with each transmission packet. The requirement also applies to test packages. If the
payload file is not present, the transmission is rejected even if the other parts of the data packet are created properly.
8. The payload file was not in the proper XML format.
The payload file must be in XML format document and created according to the published XML schema. If the data is
presented in a non-XML format, your transmission will be rejected.
9. The payload file has an incorrect filename.
The payload file name must be in the proper naming convention or format FATCAEntitySenderID_Payload.
For example, if the sender is an HCTA, the file name should be 000000.00000.TA.NNN_Payload, where NNN is the
three digit ISO code for the HCTA’s country. Note that there is no extension on the file. Also check for correct
capitalization.
10. The payload file is not encrypted or fails entropy check.
It is not possible to determine whether a file is properly encrypted. IDES applies an entropy check to determine if a
file was likely to be encrypted. If the file does not pass the entropy check, it will not be accepted. Encrypt the payload
using a randomly generated AES-256 key with the following settings:
• Cipher Mode: CBC
• Salt: No Salt
• Initialization Vector: 16 byte IV
• Key size: 256 bits/32 bytes
• Encoding: None
• Padding: PKCS#5 or PKCS#7
11. The payload file is not signed.
The payload file must be digitally signed by the sender using the standard RSA digital signature method. More
information can be found at http://www.irs.gov/Businesses/Corporations/Digital-Signatures-for-Data-Preparation.
12. The digital signature is not valid.
IDES requires an enveloping signature and the SHA2-256 algorithm. If an incorrect digital signature type or algorithm
is used, the digital signature will fail validation. Any changes to the XML after the digital signature has been
performed will cause the validation to fail. There are digital signature validation tools available that can be used to
verify the signature is valid before submission.
13. The digital signature used the wrong signature type, such as enveloped or detached.
The XML must be signed with an enveloping digital signature. If the wrong digital signature type is applied the data
packet will fail validation. If you create a different kind of signature but move the signature block within the XML file
so that it appears to be an enveloping signature, the file will still fail validation.
140

14. The key used for signature does not match the certificate store.
The private key used to perform the digital signature must correspond with the certificate that was uploaded during
IDES enrollment. IRS sample keys and certificates should not be included as part of the data packet.
15. The file contained incorrect encryption settings. The file may contain one or more incorrect settings, such as:
• Wrong cipher mode
• Salt settings
• Wrong key size
• Encoding applied
• Wrong padding
More information can be found at http://www.irs.gov/Businesses/Corporations/IDES-Data-Transmission-and-File-
Preparation or review Item 10 above.
16. The FATCA XML Schema v1.1 contains invalid elements.
Only elements described in the published XML schema may be used. Certain elements are required in the
transmitted payload XML. Review the FATCA XML Schema v1.1 User Guide at http://www.irs.gov/pub/irs-
utl/Pub5124UserGuide.pdf for details.
17. The FATCA XML Schema v1.1 contains illegal characters.
Certain characters cannot be used in the FATCA data packet or must be replaced with entity references. Review the
information at http://www.irs.gov/Businesses/Corporations/FATCA-XML-Schemas-and-Business-Rules-for-Form-
8966 for details.
Note that some signature tools may insert illegal characters in the KeyInfo element when generating a signature. The
KeyInfo element should be removed before submitting the data packet.
Key files
18. There is no key file in the transmission data packet.
A key file representing each receiver for the package must be present in the data packet.
19. The key file has an incorrect file name.
The key file name must be in the correct format FATCAEntityReceiverId_Key. Files received by the IRS should have
a file named 000000.00000.TA.840_Key.
20. The data packet has the incorrect key size.
The unencrypted key file should have a length of 48 bytes (32 bytes for AES, plus 16 bytes for IV). Encrypt the key
file and place it in the archived data packet. The key size should be 256 bytes. Verify the key size before and after
encryption. If you move the key file between operating systems, it may add extra characters that cause an incorrect
key size or transmission failure.
21. The key file is not encrypted or fails entropy check.
It is not possible to determine whether a file is properly encrypted. IDES applies an entropy check to determine if a
file was likely to be encrypted. If the file does not pass the entropy check, it will not be accepted. Encrypt the payload
using a randomly generated AES-256 key with the following settings:
• Cipher Mode: CBC
• Salt: No Salt
• Initialization Vector: 16 byte IV
• Key size: 256 bits/32 bytes
• Encoding: None
• Padding: PKCS#5 or PKCS#7
141

- -
22. The key file is encrypted with an incorrect key.
The key must be encrypted with the AES public key of the recipient. For files received by the IRS, use the public key
available at www.ides-support.com.
23. The wrong padding was used during the encryption process.
The padding used during the key encryption must be PKCS#1 v1.5. Ensure the tool used to perform the encryption
has the correct padding settings.
24. The data packet is missing the second key file (Model 1 Option 2 Only).
If you submit under Model 1 Option 2, there should always be two keys present in the archived data packet. One key
for the IRS and the second key will be used by the HCTA.
More information on keys required for the Model 1 Option 2 can be found in Step 5, Section 9.2 of the IDES User
Guide.
25. The data packet contains a second key file and you are not under a Model 1 Option 2 (M1O2) IGA.
Only submitters under a Model 1 Option 2 agreement should submit a data packet with two key files. All other
submitters should submit an archived data packet that contains only one key file.
Type of File Model 1, Option 2 (Only) Attach 4 Files Models 1 & 2 Attach 3 Files
Metadata FATCAEntitySenderId_Metadata.xml FATCAEntitySenderId_Metadata.xml
Key File(s): FATCAEntityReceiverId_Key FATCAEntityReceiverId_Key
HCTAFATCAEntityId_Key N/A
Payload FATCAEntitySenderId_Payload FATCAEntitySenderId_Payload
Metadata file
26. The metadata file has an incorrect file name.
The metadata file name must be in the recommended format FATCAEntitySenderId_Metadata.xml.
For example, if the sender is an HCTA, the file name should be 000000.00000.TA.NNN_Metadata.xml, where NNN
is the three digit ISO code for the HCTA’s country
27. The metadata file is encrypted.
The metadata file must NOT be encrypted. IDES reads the metadata file and uses the elements to identify and route
the transmission.
28. There are invalid elements in the metadata schema.
Please review the Metadata user guide for information on the fields to use in the Metadata file.
29. There are missing required elements in the metadata schema.
IDES validates the following mandatory elements in the metadata Schema:
• FATCAEntitySenderID (see #31 below)
• FATCAEntityReceiverID
• FATCAEntCommunicationTypeCd
• SenderFileID
• FileCreateTS
• TaxYear (see #33 below)
• FileRevisionInd
142

30. There is an incorrect type code (NTF or RPT) in the metadata schema.
All FATCA reporting files submitted to the IRS should have the transmission type code RPT. RPT is the only
allowable entry. The NTF code is used for Notifications that are sent in response by IRS. If the incorrect code
(NTF) is used on a report, the file cannot be processed and will fail validation.
31. The metadata SenderID element does not match the IDES account used.
The SenderID in the metadata file must represent the GIIN associated with the user who is logged in to IDES and
transmitting the data packet.
32. The metadata ReceiverID element is not the IRS GIIN.
The ReceiverID in the metadata file must be the IRS GIIN: 000000.00000.TA.840.
33. The metadata TaxYear element is invalid or missing. A valid TaxYear must be specified.
34. The metadata file contains illegal or restricted characters.
Certain characters are prohibited and must be encoded or replaced with entity references. Review the information
at http://www.irs.gov/Businesses/Corporations/FATCA-XML-Schemas-and-Business-Rules-for-Form-8966
for details.
IDES Testing Window
The IDES Open Testing windows provide users with a safe test environment (PSE) to submit test FATCA Report files in non-
production to troubleshoot data file submission issues. Enrolled IDES users can log into the PSE/testing environment during
open testing windows to submit their files using the same credentials used for production.
Periodically, there may be FATCA system upgrades that would necessitate an ad-hoc open test window. There is one annual
open test windows per year regardless of whether there have been changes to the FATCA Reporting process.
Your participation in IDES open testing is voluntary.
Additional information on the IDES testing is found on the IDES Testing Schedule
webpage.
Please subscribe to the FATCA News and Information List to stay current on IRS news, guidance, regulations, reporting process
changes, and testing windows.
Notice: Please DO NOT submit production files to the test environment nor test files to the production environment.
143
Appendix G: IDES Gateway UI Accessibility
Getting Started
Visually-impaired users can use Secure Transport Web Client with screen reader applications. Web Client has
passed accessibility validation for visually-impaired users with JAWS (Job Access with Speech) on Windows.
Tips when using JAWS
If you are using Job Access with Speech (JAWS) as your screen reader, we recommend using Internet Explorer as
your browser with the latest version of JAWS. You do not need to change the screen reader setting for use with Web
Client.
When in the Forms mode you can also use Web Client keyboard shortcuts to navigate faster and easier. To enter
the Forms mode at any time, turn off the virtual cursor and press JAWS + z to hear when the virtual cursor is turned
off or on.
Tips when using NVDA
If you are using Non Visual Desktop Access (NVDA), we recommend using Mozilla Firefox as your browser. You do
not need to change the screen reader setting to navigate around Web Client.
NVDA will automatically enter the Focus mode when focus is on a tabs control, on a Remote folder. The Focus mode
allows you to use the arrow keys to navigate between files and folders, tabs.
When in the Focus mode you can also use Web Client keyboard shortcuts to navigate faster and easier. To toggle
between the Focus and Browse mode at any time press NVDA + SPACEBAR to hear a specific tone for each
mode.
Accessing Web Client
The following topics describe accessing Web Client with a screen reader.
Logging in
To log in with a screen reader:
1. Use the TAB key to navigate between fields.
2. TAB to the User ID edit box and type in your user identification.
3. TAB to the Password edit box, type in your password and press ENTER. You are taken to the default view of
Web Client. Alternatively, focus and press the Log In button.
Recovering your password
If you forgot your password:
On the login page use the TAB key to focus the Forgot Your Password link and activate it.
144

Session timeout
After a period of inactivity Web Client will automatically log out. To log in again, focus and activate the Login Page
link.
Navigating Web Client
The following topics describe navigating Web Client with a screen reader.
Navigation overview
By default, after logging in the focus is on the Remote Folders tab. To navigate through the list of files and folder,
press the DOWN and UP arrows. To open an item, press o or Enter.
Web Client has a number of keyboard shortcuts to make navigation faster and easier. For a complete list of
keyboard shortcuts, refer to the Shortcut Tables.
Another fast and easy way to navigate using the screen reader built-in commands:
• For JAWS users: JAWS + F7 to display the Links list, JAWS + F6 to display the Headings list, and JAWS + F5
to Select a form field
• For NVDA users: NVDA + F7 to display the Elements list with links, headings, and landmarks
Note that when the focus is on a tab control; the screen reader commands are automatically disabled and allows the
usage of keyboard shortcuts.
To regain control of the virtual cursor and to use screen reader commands:
• For JAWS users: Press the NUMPAD PLUS key to hear the virtual PC cursor enabled. Alternatively, you can
press ESC or ENTER.
• For NVDA users: Press NVDA + SPACEBAR to hear the specific tone for the Focus mode.
Web Client buttons and menus
The Web Client button and menus enable you to perform actions on your files, folders, and messages. Most of these
buttons and menu actions have keyboard shortcuts for quick access. To navigate you can also use TAB or SHIFT +
TAB.
145
Managing Files and Folders
The following topics provide instructions for managing files and folders with a screen reader.
Open folders
To open a folder from your Remote Folders view list:
1. Use the DOWN and UP arrows to navigate through the list. If you have switched to icons view, use the RIGHT
and LEFT arrows.
2. To open a folder, press Enter.
Upload a file
To upload a file in a remote folder:
1. Navigate through the IDES Gateway list and open the folder where you want to upload the file.
2. Press the Upload Files button or, if you are using shortcuts, press u.
3. Use TAB to focus the Select file to upload button and press SPACEBAR to activate.
4. Select the files to be uploaded and then press ENTER.
Download a file
To download a file from a remote folder:
1. Navigate through the IDES Gatewya list and select the file you want to download.
2. Press the Download button or, if you are using shortcuts, press d or ENTER.
3. Use your browser file download feature to complete the download.
Move a file
To move a file from one remote folder to another:
1. Navigate through the IDES Gateway list and select the file you want to move.
2. Press the Actions button to open the actions menu or, if you are using shortcuts, press a.
3. Press the DOWN arrow until you reach the Move command and then press ENTER.
4. Navigate through the IDES Gateway list and select the folder where you want to move the file.
5. Press the DOWN arrow until you reach the target folder and then press ENTER.
Read details about a file or folder
To read more details about a file or folder:
1. Press the Actions button to open the actions menu or, if you are using shortcuts, press a.
2. Press the DOWN arrow until you reach the Properties command and then press ENTER.
3. A dialog will be focused with the details listed in a table. You can use the DOWN an UP arrows to quickly read
the list using your screen reader.
Alternatively, if you are using shortcuts, press CTRL + i to display the Properties dialog without using the Actions
menu.
Using the Uploads monitor
The Transfers queue is a region of the application where you can track the status of uploaded files.
In the screen reader you can see if a transfer is in progress, finished, or failed. You can also pause and resume
running transfers, as well as delete finished or running transfers.
146
Although it can be collapsed and expanded, the contents are visible to screen reader users and accessible with
TAB, even when the region is collapsed.
To quickly focus on the Transfer queue:
• Use screen reader commands to focus on and activate the Transfers queue heading two link – either available
from the list of links or from the list of headings
• Use the Go to keyboard shortcuts for Web Client. The shortcut to open the Transfers queue is g then q
• While focused on the browser address bar press SHIFT + TAB. The Transfers list is the last item in Web Client
and will immediately be focused
Pause or resume a transfer
To pause or resume a running transfer:
1. Focus on the Transfers queue.
2. TAB to focus on the Transfers list and use the UP and DOWN arrow keys to select a transfer.
3. Press the Pause or Resume buttons or, if you are using shortcuts, press p or r.
Delete a transfer
To delete a transfer:
1. Focus on the Transfers queue.
2. TAB to focus on the Transfers list and use the UP and DOWN arrow keys to select a transfer.
3. Press the Delete button or, if you are using shortcuts, press DELETE or #.
Keyboard Shortcuts for Web Client
Web Client has a number of keyboard shortcuts to make navigation faster and easier.
For the best experience screen readers automatically enable the use of shortcuts when focused on a tabs control, on
a Remote folder.
To allow use of shortcuts at any time:
• For JAWS users: Press JAWS + z to hear that the virtual cursor is turned off. Press the same combination, if you
want to turn the virtual cursor on again.
• For NVDA users: Press NVDA + SPACEBAR to hear the specific tone for the Focus mode. Press the same
combination, if you want to return to browse mode again.
147

Tables
Use following list of keyboard shortcuts instead of mouse actions to perform actions in Web Client:
Application
To do this Press
Go to the previous tab Ctrl + Left or Ctrl + Page Up
Go to the next tab Ctrl + Right or Ctrl + Page Down
With focus on a tab, go to the previous tab Left
With focus on a tab, go to the next tab Right
With focus on a tab, close the tab Esc
With focus anywhere within a tab, close the tab Alt + Delete
Display a list of all keyboard shortcuts ?
Table 39 – Application Keyboard Shortcuts.
Go To
To do this Press
Go to the Uploads queue
g then q
Table 40 – Go To Keyboard Shortcuts.
Selection
To do this Press
Go to the next item in a list
j or Down or Right
Go to the previous item in a list
k or Up or Left
Select all items in a list
Shift + a or Ctrl + a
Clear the selection in a list
Shift + n
Extend the selection in a list
Shift + j or Shift + Down
Shift + k or Shift + Up
Select or deselect an item
x or Ctrl + Spacebar
Table 41 – Selection Keyboard Shortcuts.
148

Files and Folder Actions
To do this Press
Upload file
u
Download a selected file
d
Delete a selected file
# or Delete
Open a folder
o or Enter
Go to the previous folder
Backspace
Move a file
v
File properties
i
Refresh a folder
e
Display all actions menu
a
Table 42 – Files and Folders Keyboard Shortcuts.
Transfer queue actions
To do this Press
Cancel a running transfer or remove a
completed transfer
# or Delete
Pause a transfer p
Restart a transfer r
Table 43 – Transfer Queue Keyboard Shortcuts.
Tips when using shortcuts
• Users of Mac OS X use the COMMAND key in place of the Ctrl key.
• In Google Chrome, CTRL+SHIFT+ t reopens the last closed tab, so it cannot be used to move the input
focus to the To field. Use TAB instead.
• In the full version of Web Client, after you press u or CTRL+ u to display the Open window, use
CTRL+ ENTER to open folders, and ENTER to select a file or folder to upload.
• Apple Safari loses input focus after the applet is loaded to display the files under My Computer and when
you press u or CTRL+ u to display the Open window. Use a keyboard shortcut, such as COMMAND+TAB,
to return focus to Safari so that you can use the Web Client keyboard shortcuts.
• In the Compose Mail page in Internet Explorer, use the SPACEBAR to invoke the Attach File button. You
may need to press the SPACEBAR twice.
Documentation Accessibility
The accessibility of the documentation has been tested with JAWS.
Keyboard-only navigation
• The documentation source code contains ARIA (Accessible Rich Internet Applications) to improve the
natural tab order and add focus where needed.
149
• ARIA landmarks are used to identify the main elements of the online help windows.
Screen reader support
• The documentation structure is clear and the source code of the online help can be interpreted by JAWS.
• Alternative text is provided for images whenever necessary.
• The PDF documents are tagged to provide a logical reading order.
Support for high contrast and accessible use of colors
• The documentation can be used in high-contrast mode.
• There is sufficient contrast between the text and the background color.
• The graphics have the right level of contrast and take into account the way color-blind people perceive
colors.
150

Appendix H: IDES Communication Types
This table details the communication types that can be exchanged through IDES.
Acronym Communication Type Description
RPT FATCA Report Sent by a registered entity or a Host Country Tax
Authority (HCTA) to meet FATCA filing requirements
NTF FATCA Notification A response to a sender of a FATCA Report file
concerning the outcome of processing the received
FATCA Report file
CAR FATCA Competent Authority Request
(IRS Use Only)
Sent to Model 2 HCTAs in response to pooled
reports from reporting Model 2 FFIs on non-
consenting U.S. accounts and nonparticipating FFIs
REG FATCA Registration Data (Reserved.
Do not use)
Annual registration list with POC's; Sent yearly
(August timeframe)
EOIR Exchange of Information Request
Sent ad-hoc when another jurisdiction requests
specific information from the IRS or in response to a
specific information request from the IRS
ICAP International Compliance Assurance
Program
Information sent through the OECD’
s ICAP program
to other jurisdictions; Sent ad-hoc
JA Joint Audit Sent ad-hoc to other jurisdictions that request
information from the IRS or in response to an
information request from the IRS
Table 44 – IDES Communication Types.
151
