
ALB
Document Templates
Version 2.6.1
Create and work with document templates,
plus an introduction to agendas.
REV1140716IS
Advanced Computer Software Group Ltd
Booths Park 4, Chelford Road, Knutsford, WA16 8GS
t: +44 (0) 844 815 5620
www.oneadvanced.com

Disclaimer
Copyright © Advanced Computer Software Group Ltd 2016.
This document contains confidential and/or proprietary information. The content
must not be disclosed to third parties without the prior written approval of
Advanced Computer Software Group Limited or one of its subsidiaries as
appropriate (each referred to as “Advanced”). External recipients may only use
the information contained in this document for the purposes of evaluation of the
information and entering into discussions with Advanced and for no other
purpose.
Whilst Advanced endeavours to ensure that the information in this document is
correct and has been prepared in good faith, the information is subject to
change and no representation or warranty is given as to the accuracy or
completeness of the information. Advanced does not accept any responsibility or
liability for errors or omissions or any liability arising out of its use by external
recipients or other third parties.
No information set out or referred to in this document shall form the basis of
any contract with an external recipient. Any external recipient requiring the
provision of software and/or services shall be required to enter into an
agreement with Advanced detailing the terms applicable to the supply of such
software and/or services and acknowledging that it has not relied on or been
induced to enter into such an agreement by any representation or warranty,
save as expressly set out in such agreement.
The software (if any) described in this document is supplied under licence and
may be used or copied only in accordance with the terms of such a licence. Issue
of this document does not entitle an external recipient to access or use the
software described or to be granted such a licence.
The development of Advanced software is continuous and the published
information may not reflect the current status. Any particular release of the
software may not contain all of the facilities described in this document and/or
may contain facilities not described in this document.
Advanced Computer Software Group Limited is a company registered in England
and Wales with registration number 05965280 whose registered office is at
Ditton Park, Riding Court Road, Datchet, Berkshire. SL3 9LL.

iii
Contents
Overview ..................................................................................... 5
Document Templates ................................................................ 8
Document Template Management ........................................................... 8
Add a New Document Template ............................................................. 11
Document Template Properties .............................................................. 12
Edit Document Template Content .......................................................... 15
Edit Document Template Properties ...................................................... 16
Copy Document Template ....................................................................... 17
Delete Document Template .................................................................... 19
Import Document Template .................................................................... 20
Duplicate Documents ........................................................................ 21
Export Document Template .................................................................... 21
Find and Replace in Document Template(s) .......................................... 22
Inserting Field Codes ............................................................... 25
The Doc_P Process ................................................................................... 25
The Field Code Selector..................................................................... 25
Insert Field Codes .............................................................................. 28
Supplementary Merge Fields ............................................................ 30
Marketing Fields ................................................................................ 31
Field Code Formatting Options ........................................................ 32
Command Codes Introduction ......................................................... 35
Command Codes ............................................................................... 36
IF Statement ....................................................................................... 38
Imported Paragraphs ........................................................................ 43
Other Imported Paragraph Options ................................................ 46
Optional Paragraphs ......................................................................... 47
Question ............................................................................................. 48

iv
Date ..................................................................................................... 50
Sentence ............................................................................................. 51
Start Address ...................................................................................... 52
Your Reference .................................................................................. 53
Table Formatting ............................................................................... 55
Document Headers ........................................................................... 59
The MT02 Process .................................................................................... 63
Field Selection .................................................................................... 65
Command ........................................................................................... 70
Formulas ............................................................................................. 75
Inserting Fields ................................................................................... 76
Deleting Fields from a Document .................................................... 78
Stationery Templates ........................................................................ 79
Master Agendas ....................................................................... 82
Introduction .............................................................................................. 82
Editing a Master Agenda .......................................................................... 83
Add a New Master Agenda ...................................................................... 84
Agenda Steps ............................................................................................ 85
Other Master Agenda Options ................................................................ 88
Index .......................................................................................... 90

ALB SYSTEM ADMINISTRATION 2.6.1
5
Overview
How to create and work with document templates and an
introduction to working with agendas.
This section deals with creating and working with Document Templates which
are used as the basis for producing client-ready documents.
ALB has a powerful, yet user-friendly facility for producing client-ready
documents based on the information stored in your database. Using pre-defined
document templates, typically created by administrators, client-ready documents
are produced as the end result of merging them with data held in your ALB
database. Documents can be letters (or other document types, e.g. statements,
wills, etc.) created in Word, email messages created in Outlook and produced via
workflow or forms created via Laserform Desktop. When templates are merged,
the final documents are then stored in a logical structure on your server, in a
central repository called Document History.
For more information about Laserform templates refer to Custom data and
mappings.
Document templates include standard text as well as field codes that pull data
from the contact, client and matter records. This prevents users having to retype
information which has already been entered into the database such as names,
addresses and matter details. Document templates can also be coded to ensure
that documents are produced according to your house style. The style can be
applied to any number of documents and any changes made to the style
templates affect documents merged from that point on.
You can use your existing standard documents to create document templates
and subsequently edit them as required.
For the end user, document templates can be accessed from both the client and
the matter screens, however, it is recommended that you produce documents
from matter level as there is more information available. Client information can
be picked up through Matters but not vice versa.

ALB SYSTEM ADMINISTRATION 2.6.1
6
There are three processes available:
• Doc_P is for use with the main ALB modules. This has been greatly
improved of late with enhanced performance and better functionality.
• MT02 is for use with workflows and ALB's User Defined Modules. It can
also be used with PMS.
• MT01 is the original merge process and is for use with the Retain Original
Merge process check box in the Document Template Properties dialog
box.
The process of creating and working with the document templates using the
different merge processes, from an ALB point of view, is more or less the same.
The differences appear once you are in Microsoft Word and editing the content
of the document templates themselves. Which process is used is dictated by the
document template's properties and is indicated by the Merge Type column in
the Document Template Management window. The Doc_P and MT01 processes
use a Field Code Selector to insert field codes and Header Documents to enforce
house styles whereas the MT02 uses a Field Picker and Stationery Templates.
MT02 can be run on a machine other than the machine that initiated it (e.g. by a
user working remotely via FED or by a batch process running on a server where
Word is not installed). This gives the added advantage that the speed of
document production is not constrained by working with Microsoft Word.
NOTE When using MT02, if you have changed your password during
the current session and you run a workflow which produces a new
document, the Save to History will fail as the workflow will try to
pass the previous password. Logging off and back on with the new
password will solve the issue. As a rule, you should always log off
and back on whenever you change your password.
As system administrator you can associate documents with agenda steps, when
creating master agendas in Utilities » Document/Agenda Setup. When you action


ALB SYSTEM ADMINISTRATION 2.6.1
8
Document Templates
How to create and edit Document Templates for use with either
the Doc_P or MT02 processes to create client-ready documents.
In this section:
• Document Template Management
• Add a New Document Template
• Edit Document Template Content
• Edit Document Template Properties
• Copy Document Template
• Delete Document Template
• Import Document Template
• Export Document Template
• Find and Replace in Document Template(s)
Document Template Management
Documents (in the document template management context, the term
"document" refers to both documents (letters) and emails) are created based on
pre-defined templates, called document templates. These are created by
administrators using Microsoft Word and include all the elements required to
produce client-ready documents and emails. Templates normally contain the
body text (i.e. standard text that does not change), plus field codes which hook
into ALB and extract the appropriate information. They can include question and
answer sequences so that the document changes depending on user responses.
Documents and emails are produced as the end result of merging data into your
templates.
Document templates are saved to a central library where they can be accessed
by ALB users throughout the firm in PMS, Accounts and modules to produce
client-ready documents and emails. Users can also use Agendas and Workflows
which access document templates to produce documents.

CHAPTER DOCUMENT TEMPLATES
9
Document templates can be linked to a Header Documents (Stationery
templates, if you are using MT02). These ensure that the documents produced
follow the house style which can include page settings, styles, header and
footers, logos, etc.
NOTE When merging to an email, header and footer information is not
produced and only one recipient is included in the To: field.
You can use your existing standard documents to create document templates
and subsequently edit them if required. Document templates can be accessed
from both the client and the matter screens, however, it is recommended that
you produce documents from matter-level as more information will be available.
Client information can be picked up through matters but not vice versa.
To display the Document Template Management window:
1. Open Utilities and click Document/Agenda Setup.
2. With the Document Production folder selected, the following options are
available:
Folder
Description
Document
Templates
This is a central storage area for document templates,
including Quick Letters and Standard Documents.
Imported
Paragraphs
This is a central storage area for optional paragraphs
which can be selected at the point of merging. Used with
Doc_P only.
Headers This is where the firm’s letterhead templates are stored.
Used with Doc_P only.
Template Types These are used to categorise your documents making
them easier for users to find e.g. Conveyancing, Family,
Probate or by recipient e.g. Client, Solicitor, Courts.

ALB SYSTEM ADMINISTRATION 2.6.1
10
Template types are displayed under the heading template
category in Document Template Properties.
Stationery
Templates
A stationery template enables administrators to ensure
that merged documents follow your house style. Used for
MT02 only.
To filter templates in the Document Template Management window:
To make it easier to locate the required template, you can use the Filter options
across the top of the dialog box.
The filter options allow you to filter by:
Filter
>Description
Code Enter relevant text. The search uses 'contains'
matching, e.g. enter client and the results will list
templates such as ClientCareLet, QuickLetClient etc.
Description Enter relevant text. The search uses 'contains'
matching, e.g. enter client and the results will list
templates such as Blank Client Letter, Client Care
Letter etc.
Template Type Drop down list, select the Template type and the list
updates to show only those templates of the
selected type.
Module Defaults to the current entity, e.g. PMS or current
module. Drop down list, select the Module and the
list updates to show only those templates assigned
to the selected module.
For Code and Description, enter the relevant text and press Enter or Return and
the list is filtered. For Template Type and Module, the list is filtered automatically
when you select from the drop down list.

CHAPTER DOCUMENT TEMPLATES
11
RELATED TOPICS
• Document Template Production
Add a New Document Template
This option allows you to create a new document template and enter text and
merge fields so that client-ready documents can be produced by users.
To add a new template:
1. Open Utilities (or click Utilities on the toolbar) and select
Document/Agenda Setup.
2. Expand the Document Production folder and select Document
Templates. This displays the full list of templates.
3. Right-click anywhere in the right-hand pane of the Document Template
Management window and select Add New Document Template.
4. When the Document Template dialog box displays, complete the
Template Properties as appropriate and click OK.
5. Microsoft Word opens with an additional ribbon. If you are using:
Doc_P
MT02
The new ribbon is Add-ins and the
Field Code Selector displays
automatically.
The new ribbon is ALB and the
Field Picker displays
automatically.
6. Type the standard letter or document or you can copy and paste text
from an existing document.
7. To insert merge fields using:

ALB SYSTEM ADMINISTRATION 2.6.1
12
Doc_P
MT02
Please refer to inserting
field codes using The Doc_P
Process for full details.
Please refer to inserting
field codes using The MT02
Process for full details.
8. If you need the document to follow your firm's house style, you can link
the document template to a header document or stationery template to
ensure the layout and style is correct. If you are using:
Doc_P
MT02
Please refer to Header Documents
for full details.
Please refer to Stationery
Templates for full details.
9. When you have completed editing the document click Save and then
close Microsoft Word or close Microsoft Word and click Yes when
prompted to save the changes.
RELATED TOPICS
• Edit Document Template Content
• Edit Document Template Properties
• Delete Document Template
Document Template Properties
When you create a document template you are prompted to enter various
information to identify it in ALB and to set certain behaviours. This information is
called properties and is stored with the document template.
The document production process used will depend on settings in one of two
fields, the Access Extensions check box or the Module field. If you select the
Access Extensions check box or select a starter pack or user-defined module in
the Module field the document template will use the MT02 process, otherwise it
will use the Doc_P process.

CHAPTER DOCUMENT TEMPLATES
13
NOTE For document templates created using MT01, there is also a check
box, Retain Original Merge Process, to be used for those templates that
have problems with the Doc_P process.
You can check which merge process is being used in the Document Template
Management window. The Merge Type column displays the code of the merge
process used, Doc_P, MT02 or MT01.
Document Template Properties dialog box
Template properties
FIELD
DESCRIPTION
Code
Enter a unique template ID, e.g. CliCare, Doc1.
Description Enter a full template description, e.g. Client Care
Letter, Client Reply Slip.
Filename Defaults to the contents of the Description field
and will populate the notes field in Document
History and Time Recording. However, you can
amend the contents if required.
Access Extensions Selecting this box instructs the template to use the
MT02 process and displays the additional fields,
Entity, Workflow Only and Stationery Template, see
below.
Module Specifies the module that the document is to be
used with, e.g. PMS, Conveyancing, etc. If you select
PMS, the template will be available throughout ALB.
However, a template associated with a module, will
only be available in that module.
If you select a starter pack or user-defined module
from the module list, the template will be set to use
MT02 process and the additional field, Entity,

ALB SYSTEM ADMINISTRATION 2.6.1
14
Workflow Only and Stationery Template, see below
display.
Template Category Specifies the category the document is to be used
with, e.g. Matter. This is linked by the module
selected above and depending on the module,
different categories are available. The categories
allow you to filter the list of documents displayed
when using the Action » Produce Correspondence
menu command.
Matter Quick Letter Specifies that the template should be added to the
Actions » Quick Letter list for easy selection when
used from the Matter Details screen. Intended for
matter letters that are used most often.
Client Quick Letter Specifies that the template should be added to the
Actions » Quick Letter list for easy selection when
used from the Client Details screen. Intended for
client letters that are used most often.
SMS Template Specifies that the template is to be used for a text
message in an agenda.
Revision Details Enter any relevant text or comments regarding the
template.
Retain Original Merge
Process
Select this option should a problem occur with a
converted .doc template using the Doc_P merge
process. This instructs ALB to use the MT01 process
so you can continue to use the document template
whilst the problem is investigated.
ADDITIONAL OPTIONS FOR MT02 PROCESS
Entity Specifies that the template is to be driven by data
from a particular entity, e.g. Matter. This tells the
Field Picker which fields and other options to
display.
Workflow Only Selecting this box means the template can be used
via Workflow only. It will not display in the Quick

CHAPTER DOCUMENT TEMPLATES
15
Letter or Produce Document lists or be available to
add to an agenda.
Stationery Template Specifies a template to be used for formatting
styles, headers and footers etc.
NOTE You cannot select Access Extensions once a template has been
created. Also, when using Access Extensions the Module and Entity fields
cannot be changed once the template has been created.
RELATED TOPICS
• Edit Document Template Properties
• Add New Document Template
Edit Document Template Content
This option allows you to go into an existing document template and make any
changes to the text, merge fields or formatting that may be required.
To edit a template:
1. Open Utilities (or click Utilities on the toolbar) and select
Document/Agenda Setup.
2. Expand the Document Production folder and select Document
Templates. This will display the full list of templates.
3. Find the document template you need to edit. You can use the filter
options across the top of the dialog box to make it easier to locate the
required template. Please see Filter Templates for full details.

ALB SYSTEM ADMINISTRATION 2.6.1
16
4. Double-click the required template (or right-click the template and select
Edit Document Template Content).
5. Microsoft Word opens with an additional ribbon. If you are using:
Doc_P
MT02
The new ribbon is Add-ins and the
Field Code Selector displays
automatically.
The new ribbon is ALB and the
Field Picker displays
automatically.
6. Make the required changes to the static text and/or field codes then close
Microsoft Word and click Yes to the prompt to save changes.
RELATED TOPICS
• Edit Document Template Properties
• Delete Document Template
Edit Document Template Properties
This option allows you to go to an existing template and amend the details about
the template.
To edit template properties:
1. Open Utilities (or click the Utilities icon on the toolbar) and select
Document/Agenda Setup.
2. Expand the Document Production folder and click Document
Templates. This will display the full list of templates.

CHAPTER DOCUMENT TEMPLATES
17
3. Find the document template you need to edit. You can use the filter
options across the top of the dialog box to make it easier to locate the
required template. Please see Filter Templates for full details.
4. Right-click the required template document and select Edit Document
Template Properties.
5. When the Document Template dialog box displays, complete the
Document Template Properties as appropriate.
NOTE The Access Extensions, Entity and Module fields (MT02
process only) cannot be amended.
6. Click OK.
RELATED TOPICS
• Document Template Properties
Copy Document Template
Should you require a document template that is similar to an existing document
template, you can copy the existing template and then make the necessary
changes to the copy instead of creating a new template from scratch. This is
useful where you have different standard letters and saves you having to
recreate the basic structure of the document template each time.
To copy a document template:
1. Open Utilities (or click Utilities on the toolbar) and select
Document/Agenda Setup.

ALB SYSTEM ADMINISTRATION 2.6.1
18
2. Expand the Document Production folder and select Document
Templates. This will display the full list of templates.
3. Find the document template you need to copy. You can use the filter
options across the top of the dialog box to make it easier to locate the
required template. Please see Filter Templates for full details.
4. Right-click the required template and select Copy Document Template
from the shortcut menu.
NOTE If you select more than one template the Copy Document
Template option will only copy the first document template you
selected.
5. The Document Template dialog box displays.
6. In the Code field " - copy" is appended to the code to make it unique but
you can amend this. Complete the fields as required, see Document
Template Properties, and click OK.
7. The copied document template opens in Microsoft Word for you to make
the required changes.
8. Close the Microsoft Word window and click Yes when prompted to save
your changes.
9. The new Document Template appears in the list of templates and is now
available for users to select when merging.
It is also possible to copy text, e.g. a paragraph or two, from one template to
another.
NOTE When using the MT02 process and copying text between
document templates, if the text includes merge fields, the merge fields

CHAPTER DOCUMENT TEMPLATES
19
will need to be re-inserted before they will work in the new document
template.
RELATED TOPICS
• Export Document Template
• Import Document Template
Delete Document Template
This option enables you to delete a document template that is no longer
required.
To delete a template:
1. Open Utilities (or click Utilities on the toolbar) and select
Document/Agenda Setup.
2. Expand the Document Production folder and select Document
Templates. This will display the full list of templates.
3. Find the document template you need to delete. You can use the filter
options across the top of the dialog box to make it easier to locate the
required template. Please see Filter Templates for full details.
4. Right-click the required template and select Delete Document Template.
5. Click Yes to confirm deletion.
RELATED TOPICS
• Add New Document Template

ALB SYSTEM ADMINISTRATION 2.6.1
20
Import Document Template
You can use this option to make an existing document available through ALB or
import an exported document template (see Export Document Template for full
details). Once a document has been added to the list of templates, you can edit it
and insert field codes so when it is accessed via the matter, information is
merged into the document automatically.
To import a document template:
1. Open Utilities (or click Utilities on the toolbar) and select
Document/Agenda Setup.
2. Expand the Document Production folder and select Document
Templates. This will display the full list of templates.
3. Right-click the right-hand side of the Document Template Management
window and select Import Document Template.
4. Browse to the document file and double-click on the file name to import.
The Document Template Properties dialog box displays.
NOTE If you are importing an exported document template the
dialog box will not display as the properties are included in the
xml file and will be set automatically so steps 5 and 6 will not be
necessary.
5. Complete the Document Template Properties as appropriate.
6. Click OK.
The document will be added to the existing list of document templates.

CHAPTER DOCUMENT TEMPLATES
21
Duplicate Documents
If there are documents with duplicate codes, the following will occur depending
on whether the import is for a single non-ALB document or for a exported
document template with existing ALB properties:
Single non-ALB Document
When importing a single non-ALB document, if you enter a Code which already
exists, when you click OK the warning icon displays next to the Code field which
as a tooltip of "This code is already in use - please enter a unique code" when
you hover the mouse over it.
ALB-exported Document
When importing using an export file, the Template Import Errors dialog box
displays. This gives the number of documents that can be imported and lists
those documents that cannot be imported. Click Import Valid Templates to
proceed or Cancel to stop.
RELATED TOPICS
• Export Document Template
Export Document Template
This option allows you to save a copy of one or more document templates
outside of ALB so you can import it to another database, e.g. from Development
to Live. It is also used as a support tool if the ALB support team requires a copy
of the document template to assist them in diagnosing a problem.

ALB SYSTEM ADMINISTRATION 2.6.1
22
To export document templates:
1. Open Utilities (or click Utilities on the toolbar) and select
Document/Agenda Setup.
2. Expand the Document Production folder and select Document
Templates. This will display the full list of templates.
3. Find the document template you need to export. You can use the filter
options across the top of the dialog box to make it easier to locate the
required template. Please see Filter Templates for full details.
4. Right-click the required template and select Export Document Template.
(Use the Shift/Ctrl key to select multiple templates prior to right-clicking
and selecting Export Document Template.)
5. Browse to the location where you wish to save the file, enter a file name
and click OK.
The template(s) is saved to the selected location as a single file with an .xml
extension. To view the document(s) the xml file needs to be imported into a PMS
module. Please refer to Import Document Template for full details.
RELATED TOPICS
• Import Document Template
Find and Replace in Document
Template(s)
The Find and Replace enables you to change multiple words in one sweep. This is
a powerful tool which can be used across multiple templates and should be used
with care.

CHAPTER DOCUMENT TEMPLATES
23
To use the Find and Replace in Templates:
1. Open Utilities (or click Utilities on the toolbar) and select
Document/Agenda Setup.
2. Expand the Document Production folder and select Document
Templates. This will display the full list of templates.
3. Find the document template you need to edit. You can use the filter
options across the top of the dialog box to make it easier to locate the
required template. Please see Filter Templates for full details.
4. Select the templates you wish to change. Use the Shift/Ctrl key to select
multiple templates.
5. Once you have your template or templates selected, right-click one and
select Find and Replace in Document Template(s).
6. The Find and Replace in Files dialog box displays.
7. Type in the text you wish to find and replace in the fields marked as such
and click Add Find/Replace. The words are inserted into the list above.
8. If you have more than one set, repeat step 6 to build up a list of
words/phrases to action.
NOTE There is a Remove Selected button which allows you to
remove a set of words from the list if you have second thoughts.
9. When you are ready to proceed, click OK.
10. A message displays asking for confirmation as changes are automatically
saved.
11. Click OK to proceed.


ALB SYSTEM ADMINISTRATION 2.6.1
25
Inserting Field Codes
How to insert field codes into a document template using
either the Doc_P process or the MT02 process to enable you to
produce customer ready documents.
In this section:
• The Doc_P Process
• Field Code Selector
• The MT02 Process
• Field Picker
The Doc_P Process
How to insert field codes into a document template using the
Doc_P process to enable you to produce client-ready
documents.
In this section:
• The Field Code Selector
• Insert Merge Fields
• Field Code Formatting Options
• Commands Introduction
• Header Document Introduction
The Field Code Selector
Each field in the PMS database or module has a corresponding field code. You
use the field code selector to select the field code and apply formatting if you

ALB SYSTEM ADMINISTRATION 2.6.1
26
wish and then drag the field code to the appropriate place in the document
template. When a document template is merged it will take the information
stored in those fields on the contact, client or matter and transfer them to the
merged document. The Field Code Selector is also used to insert fields into
Laserforms.
When you create or open a document template, the Field Code Selector displays
on the right-hand side of the screen.
Field
Description
FIELD CODES
Search/Browse Fields Enter text and the field list will filter
only those fields that include the
entered characters.
Standard Fields List of fields in the PMS database and
agenda modules.
User-defined Fields List of fields created using Designer
Studio.
Command Codes List of command codes. See
Command Codes Introduction for full
details.
Firm Details
List of fields relating to your firm.
FORMATTING OPTIONS
Options to ensure data is pulled through to the document in the required
format. See Formatting Options for full details.
For example, when entering client information you are asked to provide title,
first and last name details:

CHAPTER INSERTING FIELD CODES
27
The corresponding field codes display in the document template as follows:
<FC>Title<format></format><RL>PC</RL><AI>1</AI></FC>
<FC>Forenames<format></format><RL>PC</RL><AI>1</AI></FC>
<FC>Surname<format></format><RL>PC</RL><AI>1</AI></FC>
The field code names are followed by formatting and other codes which allow
you to instruct the system how to handle the data and how to format it for the
final document.
To Close, Reopen and Resize the Field Code Selector:
1. The Field Code Selector can be closed by clicking on the standard
Windows close cross.
2. To re-open the side pane, select the Add-ins ribbon and select ALB
Menus.
3. You can move and size the window using standard Windows methods.
NOTE If you move, size and/or close the Field Code Selector, when
you next open a template, it will display in its default size and
position.
4. Click ALB Menus again to hide the Field Code Selector.
RELATED TOPICS
• Insert Field Codes

ALB SYSTEM ADMINISTRATION 2.6.1
28
• Field Code Formatting
• Add New Document Template
• Edit Document Template Content
Insert Field Codes
You can add field codes to a template document by dragging them from the Field
Code Selector window to the required location within the document template.
Field Code Selection
The Field Codes section lists all the fields available for you to select. To make
locating the required field easy, the Field Code Selector has a Search/Browse
Fields field which filters the list of field codes based on the criteria you type in
using a contains match. You can also expand the relevant folders to display the
fields and locate the required field manually.
There are also Insert Command Codes and Insert Firm Details folders. The
Commands folder which extends the functionality of the merge process with pick
lists, questions and standard paragraphs and the Firm Details folder has fields
holding branch, fee earner and partner information. Please refer to Commands
for full details on their usage.
Once you have selected the field, use the Formatting Options in the lower half of
the window to ensure the data is pulled into the document appropriately, e.g.
the address in a block or single line.
For full details on formatting, please refer to Field Code Formatting Options.
Having selected the field and appropriate format option, you then click and drag
the field to the required location in the document template.
All field codes begin with <FC> and end in </FC>.

CHAPTER INSERTING FIELD CODES
29
To insert a merge field:
1. If necessary, display the Field Code Selector (use the Add-ins ribbon and
click ALB Menus).
2. Enter relevant criteria in the Search/Browse Fields field or expand the
folders to locate and select the required merge field.
3. Select the required formatting.
4. Drag the field into the required position within the document template.
To delete a merge field:
1. Field codes begin with <FC> and end in </FC>, highlight the entire field
code and press Delete.
NOTE You must make sure to delete the full field code including the start
<FC> and end </FC> points.
Search Field Example:
Type surname in the Search/Browse Fields field.
Select Surname in the Standard Fields, Individuals, Client/Contact folders.
In the lower section, the Formatting Options Screen is visible.
Select the appropriate Role, in this example Primary Client.
Drag the Surname field code to the point in the document where you wish the
clients surname to appear.
The field is displayed as follows:
<FC>Surname<format></format><RL>PC</RL><AI>1</AI></FC>

ALB SYSTEM ADMINISTRATION 2.6.1
30
Expand Folder Example:
Expand the Standard Fields, Individuals then Clients/Contact folders.
Scroll down until you can see and select the Surname field.
In the lower section, the Formatting Options Screen is visible.
Select the appropriate Role, in this example Primary Client.
Drag the Surname field code to the point in the document where you wish the
clients surname to appear.
The field is displayed as follows:
<FC>Surname<format></format><RL>PC</RL><AI>1</AI></FC>
RELATED TOPICS
• Field Code Selector
• Field Code Formatting
• Add New Document Template
• Edit Document Template Content
Supplementary Merge Fields
Administrators can add Supplementary fields via Utilities » Firm Options. (See the
System Administration Firm Options section for full details.) Once a
supplementary field has been created it is automatically added to the merge
field list.
To insert Supplementary Merge Fields:
1. Open or create a new document template.

CHAPTER INSERTING FIELD CODES
31
2. Using the Field Code Selector expand the Standard Fields folder, then
the Individuals or Organisations folder and select the Supplementary
Details folder.
3. Once you have highlighted the required supplementary field, the relevant
Formatting Options will display as they would for the database fields.
4. Select the required format option for the required supplementary field
and then drag the field to the appropriate location in the document
template.
5. Complete the remainder of the document template then close Word and
click Yes when prompted to save your changes.
Marketing Fields
In the Marketing module, there is a check box Use Organisation Address
leading to marketing address fields looking for different address types. As such,
there is a group of address fields specifically for marketing documents.
These are found under the Addresses folder in the Marketing sub-folder and
will ensure the correct address details are included in the merged document.
Use these in the normal manner, selecting the field, setting the required format
and then dragging the field into the document template.
RELATED TOPICS
• Field Code Selector
• Insert Field Codes
• Field Codes Formatting

ALB SYSTEM ADMINISTRATION 2.6.1
32
Field Code Formatting Options
The Formatting Options enable you to choose how the data displays when it is
pulled through to the merged document.
The options display under a number of tabs:
Tab
Description
Numerics • Add Currency Symbol - £3500.00
• Comma Separators (000's) - 3,500.00
• Negatives in Brackets - (3500.00)
• Convert to Words - Three Thousand Five Hundred
Pounds & Zero Pence
•
Absolute Value - 3500
Dates • Leading Zeros on Short Date - 21082015
• No Leading Zeros on Long Date - 21 August 2015
• Date and Time - 21/08/2015 at 15:40
• Time Only - 15:40
• Short Date - 21/08/2015
•
Long Date - 21 August 2015
Strings Case Formatting:
• Upper Case - IMPORT ADDED
• Lower Case - import added
• Proper Case - Import Added
•
None - Import added (exactly as typed)
Data Options • Check Boxes - Defines which Roles information to
merge. If you select multiple roles, e.g. Primary
Client and Client, you will get a prompt to select the
required associated role during the merge process.
Any subsequent merge fields with the same roles
and numeric reference will automatically merge
with data from the previously selected role.
• Line Number - XXX
• Don’t Use Role Groups - XXX
• Role Grouping - Used when multiple contacts of the
same role are listed on a document

CHAPTER INSERTING FIELD CODES
33
• Assets/Liabilities - For Probate and Personal Injury
module lists
Misc Delete Options:
• Delete Word if Blank - Stops the system prompting
for missing data during the merge process.
• Delete Line if Blank - Used to remove extra carriage
returns when information is missing from the
database, e.g. in short addresses.
• Delete Line and Word if Blank - Combines both of
the above options
• Delete Table - For use with an accounts document
template. A field code is formatted with a "delt"
code and a delete Word code so if there is missing
data the whole table is removed, e.g. separate
tables for different types of disbursement and it will
delete those tables where there are no
disbursements of that type. See Table Formatting
for full details.
• Delete Table Row with Surround - For use with an
accounts document template. A field code is
formatted with a "delt_1" code and a delete Word
code so that if there is missing data that row plus
one above i.e. a header/ title row and one below i.e.
a totals row are removed, e.g. if there are paid but
no unpaid disbursements, the unpaid section of the
table with sub-header and subtotals will be
removed from the merged document. See Table
Formatting for full details.
Operators:
• Add OF - Inserts the word of in a document only if
the subsequent field is complete.
• Example, when you want to include the address of
an individual only if it exists such as, John Smith of
Smithfield Drive
• Add AND - Inserts the word and in a document only
if the subsequent field is complete.
• Example, if there are two clients include the word
‘and’ such as, Alan Smith and Helena Jones.

ALB SYSTEM ADMINISTRATION 2.6.1
34
• None - Allows you to deselect the above options.
Table:
• First Column of Table - For use with an accounts
document template. A field code is formatted with a
"tab" code adds a row for each instance in the list,
e.g. where there are paid disbursements, it will add
a row for each one of the paid disbursements. See
Table Formatting for full details.
Name Block Name Display Options: Use the drop down fields to
specify the first, second and third parts of the name.
Includes Section:
• Include Employee - Makes the name of employees
of a company available during the merge process.
• Include Directors - Makes the name of directors of a
company available during the merge process.
• Include Organisation Name - Inserts the
organisation name whatever is specified as the
name block.
• Include Confirm Contact - Prompts user to confirm
the contact.
Address Block Address Formatting:
• Horizontal Address Block - displays the address in a
single line with appropriate commas.
• Vertical Address Block - displays the address in a
vertical block for envelopes, tops of letters, etc.
During the merge process, any blank lines, where
the address is short, are removed to close up any
gaps.
Address Details:
• DX Only (if available) - will produce the DX Address if
entered or the postal address.
• Postal Address Only - will produce the postal
address even if a DX Address has been entered.
• Both - Will produce the whole address including the
DX Address.

CHAPTER INSERTING FIELD CODES
35
NOTE If you need the text following an address
block to start at a set line, e.g. where you are using
window envelopes, you can put the address block
field into a text box or table with a set height, so
any following text is not pulled up as lines in the
address block are removed.
Logicals • Male/Female
• Yes/No
•
True/False
RELATED TOPICS
• Field Code Selector
• Insert Field Codes
• Add New Document Template
• Edit Document Template Content
Command Codes Introduction
Document templates can contain a range of extra commands and field codes
which extend the functionality of the merge process. This includes commands
which enable you to use conditional logic to determine content, select additional
paragraphs and insert paragraphs based on your responses during the
merge and questions which can be asked during the merge with text being
added depending on your response. There are also commands that work
specifically with Header Documents to ensure house style is followed.
These commands are for the Doc_P process located in the Field Code Selector
under the Insert Commands Code folder.

ALB SYSTEM ADMINISTRATION 2.6.1
36
RELATED TOPICS
• Supplementary Merge Fields
• Marketing Fields
• Command Codes
• IF Statement
• Imported Paragraphs
• Optional Paragraphs
• Question
• Date
• Sentence
• Start Address
• Your Reference
• Table Formatting
Command Codes
The Command codes instruct the merge process to lay out and format the
document correctly. They can also ask for extra information that is not available
in the database.
Code
Description
Current Date Enters the current date into the document.
Select the code and set the required date format. Drag the
code into the document template.
HD - Single
Header
Uses a selected header document to ensure the merged
document complies with the house style. See Using Header
Documents for full details.
HQ - Multiple
Headers
Allows you to select from the list of header documents at
the point of merging so the merged document complies
with the required house style. See Using Header
Documents for full details.
IF - If Statement Allows you to use conditional logic to determine content of
the merged document.

CHAPTER INSERTING FIELD CODES
37
For details on using the IF command, see IF Statement.
IP - Imported
Paragraphs
This command presents you with a selection of pre-typed
paragraphs to select from.
For details on using the IP command, see Imported
Paragraphs.
OP - Optional
Paragraphs
The OP Command is used to insert appropriate text in
response to a Yes/No question.
See Optional Paragraphs for full details.
RQ - Question This command allows you to select from a drop-down list
of options at the point of merging.
See Question for full details.
RD - Date This command prompts you to confirm or amend a date
and then inserts it into the document in the required
format.
See Date for full details.
RS - Sentence This command prompts you to enter information that is
not on the database.
See Sentence for full details.
SA - Address This command allows you to specify what information goes
in the address section of a document which is
subsequently picked up by the Header Document.
See Start Address and Header Document for full details.
TT - Time Type This command defaults the time type when time recording
in the Document History when the document is saved.
Highlight the Time Type command and then select the type
from the Formatting Options. Drag the command to the

ALB SYSTEM ADMINISTRATION 2.6.1
38
document, e.g. <TT>006</TT>. The code does not display in
the merged document.
TU - time Units This command defaults the time units when time recording
in the Document History when the document is saved.
Highlight the Time Type command and drag the command
to the document. Enter the number of units in the middle
of the code, e.g. <TU>10</TU>. The code does not display
in the merged document.
YR - Your
Reference
This command allows you to specify the reference of a
service, matter or contact which is subsequently picked up
by the Header Document. See Your Reference and Header
Document for full details.
DR - Document
Reference
The Document Reference is a document-unique, system-
created number that allows for quick retrieval of
documents from Document Management.
RELATED TOPICS
• Field Code Selector
• Insert Field Codes
• Field Codes Formatting
IF Statement
The IF statement command allows you to code tests into documents and
Laserforms which can check database fields for appropriate values, then supply
relevant text to be used to complete the document. For example, if your client
has an informal salutation entered in their record, you will want to use this but
use the formal salutation if not. This can be coded into document templates and
Laserform mappings.
To build up the logic test, the Formatting Options are split into two sections:

CHAPTER INSERTING FIELD CODES
39
• Choose Operator
• Choose Answers
Choose Operator
This section allows you to select the test you wish to use:
• Equal To
• Not Equal To
• Is Empty
• Is Not Empty
• Less Than
• Less Than Or Equal To
• Greater Than
• Greater Than Or Equal To
NOTE When using the Is Empty or Is Not Empty operators to check for an
empty field and not prompt the user, you will need to use the Delete
Word If Blank format option for the field code you are testing.
Choose Answers
This section allows you to have an either/or response or just a response if the
logic evaluates to Yes or No. You have the option to select:
• Yes and No
• Yes
• No
The default is for Yes and No.
The choose answers options are available for all the operators.

ALB SYSTEM ADMINISTRATION 2.6.1
40
To insert a basic IF statement in a document template:
1. Create a new document template or open the required existing template.
2. Using the Field Code Selector, expand Insert Command Codes.
3. Highlight the IF - If Statement command.
4. Select the required Operator and Answer.
5. Drag the IF command to the appropriate location in the document.
NOTE You can click Insert instead if the cursor is in the correct
place in the document.
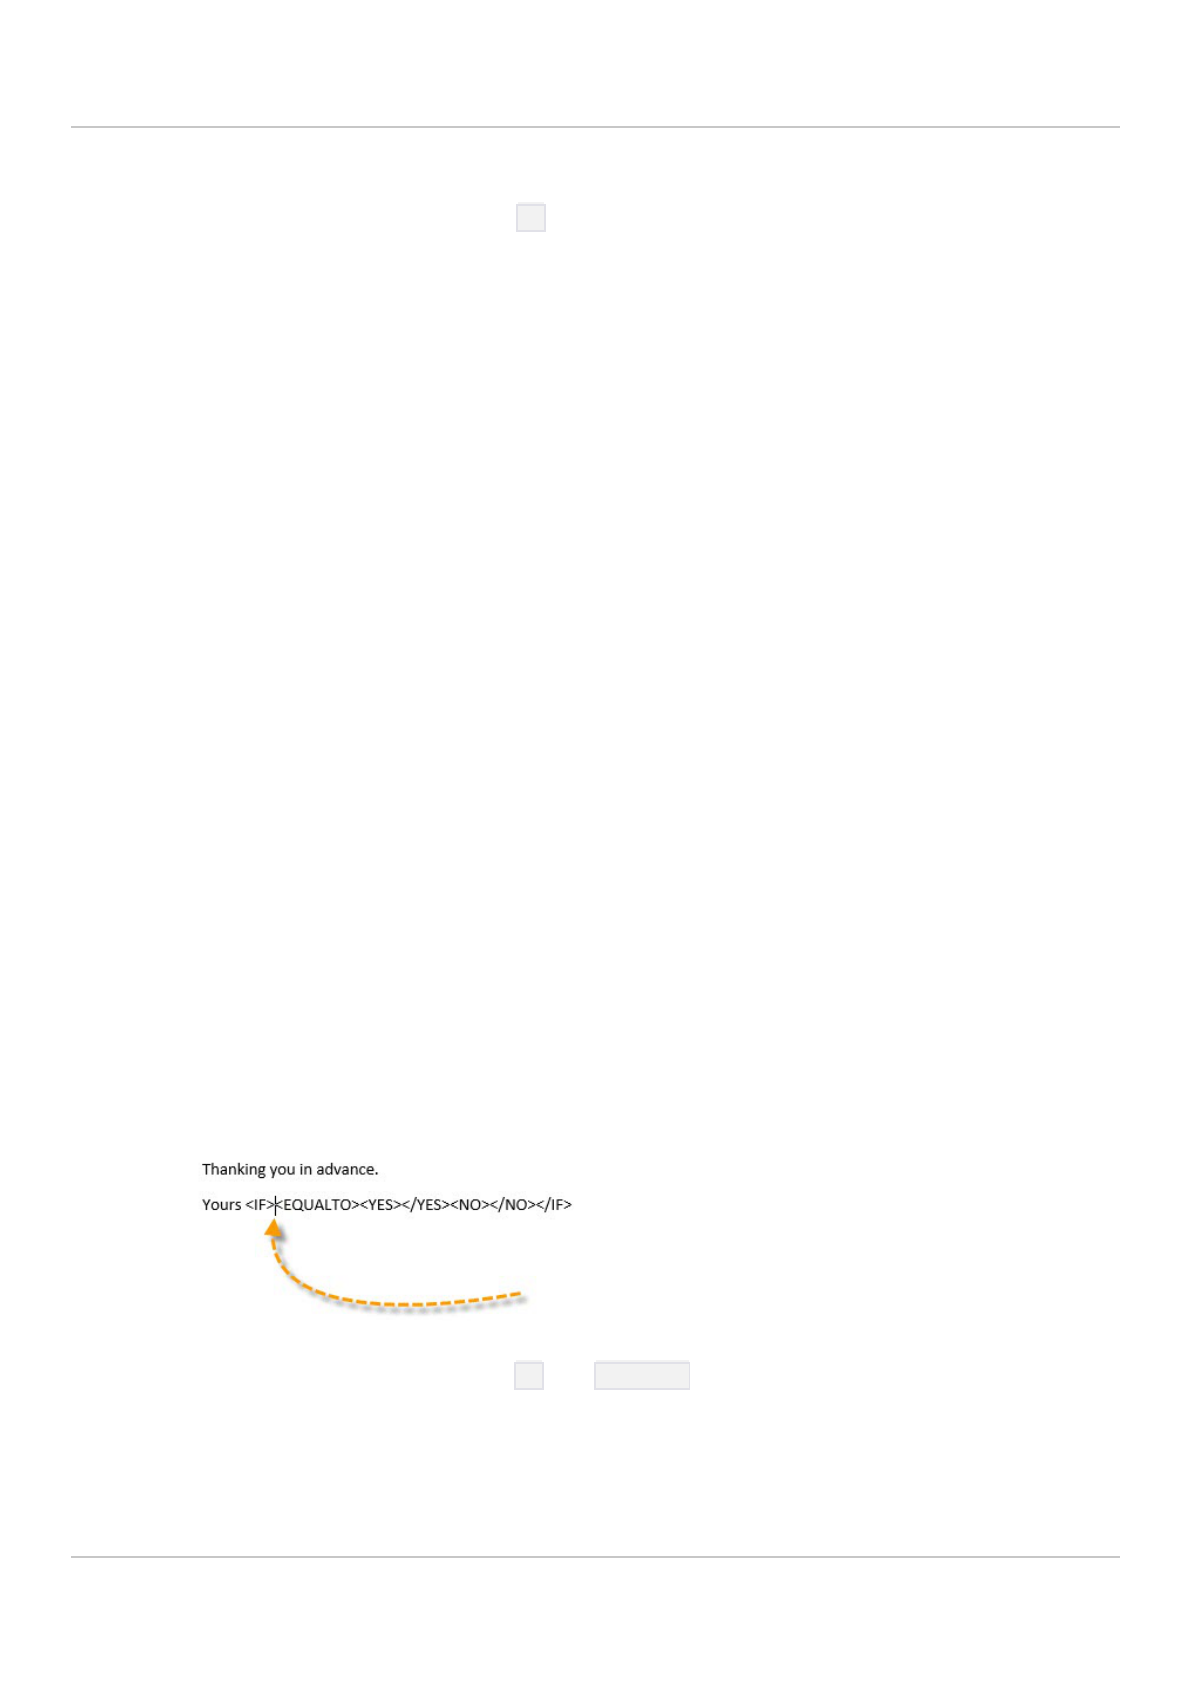
6. The basic coding displays in the document.
<IF><EQUALTO><YES></YES><NO></NO></IF>
7. Position the cursor after the IF section and use the Field Code Selector to
insert the field you want to test.
<IF>Field Code<EQUALTO><YES></YES><NO></NO></IF>
8. Position the cursor after the EqualTo sections and enter the comparison
data.
<IF>Field Code<EQUALTO>Comparison Field Code or
Text<YES></YES><NO></NO></IF>
9. Position the cursor in the Yes section and enter what should be entered
into the document.
<IF>Field Code<EQUALTO>Comparison Field Code or Text<YES>Field code or
text to enter if true</YES><NO></NO></IF>
CHAPTER INSERTING FIELD CODES
41
10. Position the cursor in the No section and enter what should be entered
into the document.
<IF>Field Code<EQUALTO>Comparison Field Code or Text<YES>Field code or
text to enter if true</YES><NO>Field code or text to enter if false</NO></IF>
11. Complete the document, close Word and click Yes to save the changes.
Example
The following example shows how you would code a letter where the sign-off
depends on the form of address used in the formal salutation. Using a logical
test, one letter can cover the range of sign-offs required without user
intervention.
As a start point, below show how to set the IF statement command to test if the
Formal Salutation contents are "Sir". The test is that if the field has Sir in, the
document will be signed off with Yours faithfully, whereas if it doesn't the sign-
off will be Yours sincerely.
Position the cursor in the correct location in the document template and from
the Field Code Selector, expand the Commands folder and select IF- If
Statement. The default options are correct for this example so click Insert.
The following displays in the document:
Fig: Basic IF Statement
Position the cursor between the IF and EqualTo sections of the command,
select the Salutation Formal field and set the Role Formatting to the Primary

ALB SYSTEM ADMINISTRATION 2.6.1
42
Client. Click Insert. The field code is inserted in the IF statement as highlighted
below.
Fig: IF Statement
Position the cursor between the EqualTo and Yes sections of the command
and enter Sir.
Position the cursor in the Yes section of the command and enter faithfully,
then similar for the No section and enter sincerely.
The statement will now look as below:
Fig: IF Statement
Nesting IF Statements
It is possible to nest IF statements so that you can have more than two
conditions. In the example above, the letter sign-off should also be Yours
faithfully if the formal salutation contains Madam. In this case, you can enter a
second IF statement in the No section of the main IF statement to test the formal
salutation field again for Madam and return faithfully if it does.

CHAPTER INSERTING FIELD CODES
43
Fig: Nested IF Statements
1. Main IF statement, testing the formal salutation for Sir.
2. Nested IF statement, testing the formal salutation for Madam if it is not
Sir.
NOTE The colours have been added to highlight the two levels of nesting
and are not standard.
RELATED TOPICS
• Field Code Selector
• Insert Field Codes
• Field Codes Formatting
Imported Paragraphs
The Imported Paragraphs function enables a number of pre-typed paragraphs to
be displayed for selection during the merge process. You can also setup
imported paragarphs so the text is pulled through during the merge process
without any intervention by the user.
The process requires two parts, a document with all the paragraphs entered and
then a command in the document template which displays the list of
paragraphs.

ALB SYSTEM ADMINISTRATION 2.6.1
44
To set up Imported Paragraphs:
1. In the Document Template Management window, expand the
Document Production folder and select Imported Paragraphs.
2. In the right pane, right-click and select Add New Imported Paragraph.
The Imported Paragraph Template dialog box displays.
3. Enter a code and description for the document and click OK.
NOTE Notes will default as in document templates.
4. Using the Field Code Selector, expand Command Codes and click PG -
Add Paragraph.
5. Drag the command code to the document template.
6. Type the description of the paragraph between <name> and </name>
and type the first optional paragraph underneath like the example below:
<para>
<id>01</id><name> Sale Only</name>
Thank you for letting me have your instructions to act on your
behalf in relation to your sale.</para>
<para>
<id>02</id><name> Sale and Purchase</name>
Thank you for letting me have your instructions to act on your
behalf in relation to your sale and purchase.</para>
<para>
<id>03</id><name> Purchase Only</name>
Thank you for letting me have your instructions to act on your
behalf in relation to your purchase.</para>

CHAPTER INSERTING FIELD CODES
45
NOTE Each optional paragraph will require a new id number e.g.
01, 02, 03…..
7. Continue to add the PG - Add Paragraph command for each optional
paragraph.
8. When you have finished adding paragraphs close the document and click
Yes to save the changes.
NOTE At point 5, if you enter relevant text into the document without
using the codes, the all text in the document will be pulled into the merge
document during the merge process automatically.
To use Imported Paragraphs in document templates:
1. Create a new document template or open the required existing template.
2. Using the Field Code Selector, expand Insert Command Codes.
3. Highlight the IP - Imported Paragraphs command.
4. Select the required Imported Paragraph Document from the lower
panel.
5. Drag the IP - Imported Paragraphs Command onto the document at the
required location.
6. Complete the rest of the template as required, close Word and click Yes
to save the changes.
During the merge process a list of paragraphs will display for you to select the
relevant ones to be inserted into the merged document. You can also use the up

ALB SYSTEM ADMINISTRATION 2.6.1
46
and down arrows to change the order that the paragraphs will appear in the
merged document.
If you have entered the text into the imported paragraph document without any
coding, all text will be entered into merged document automatically.
RELATED TOPICS
• Field Code Selector
• Insert Field Codes
• Field Codes Formatting
• Other Imported Paragraph Options
Other Imported Paragraph Options
There are other imported paragraph options from the right-click shortcut menu.
These allow you to:
• Edit Imported Paragraph Content
• Edit Imported Paragraph Properties
• Copy Imported Paragraph
• Delete Imported Paragraph
• Import Imported Paragraph
• Export Imported Paragraph
• Find and Replace in Imported Paragraph(s)
The options work the same as for document templates. The links take you to the
relevant section within the document template chapter.
RELATED TOPICS
• Imported Paragraphs

CHAPTER INSERTING FIELD CODES
47
Optional Paragraphs
This option prompts you during the merge process with a question and inserts
relevant text into the merged document depending on the answer selected.
To insert Optional Paragraphs in a document template:
1. Create a new document template or open the required existing template.
2. Using the Field Code Selector, expand Insert Command Codes.
3. Highlight the OP - Optional Paragraphs command.
4. Drag the OP - Optional Paragraphs command onto the document at the
required location.
5. The following coding displays in the document template.
<OP>Enter Yes/No Optional Paragraph Question
Here<YesAnswer>Enter the text you want to display if the answer is
Yes</YesAnswer><NoAnswer>Enter the text you want to display if
the answer is No</NoAnswer></OP>
6. Amend the text as required, for example:
<OP>Are There Any
Enclosures?<YesAnswer>Enc</YesAnswer><NoAnswer>No
Enclosures</NoAnswer></OP>
When the document merges, the question will display with a Yes and No
button. Depending on which button is clicked, the appropriate text will be
entered into the document at the point of the command.
7. Complete the document, close Word and click Yes to save the changes.

ALB SYSTEM ADMINISTRATION 2.6.1
48
RELATED TOPICS
• Field Code Selector
• Insert Field Codes
• Field Codes Formatting
Question
This command allows the user to select from a drop-down list of options at the
point of merging. You can add up to 10 options.
To insert the Question Command:
1. Create a new document template or open the required existing template.
2. Using the Field Code Selector, expand the Insert Command Codes
folder.
3. Highlight the RQ - Question command.
4. In the Format Options, select if the question is to be the standard
signatory question or one of your own making.
5. Drag the RQ - Question command onto the document at the required
location.
6. The following coding displays in the document template (if you select No
for the formatting, the signatory coding is structured along similar lines):
<RQ>Enter Question Here<answer>Enter Possible Answer 1
Here</answer><answer>Enter Possible Answer 2
Here</answer><answer>Enter Possible Answer 3
Here</answer></RQ>

CHAPTER INSERTING FIELD CODES
49
NOTE You can have up to ten answers if needed. Copy the
<answer></answer> and enter the text between the codes.
7. Amend the text as required, for example:
<RQ>What Is The Fee Earner's
Position?<answer>Partner</answer><answer>Solicitor</answer><a
nswer>Legal Executive</answer></RQ>
When the document merges, the question will display and the
appropriate text will be entered into the document based on the choice
made.
8. Complete the document, close Word and click Yes to save the changes.
NOTE The Standard Signatory coding is:
<RQ>Signed By?<answer><RS>Signed By?</RS></answer><answer><FC>User
Correspondence Name <format></format></FC></answer><answer><FC>Earner
Name<format></format></FC></answer><answer><FC>Matter Branch Company
Name<format>Upper</format></FC></answer></RQ>
RELATED TOPICS
• Field Code Selector
• Insert Field Codes
• Field Codes Formatting

ALB SYSTEM ADMINISTRATION 2.6.1
50
Date
This command allows you to prompt the user to confirm or amend a date and
have that date put into the document in the correct format.
To insert a Date command:
1. Create a new document template or open the required existing template.
2. Using the Field Code Selector, expand the Insert Command Codes
folder.
3. Highlight the RD - Date command.
4. Select the required date format form the lower panel.
5. Drag the RD - Date command into the document at the required location.
6. The following code displays:
<RD>Enter Prompt Here<format></format></RD>
7. Amend the text as appropriate, for example:
<RD>Date of Court Hearing<format></format></RD>
8. Complete the document, close Word and click Yes to save the changes.
RELATED TOPICS
• Field Code Selector
• Insert Field Codes
• Field Codes Formatting

CHAPTER INSERTING FIELD CODES
51
Sentence
The Sentence command allows you to prompt the user with a question during
the merge process and have them enter a response which is then inserted into
the merged document.
To use the Sentence command:
1. Create a new document template or open the required existing template.
2. Using the Field Code Selector, expand the Insert Command Codes
folder.
3. Highlight the RS - Sentence command.
4. Drag the RS - Sentence command into the document at the required
location.
5. The following code displays:
<RS>Enter Prompt Here<format></format></RS>
6. Amend the text as required, for example:
<RS>What Are You Enclosing?<format></format></RS>
7. Complete the document, close Word and click Yes to save the changes.
RELATED TOPICS
• Field Code Selector
• Insert Field Codes
• Field Codes Formatting

ALB SYSTEM ADMINISTRATION 2.6.1
52
Start Address
This coding allows you to specify everything that you want to appear in the
Address block by placing the field codes and any text between the symbols
<SA></SA> in the document template with the start address code also entered at
the appropriate place in the Document Header.
To lay out the Start Address command:
1. Create a new document template or open the required existing template.
2. Using the Field Code Selector, expand the Insert Command Codes
folder.
3. Highlight the SA - Address command.
4. Drag the SA - Address command into the document. The specific location
is not important as this will be determined by the document header.
5. The following coding displays:
<SA>Enter Field Codes to Transfer to Header Here</SA>
6. Amend the text as required, for example:
<SA><FC>Salutation
Envelope<format></format><RL>PC,CL</RL><AI>1</AI></FC>
<FC>Mailing Address
Block<format></format><RL>PC,CL</RL><AI>1</AI></FC></SA>
7. Complete the remainder of the document, close Word and click Yes to
save your changes.
To insert the Start Address command in the document header:
1. Create a new document header or open the required existing document
header.

CHAPTER INSERTING FIELD CODES
53
NOTE Please see Document Header Introduction for full details.
2. Using the Field Code Selector, expand the Insert Command Codes
folder.
3. Highlight the SA - Address command.
4. Drag the SA - Address command into the required location in the
document header.
5. The following coding displays:
<SA></SA>
6. Complete the remainder of the document header, close Word and click
Yes to save your changes.
RELATED TOPICS
• Field Code Selector
• Insert Field Codes
• Field Codes Formatting
• Header Document
Your Reference
This coding allows you to specify everything that you want to appear in the Your
Reference block by placing the field codes and any text between the symbols
<YR></YR> in the document template with the your reference code also entered
at the appropriate place in the Document Header.

ALB SYSTEM ADMINISTRATION 2.6.1
54
To lay out the Your Reference command:
1. Create a new document template or open the required existing template.
2. Using the Field Code Selector, expand the Insert Command Codes
folder.
3. Highlight the YR - Your Reference command.
4. Drag the YR - Your Reference command into the document. The specific
location is not important as this will be determined by the document
header.
5. The following coding displays:
<YR>Enter Field Codes to Transfer to Header Here</YR>
6. Insert the required contact or service reference fields, for example:
<YR><FC>Case Number<format></format></FC> </YR>
7. Complete the remainder of the document, close Word and click Yes to
save your changes.
To insert the Your Reference command in the document header:
1. Create a new document header or open an existing document header.
NOTE Please see Document Header Introduction
for full details.
2. Using the Field Code Selector, expand the Insert Command Codes
folder.
3. Highlight the YR - Your Reference command.

CHAPTER INSERTING FIELD CODES
55
4. Drag the YR - Your Reference command into the required location in the
document header.
5. The following coding displays:
<YR></YR>
6. Complete the remainder of the document header, close Word and click
Yes to save your changes.
RELATED TOPICS
• Field Code Selector
• Insert Field Codes
• Field Codes Formatting
• Header Document
Table Formatting
Table formatting is designed to work with accounts documents where you have
an indeterminate number of items and enables you to code tables so that they
insert the correct number of rows for each disbursement or other item, remove
rows where there are no items or even remove the table altogether.
Tab Code
The Tab code will, using Word's table feature, add a row for each instance of a
field in a list. It enables you to produce a flexible template for a bill which will list
disbursements or time entries, adding as many rows as necessary depending on
the number of entries and placing relevant data in columns as required.
To insert the Tab code:
1. Create a new document template or open the required existing template.

ALB SYSTEM ADMINISTRATION 2.6.1
56
2. At the appropriate place, insert a table with the relevant number of
columns and a row for the heading and total rows and one row for the
data item, e.g. Paid Disbursement.
3. Using the Field Code Selector, select the relevant field code and choose
First Column of Table from the Table section in the Misc formatting
area of the field code selector.
4. Drag the field into the first column of the data item row.
The tab command only needs to be added to the data on the field code in
column one.
5. Complete the remainder of the document, close Word and click Yes to
save your changes.
During the merge process, the system will add a row for each appropriate paid
disbursement the matter has.
Delt Code
The Delt code will, using Word's table feature remove the whole table if there is
missing data, e.g. where you have separate tables for different types of
disbursement it will delete those tables where there are no disbursements of
that type.
1. Create a new document template or open the required existing template.

CHAPTER INSERTING FIELD CODES
57
2. At the appropriate place, insert a table with the relevant number of
columns and a row for the heading and total rows and one row for the
data item, e.g. Paid Disbursement.
3. Using the Field Code Selector, select the relevant field code and choose
Delete Table from the Delete Options section in the Misc formatting
area of the field code selector.
4. Drag the field into the first column of the data item row.
The tab delt command only needs to be added to the data on the field
code in column one.
5. Complete the remainder of the document, close Word and click Yes to
save your changes.
During the merge process, if there are no appropriate relevant time entries, the
entire table will be removed from the document.
Delt_1 Code
The Delt_1 code will, using Word's table feature remove the row plus the row
above and below, e.g. where you have separate sections in one table for
different types of disbursement it will delete the section with its sub-header and
sub-total rows where there are no disbursements of that type.
1. Create a new document template or open the required existing template.
2. At the appropriate place, insert a table with the relevant number of
columns and rows for the sub-heading and sub-total rows and one row

ALB SYSTEM ADMINISTRATION 2.6.1
58
for each of the data items, e.g. Paid Disbursement and Unpaid
Disbursement.
3. Using the Field Code Selector, select the relevant field code and choose
Delete Table Row With Surrounding from the Delete Options section
in the Misc formatting area of the field code selector.
4. Drag the field into the first column of the data item rows.
The delt_1 command only needs to be added to the data on the field code
in column one.
5. Complete the remainder of the document, close Word and click Yes to
save your changes.

CHAPTER INSERTING FIELD CODES
59
During the merge process, if there are no appropriate unpaid disbursements,
the Unpaid section (sub-heading, data row and sub-totals) will be removed from
the table.
RELATED TOPICS
• Field Code Selector
• Insert Field Codes
• Field Codes Formatting
Document Headers
Introduction
The document header dictates how the final merged document will look. This
includes paper size, orientation, margins, styles, headers and footers and logos
or other images, together with the layout for the top of the letter which can
include standard text and merge field codes.
NOTE If you set headers and footers up for different pages, e.g. different
first page, odd and even pages, the headers and footers will be recreated
in the merged document appropriately.
Document Templates are linked to Document Headers via a code and when the
merge process is complete the resultant document will take on the formatting,
etc, from the document header along with the standard text and merge fields
from the document template. See Using a Document Header for full details.
Linking documents to the document header means that if you need to make
changes to your company letterhead you will only have to change it once in the
document header. Any documents merged using document templates linked to
the document header from that point on will take on the new settings.

ALB SYSTEM ADMINISTRATION 2.6.1
60
Fig: Example Header Document
1. This instructs the system where in the letter to start the address.
2. This inserts the current date in the correct format.
3. This code instructs the system where to place Your Reference.
4. This code instructs the system where to insert Our Reference and in what
format.
NOTE Logos or other image files can also be added, both to the main
letter layout at the top of page one or in headers and footers and these
plus the command codes and merge fields can be moved around as
required.
If necessary you can create more than one document header, e.g. if a separate
layout is required for marketing purposes as opposed to legal correspondence.
Aside form the specific header document codes, above, creating and editing
document headers is the same as working with document templates, using the
field code selector, static text and any image files, you just need to ensure you
are working from the Headers folder in the Document Template Management
window.
RELATED TOPICS
• Using a Document Header
• Other Document Header Options

CHAPTER INSERTING FIELD CODES
61
Using a Document Header
Once you have created your document header you need to link it to the relevant
document templates. Alternatively, if you have multiple document headers you
can code the document template so that it displays a list of available document
headers for you to select at the point of merging.
To link a document template to a specific document header:
1. Open the document template from the Document Template
Management window.
2. Using the Field Code Selector, expand the Insert Command Codes
folder.
3. Select HD - Single Header.
4. In the formatting options, select the relevant document header.
5. Drag the HD - Single Header code to the top of the document template.
6. The <HD></HD> coding (1) displays in the document template with the
document header's id number and name, similar to the example below.
7. From the Field Code Selector, select the SA - Address command code
and drag it on to the document. The correct position will be dictated by
the code in the document header.
8. Insert the relevant field codes between the start and end SA coding (2).
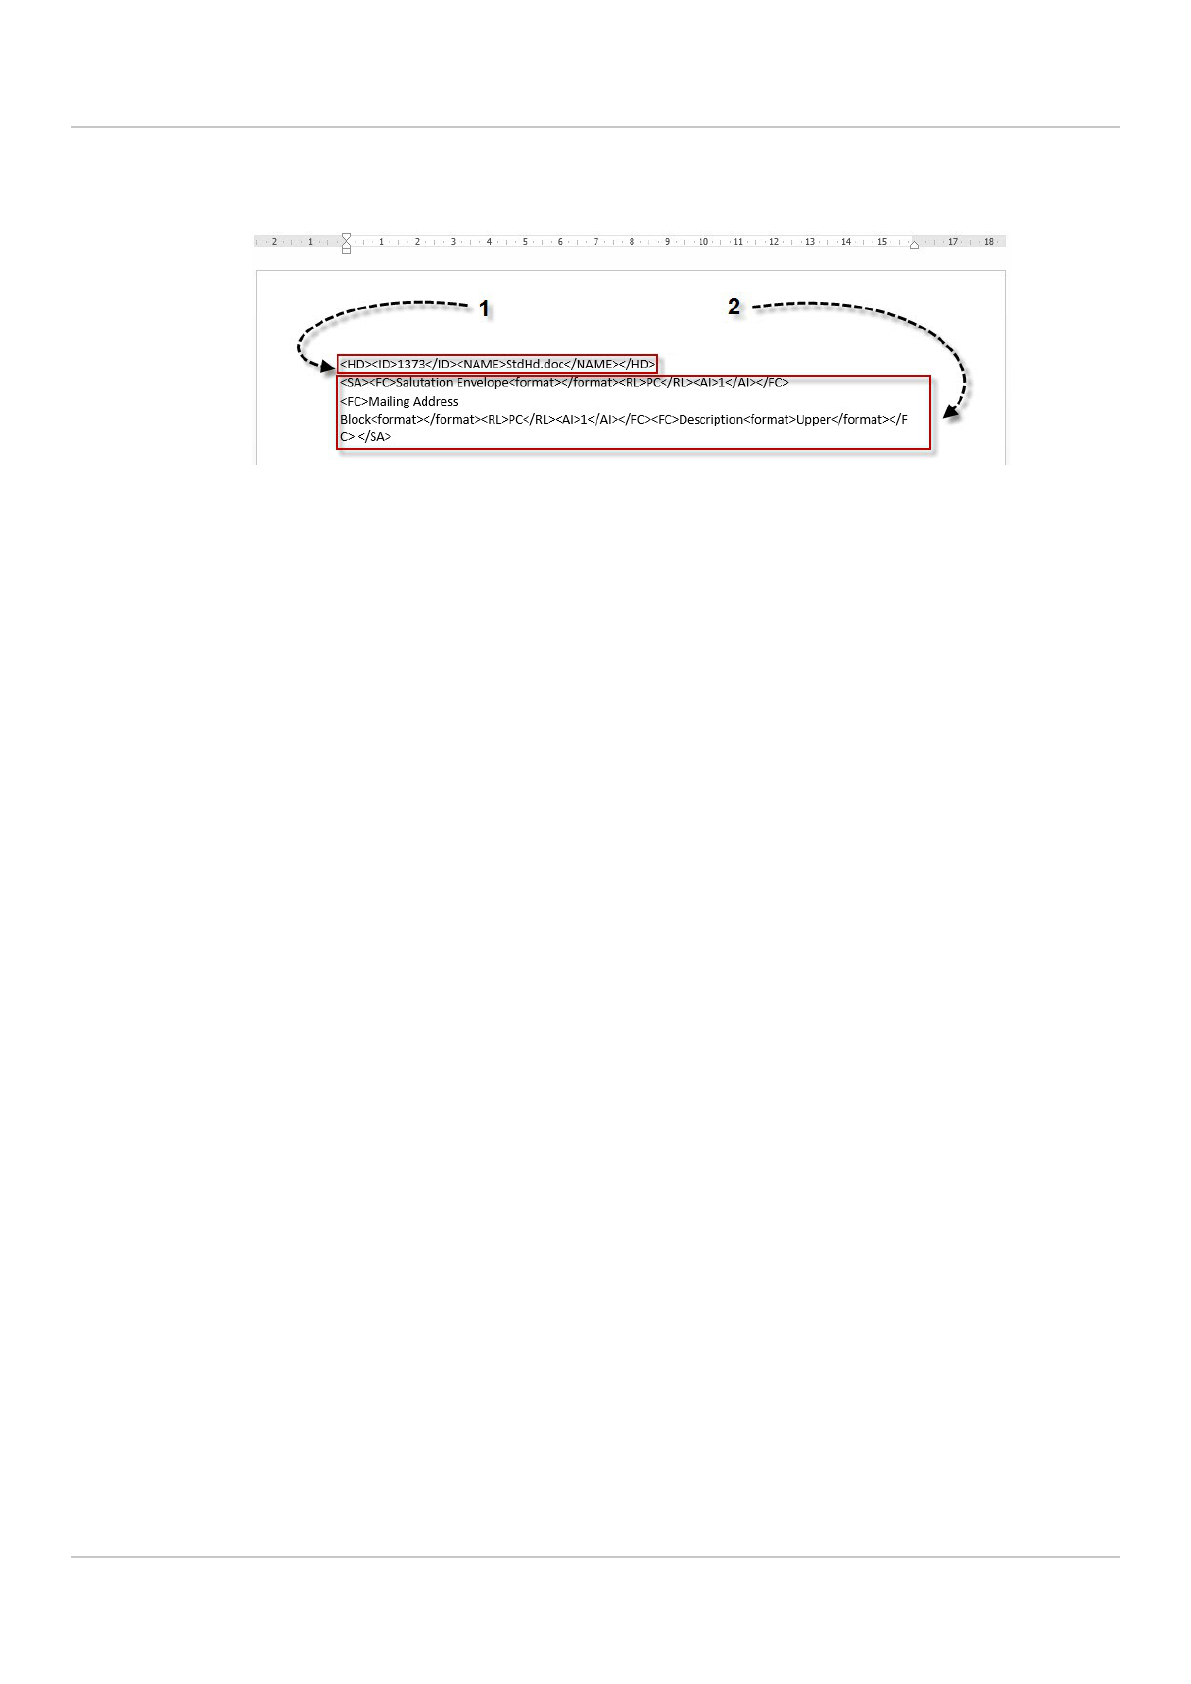
ALB SYSTEM ADMINISTRATION 2.6.1
62
Fig: Header coding
9. If necessary, drag the Your Reference code to the document and insert
the relevant coding. The document header will dictate the position.
10. Close the document template and click Yes to save your changes.
To allow the user to select the header document:
1. Open the document template from the Document Template
Management window.
2. Using the Field Code Selector, expand the Insert Command Codes
folder.
3. Select HQ- Multiple Headers.
4. Drag the HQ- Multiple Headers code to the top of the document
template.
5. The <HQ></HQ> coding displays in the document template.
6. If necessary, drag the Address and Your Reference codes to the
document and insert the relevant coding. The selected document header
will dictate their positions.
7. Close the Document template and click Yes to save your changes.
When the document template is selected to merge, the Missing Data Assistant
displays the list of document headers available for you to select and then click
Continue.

CHAPTER INSERTING FIELD CODES
63
RELATED TOPICS
• Other Document Header Options
Other Header Document Options
There are other document header options from the right-click shortcut menu.
These allow you to:
• Add New Document Header
• Edit Document Header Content
• Edit Document Header Properties
• Copy Document Header
• Delete Document Header
• Import Document Header
• Export Document Header
• Find and Replace in Document Header(s)
The options work the same as for document templates. The links take you to the
relevant section within the document template chapter.
RELATED TOPICS
• Document Header
The MT02 Process
How to insert field codes into a document template using the
MT02 process to enable you to produce client-ready
documents.
In this section:
• The Field Picker

ALB SYSTEM ADMINISTRATION 2.6.1
64
• Inserting Fields
• Field Selection
• Commands
• Stationery Templates
The Field Picker allows fields from the ALB database to be inserted in a
document or stationery template for the MT02 process. During the merge
process, the data, based on the merge field, is pulled through to the final
document to personalise items such as names and addresses, letter headings,
fee earner etc. The Field Picker is also used to insert fields into Laserforms or a
screen in a User Defined Module.
When you create or open a document template, the field picker displays on the
right of the window.
To Close, Reopen and Resize the Field Picker:
1. The side pane can be closed by clicking on the standard Windows close
cross.
2. To re-open the side pane, select the ALB ribbon and select Insert Merge
Field.
3. The drop down, next to the close icon, allows you move and size the
window.
NOTE If you move, size and/or close the field picker, when you next open
a template, it will display in its default size and position, i.e. maximised
and on the right-hand side of the window.
There are two tabs, Field Selection and Command. For more information on
these, click on the links below.

CHAPTER INSERTING FIELD CODES
65
RELATED ITEMS
• Field Selection
• Command
Field Selection
Under the Field Selection tab, you can locate and insert field codes from the ALB
database in to a document template. The merge process substitutes the field
codes with data from ALB to generate a new document bassed on the template.
There are four sections:
• Get Field From
• Find Field
• Choose Field
• Format Field
Get Fields From
This section displays a drop down field which allows you to select the entity for
the field code you are looking for, e.g. Client, Matter, Associated Contact, Branch.
Depending on the choice, a second drop down will display. For instance if you
select Client, the second drop down allows you to select whether this is the
Primary Client or other Client. Similarly with Associated Contact, the second drop
down will allow you to select which type of contact, e.g. Agent, Child, Counsel,
Court, etc. This list is built up from the contact types you have in your database.
In the second drop down, there is also a [Select on Run] option. This option
allows users to select the contact they wish to write to at the point of merging
which can be used for Ad Hoc documents or documents produced via a
workflow.
Use the General entity for fields relating to the document, currently Current Date
and Document Reference.

ALB SYSTEM ADMINISTRATION 2.6.1
66
Find Field
This section enables you to enter information to filter the list of fields
displayed. It enables the system to reduce the number of fields on display so
you can quickly locate and insert the required field.
It works on a contains basis, so whatever you type in, the list will display all fields
that contain the series of characters entered, e.g. type in "li" with Client in
context and you will see the address lines 1 2 and 3, client ref, and any other
fields that have "li" somewhere in their names.
Choose Field
This section lists the fields for you to insert into the document template. These
are grouped dependent on the context selected e.g. Client will have Address,
Client, Contact, Contact Details, Individual and Organisation. The groups enable
you to locate the required field more quickly. They can also be collapsed to make
field selection more efficient.
There is further selection available when dealing with the Address group of
fields.
When you first see the Address group, it displays as Address - Main Mailing (Click
to change). As addresses have different types, it defaults to the main mailing
address type, but if you wish to code the document up to send to the Billing
address, click on (Click to Change). This displays a drop down with a list of the
different address types set up in your database, e.g. Main Mailing, Billing,
Previous etc. Select the required address type and the address group heading
changes, displaying the selected group where Main Mailing was before.
Format Field
This section will display the appropriate tab and options, Text, Date, Number and
Address Block, depending on the type of field selected in the Choose a Field
section.

CHAPTER INSERTING FIELD CODES
67
Text Tab
For the examples in the table below, the text entered is The cat sat on the mat.
Selection
Output
Unformatted
The cat sat on the mat.
Upper Case
THE CAT SAT ON THE MAT.
Lower Case
the cat sat on the mat.
Title Case
The Cat Sat On The Mat.
Sentence Case
The cat sat on the mat.
Date Tab
For the examples in the table below, the date entered is 31/01/12.
Selection
Output
DD/MM/YYYY
31/01/2012
DD Month YYYY
31 January 2012
DDst Month YYYY
31st January 2012
Day Month YYYY
Thirty first January 2012
Show year as two digits
If checked displays all years above as "12"
Show partial date only If checked drop down displays allowing you to
select either Day, Month or Year, using the
selected format above.
Number Tab
For the examples in the table below, the number entered is 123456.45678.

ALB SYSTEM ADMINISTRATION 2.6.1
68
Selection
Output
Show as number (decimal
places 2)
Can have 0 - 9 decimal places.
123456.45
Use 1000 separator (,)
With set number of decimal
places.
123,456.45
Show partial number - Whole
or Decimal
123,456 (whole)
45 (decimal - with set number of places)
Show as text (whole number
only)
One hundred and twenty three thousand four
hundred and fifty six.
Address Block Tab
For the examples in the table below, the address entered is 25 Idle
Road Bradford West Yorkshire BD8 3ED, DX field as 2345 BRADFORD
Selection
Output
Use full address If Single Line selected:
25 Idle Road, BRADFORD, BD8 3ED
If Multi-line selected:
25 Idle Road
BRADFORD
BD8 3ED
Use DX address DX 2345 BRADFORD
Use DX if available otherwise
use full address
DX 2345 BRADFORD
Note: The DX address will only be pulled
through if both parts of the DX address have
been completed.
Line Layout A choice of Multi-line or Single Line layout
applied to the above selected address type.
Note: When Use DX is selected, Single Line is

CHAPTER INSERTING FIELD CODES
69
the default with the Multi-line option is greyed
out.
When you insert the address block, the code will display as follows when using
the Multi-line layout.
During the merge process, any blank lines, where the address is short, are
removed to close up any gaps.
NOTE If you need the text following an address block to start at a set line,
e.g. where you are using window envelopes, you can put the address
block field into a text box or table with a set height, so any following text
is not pulled up as lines in the address block are removed.
Similarly the Single Line layout will display as below, but will use any fields that
have data in and use a comma separated format.
RELATED ITEMS
• Edit Document Template Content

ALB SYSTEM ADMINISTRATION 2.6.1
70
• The Field Picker
• Command
Command
The Command tab allows you to code tests into documents and Laserforms
which can check database fields for appropriate values, then supply relevant text
to complete the document. For example, if your client has an informal salutation
entered in their record, you will want to use this but use the formal salutation if
not. This can be coded into documents and Laserforms.
There are some slight differences in how the coding displays in the Custom
Laserform Mapping tool used for Laserforms. See Custom Form Mapping for
details.
To build up the logic test, the Command tab is split into five sections:
• Select Command
• Field to Compare
• Evaluate using
• Compare with
• Preview
Select Command
This is a drop down allowing you to build up the logic test by selecting
• If
• Else
• ElseIf
• EndIf
See the example on how to piece together the logic test.

CHAPTER INSERTING FIELD CODES
71
NOTE When you select If, the system enters an EndIf command ready for
you to enter the text and/or merge fields in between.
Field to Compare
This allows you to specify the field you want to compare. Click on the button
with the ellipsis to display the field picker for you to select a field. See Field
Picker for details.
Evaluate using
This is a drop down which allows you to set the test for the selected field. You
have the options of:
• Is equal to (=)
• Is not equal to (<>)
• Is empty
• Is not empty
• Contains
• Is greater than (>)
• Is greater than or equal to (>=)
• Is less than (<)
• Is less than or equal to (<=)
Compare with
The Compare with section allows you to compare the selected field with either a
set value or another field (or rather the contents thereof).
Use the drop down to select Value or Field.

ALB SYSTEM ADMINISTRATION 2.6.1
72
If Value, type in the required content. If Field, click on the ellipsis to
display the field picker for you to select a field. See Field Picker for details.
Preview
The preview section displays the logic statement as you build each section.
Example
The following example will be used to explain how the logical test sections work
together. The screen shots show the logic statement and how it appears in a
Document Template. For full details on how the same coding will display in a
Laserform mapping, see Custom Form Mapping.
Letters to clients and other contacts and services need a sign-off which depends
on the form of address used in the salutation. Using a logical test, one letter can
cover the range of sign-offs required without requiring user intervention.
As a start point, the screen below shows how to set the Command fields to test if
the Formal Salutation was "Sir"
The preview pane displays:

CHAPTER INSERTING FIELD CODES
73
With the cursor at the relevant location in the document, click Insert. The
document displays IfEndIf. Position the cursor between the If and Endif and
enter faithfully.
Clicking on the If section of the command displays the logic entered if the Field
Picker dialog box is hidden.
To take it a step further, the sign off will need to cover other instances, so if the
salutation is not Sir, the document should have "sincerely" in the sign off. The
Else section in the logic statement instructs the system what to merge if the
salutation is not "Sir".
Position the cursor in front of the EndIf and insert the Else command. The other
elements of the command become inactive when "Else" is selected as this does
not require them.
The cursor is positioned in front of the Else. Type in sincerely.
When merged against different matters, if the formal salutation is "Sir",
"faithfully" will be merged. For all other formal salutations, "sincerely" will be
entered. Any white space, including carriage returns included in the document
template are also honoured.

ALB SYSTEM ADMINISTRATION 2.6.1
74
In reality, you also need "faithfully" merged when "Madam" is the formal
salutation, so you can extend the logic to include an ElseIf section to perform a
second test before merging the catch all "sincerely".
Position the cursor in front of the Else and the following screen shows that ElseIf
was selected from the Select Command section. The ellipsis was used to select
Salutation Letter Formal from the field list. Equal to was selected in the Is
section. Value was selected in the Compare with section with the word Madam
entered in the field below.
In the document, it looks like (with the ElseIf selected, the logic test displays).
The coding will now merge in "faithfully" where Sir or Madam is the formal
salutation and "sincerely" for all other formal salutations.
RELATED ITEMS
• Edit document Template Content
• The Field Picker
• Field Selection

CHAPTER INSERTING FIELD CODES
75
Formulas
As well as static fields, you can also include formulae in both document
templates and Laserform mappings.
This powerful feature allows you to select parts of a field's contents, such as
splitting post codes into two halves or picking out certain characters such as the
day and month from a date field. You can also use a formula to create a central
definition, e.g. for a standard sign-off which can then be used in all documents.
When a change is required to the sign-off it can be amended once without
having to amend every document.
Formulae are created in the ALB Designer Studio and so you need to have
purchased this module to make use of this feature.
To enable easy location of the formulae from the Field Picker, there is a section
where all available formulae are held.

ALB SYSTEM ADMINISTRATION 2.6.1
76
For more detailed information on creating formulae click on formulas in the ALB
Designer Studio section of the online help or download the pdf version here.
RELATED ITEMS
• Edit document Template Content
• The Field Picker
• Field Selection
Inserting Fields
Once you have located and selected the required field, set the formatting, you
are then ready to insert the field into the document template as the appropriate
point.

CHAPTER INSERTING FIELD CODES
77
Inserting Fields into a Document Template
Once you have located the required field, highlight the field and click on the
Insert button which will now be active.
Alternatively you can double click on the field to insert it.
The field will be inserted in the document at the cursor position, but can, if
necessary, be moved using the standard Word functions.
The field labels display in the document with square brackets around them, but
when you click on, or cursor to, them, they display as the Client Partner one
does, giving the full field name, otherwise this would display as [Contact Name].
In the above example there are two Contact Name fields. In this case, the first,
for the secretary's name, and the second, for the partner's name. This can be
confirmed by clicking on the field label, as above on the Partner Contact Name
field as specific field information is then displayed above the field label.
You can make the coding in the template easier to read by amending the merge
field labels. To change the labels, click on the field label and type a more user
friendly name. This does not affect the link to the database field or the data
pulled through.

ALB SYSTEM ADMINISTRATION 2.6.1
78
The example above shows the amended labels as [ Secretary Contact Name ]
and [ Partner Contact Name ], although if you click on Partner Contact Name you
will see the link is still to the Matter.ClientPartner.GeneralContact.ContactName
database field as in the previous screen shot.
RELATED ITEMS
• Edit document Template Content
• The Field Picker
• Field Selection
Deleting Fields from a Document
Document templates will require updating from time to time and this may
require you to delete field codes.
To delete a field from a document template:
1. Click on the field to display the full field name.

CHAPTER INSERTING FIELD CODES
79
2. Click on the three vertical dots at the beginning of the full field name.
3. Press Delete.
RELATED ITEMS
• Edit document Template Content
• The Field Picker
• Field Selection
Stationery Templates
A stationery template enables administrators to ensure that merged documents
follow your house style. A stationery template can hold:
• static text
• styles
• headers and footers
• margins and other page settings
• merge fields
• watermarks
• logos or other image files
Where the stationery template includes any or all of the above, they will be
applied to the merged document. Any specific formatting applied to text in a
document template, i.e. not via a style such as bold, font size, will persist through
the merge process. Any styles in the merge document but not in the stationery
template will also be retained during the merge process.
A stationery template can be assigned to multiple document templates, e.g. all
letters will use the same template to ensure a standard house style is applied.
Any subsequent changes to a stationery template are reflected when document

ALB SYSTEM ADMINISTRATION 2.6.1
80
templates, using the stationery template, are used to merge documents. Existing
merged documents will not be affected by the change.
A stationery template can also be set as a default stationery template, which can
be set against document templates easily and means that should the default
stationery template be changed, all document templates set to use the default
stationery template will change and use the new setting automatically from that
point on.
Working with Stationery templates is the same as with document templates.
However the following should be noted:
• The body text of the stationery template is replaced by the body text of
the document template that is associated with it.
• The stationery template headers/footers take precedent over the
document template headers/footer. The document template headers and
footers will only be retained where the stationery template does not have
any.
• Any specific formatting in the document template, e.g. font, font size,
bold, italics, underline added to text will remain in the merged documents
even when the stationery template applies a style.
• For information on assigning the stationery template to a document
template, see Add document templates.
As such, the items under Stationery Template Options link to the document
template instructions.
RELATED TOPICS
• Other Stationery Template Options

CHAPTER INSERTING FIELD CODES
81
Stationery Template Options
The stationery template options from the right-click shortcut menu allow you to:
• Add New Stationery Template
• Edit Stationery Template Content
• Edit Stationery Properties
• Stationery Template Properties
• Copy Stationery Template
• Delete Stationery Template
• Import Stationery Template
• Export Stationery Template
• Find and Replace in Stationery Template(s)
The options work the same as for document templates. The links take you to the
relevant section within the document template chapter.

ALB SYSTEM ADMINISTRATION 2.6.1
82
Master Agendas
How to guide users through a standard process, producing and
sending documents in the correct sequence, e.g. Client
inception, Conveyancing.
In this section:
• Introduction
• Editing a Master Agenda
• Add a New Master Agenda
• Agenda Steps
• Other Master Agenda Options
Introduction
How to use Master Agendas for standard processes.
As system administrator you can associate documents with agenda steps, when
creating master agendas in Utilities - Document/Agenda Setup. The majority of
agenda steps result in documents being produced. When you action an agenda
step that contains a document, the document opens and merges as normal,
ready for you to check, complete and save.
to the left of a step on the Agendas tab indicates that the agenda step has
been set up to produce a document or Laserform.
to the left of a step on the Agendas tab indicates that the agenda step has
been set up to produce more than one document or Laserform.
To save agenda changes for all future matters you must amend the master
agenda(s).

CHAPTER MASTER AGENDAS
83
It is also possible for users to edit an agenda for an individual matter and add or
remove documents for an agenda step as necessary.
RELATED TOPICS
• Editing a Master Agenda
• Add a New Master Agenda
Editing a Master Agenda
Editing an existing master agenda allows you to customise the steps to suit your
firm's working practices.
To make changes to the Master Agendas:
1. Open Utilities and select Document/Agenda Setup.
2. Expand the Agendas folder and select Master Agendas.
3. Double click to open the Agenda you wish to edit or right-click and select
Edit Master Agenda.
4. The Master Agenda screen is displayed:
• Master Agenda - Tabs
• Add Page . Adds a new page tab at the end of the tabs
named Page n.
• Delete Page . Deletes the selected page. You will need
to confirm the delete instruction.
• Order Arrows . Enables you to change the order of
the pages.
• Page Details. A list of existing pages
• Agenda Details section

ALB SYSTEM ADMINISTRATION 2.6.1
84
• Ref. Enter a suitable reference for the agenda.
• Title. Enter a title for the agenda.
• Application. Select the required application the agenda is to
be used with from the drop down list.
• Page Details section - When you click on a page tab
• Page Name. Enter a suitable name for the page.
NOTE When you click on the page tabs, the Add and Delete Page
buttons change to Add Step and Delete Step.
5. Click OK to save your changes.
For details of building the steps in an agenda, see Agenda Steps.
RELATED TOPICS
• Add a New Master Agenda
• Agenda Steps
• Other Master Agenda Options
Add a New Master Agenda
You can create new master agendas as you require.
To Add a New Master Agenda:
1. Open Utilities and click on Document/Agenda Setup.
2. Expand the Agendas folder and select Master Agendas.
3. Right click on the right hand-side of the document management window
and click on Add New Master Agenda.

CHAPTER MASTER AGENDAS
85
4. The Master Agenda screen displays.
5. Refer to Editing a Master Agenda for details on adding new pages and
steps.
6. Click OK to save changes.
7. For details of building the steps in an agenda, see Agenda Steps.
RELATED TOPICS
• Introduction
• Editing a Master Agenda
• Agenda Steps
• Other Master Agenda Options
Agenda Steps
When you have created the required pages for your agenda you are in a position
to build up a series of steps to carry out the required process.
To Add a step:
1. Click on the page where you would like to add a new step.
2. Click on the Add Step button OR right click and select Add Step.
3. The Step Details screen displays:
• Action. The name of the step.
• Reminder. Optional. The subject of the reminder to include in the
step.
• Reminder Days. The estimated due date of the reminder, i.e. x
number of days from the date the reminder is actioned.

ALB SYSTEM ADMINISTRATION 2.6.1
86
• Predecessor. Optional. When the predecessor step is actioned it
will set a target date for the current step.
• Process After. X number of days that the target date should be set to
from when the predecessor step has been actioned.
• Make All Documents Public for this Step. This enables
documents generated by this step to be visible to the client if they
are using the Self-service module.
• Function to Action.
• Target Date. Will be unavailable until the step has been added to
the Agenda.
4. To select documents that will be produced when the step is actioned, click
on the Documents tab.
• Add Document . Click to select the document to be produced
when the step is actioned. See Add Document below.
• Delete Document . Use to un-assign a document from the
step when it is no longer required.
• Order Arrows . Use to re-order the documents where you
have more than one assigned to the step.
• Select All . Use to select all assigned documents.
• Select None . Use to deselect all assigned documents.
Add Document.
The Document Details screen display:
• Document Template. Use the lookup button to select from
the list of available documents.
• Make this Document Public. Set the flag so the user can
view the document via the Self-Service module.
• Email. Select this box if the document is to be emailed out
to the client, contact etc.
• Fax. Select this box if the document is to be faxed out to
the client, contact etc.
• SMS Text. Select this box if the document is to be sent via a
text message to the client, contact etc.

CHAPTER MASTER AGENDAS
87
Click OK to return to the Step Details screen.
5. If the step relates to Web Case Tracking or to online searches, the
appropriate step type must be selected.
6. Click on the Step Types tab.
• Update IRIS Law Business WCT
• Update LMS STARS
• Link to Transactions Online
• Link to Searchflow
• Link to TM
Select as appropriate.
7. Click OK to return to the Step Details screen.
To Edit a Step:
1. Go to the relevant page, right-click on the step and select Edit Step.
2. The Step Details screen displays.
3. Amend as required, see above, and click OK to save the changes.
RELATED TOPICS
• Introduction
• Editing a Master Agenda
• Add a New Master Agenda
• Other Master Agenda Options

ALB SYSTEM ADMINISTRATION 2.6.1
88
Other Master Agenda Options
There are other commands you can use with master agendas, delete, Export,
Import and Copy to allow you complete control over the agendas.
For each one, from the Document Template Management window, expand the
Agendas folder and click on Master Agendas.
To Delete a Master Agenda:
1. Select the Master Agenda no longer required, right-click and select Delete
Master Agenda.
2. A warning displays "Are you sure you wish to delete this Master Agenda?"
3. Click Yes.
To Export a Master Agenda:
1. Select the Master Agenda to be exported, right-click and select Export
Master Agenda.
2. The Save As dialog box displays.
3. Browse to a relevant folder and enter a suitable file name.
4. Click Save.
To Import a Master Agenda:
1. In the right-hand pane of the Agendas screen, right-click and select
Import Master Agendas.
2. The Open dialog box displays.
3. Browse to where the master agenda file is and select it.

CHAPTER MASTER AGENDAS
89
4. Click Open.
To Copy a Master Agenda:
1. Select the Master Agenda to be copied, right-click and select Copy Master
Agenda.
2. The master agenda is copied and the name is prefixed with the words
Copy of.
3. Open the agenda and amend as required.
RELATED TOPICS
• Introduction
• Editing a Master Agenda
• Add a New Master Agenda
• Agenda Steps

ALB SYSTEM ADMINISTRATION 2.6.1
90
Index
A
add
document template 11
master agenda 84
agenda steps 85
C
command codes 36
Date 50
introduction 35
Question 48
Sentence 51
Start Address 52
Your Reference 53
command tab 70
D
delete
document templates 19
fields from a document 78
Doc_P 25
documents
Doc_P process 25
find and replace 22
header introduction 59
MT02 process 63
overview 5
template management 8
template production 8
template properties 12
E
edit
document template content 15
document template properties 16
master agendas 83
export
document template 21
F
fee codes
insert 28
Field Code Selector 25
field codes 25
date 50
Field Code Selector 25
Field Picker 64
field selection 65
formatting options 32
question 48
sentence 51
supplementary merge fields 30
Field Picker 64
fields
field selection 65
inserting 76
find
find and replace in document
template(s) 22

CHAPTER
91
formulas 75
H
header
document options 63
using a header 61
I
IF statements 38
import
document template 20
paragraphs 43
insert
field codes 28
fields 76
M
Marketing module
marketing fields 31
master agendas 82
introduction 82
master agenda options 88
MT02 63
P
paragraphs
imported paragraph options 46
imported paragraphs 43
optional paragraphs 47
S
stationery templates 79
options 81
T
tables
formatting 55
templates
copy document templates 17
delete document template 19
document template management
8
document template production 8
document template properties 12
edit document template content
15
edit document template
properties 16
find and replace in document
template(s) 22
stationery template options 81
stationery templates 79

Advanced Computer Software Group Ltd
Booths Park 4, Chelford Road, Knutsford, WA16 8GS
t: +44 (0) 844 815 5620
www.oneadvanced.com
